 Photo 1
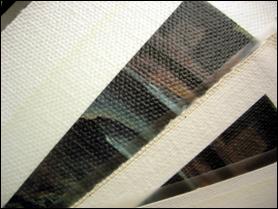
Photos are surface laminated, peeled then aligned and mounted to the HA canvas.
During the early 1980s the concept of transferring an RC photograph to canvas was reserved for the photo industry. By 1991 a canvas product called CanvasMount was released into the framing market by Seal Products. It was an adhesive coated, heat activated canvas with a release liner that allowed for mounting of already laminated and stripped photos or prints to take on the appearance of having been created on canvas (photo 1). All the usual suspects came out with their own versions and the in-house production of canvas transferring was totally embraced. Canvases for transferring were available from all the regular all dry mount companies and ran from white to dark natural, course cotton duck to fine linen (photo 2). Some had release liners that protected the light tack adhesive for placement that hold the transfer until mounted (photo 3), while others only have the adhesive coating.
Photo 1
Photos are surface laminated, peeled then aligned and mounted to the HA canvas.
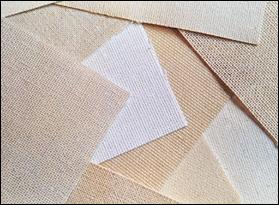 Photo 2
Assorted commercial canvas textures and colors allowed for greater product variation.
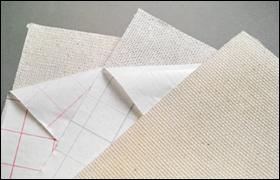 Photo 3
Liners protect tacky placement adhesive which holds the decal transfers prior to mounting.
Fast forward fifteen years and the onset of digital printing. Many of these products are still available today, but very little call for canvas transfers remains, though an occasional request may have us digging out old dusty rolls of HA (heat activated) canvas. If only there was a practical application that could make it useful in today's market—like a museum presentation.
New Gallery
After years of planning, our local museum celebrated a grand reopening with a ribbon cutting of the Mark and Jessie Milano Gallery for the history of the Tehachapi Kawaiisu Indians. The new gallery features floor to ceiling showcases; low temperature LED exhibition lighting; non-shatter acrylic glazing; and a multi camera, round-the-clock security system which has brought this small town museum into the 21st century. The inaugural exhibition was to feature handmade baskets and photos of local families and regional rock art pictographs and petroglyphs.
All photos were digital reproductions so they were able to be trimmed and mounted without concern, and since they were to be in showcases they did not require surface lamination. Black ³⁄₁₆" foam center board was selected as the substrate for both color and ability to reverse bevel cut the edges for display. The most efficient way to mount multiples is to use full 32x40" boards, cut a single sheet of permanent tissue adhesive and puzzle them for the best use of space (photo 4). All were individually tacked so as not to slip and they were all mounted at one time in a large 40x60" hot vacuum press. Once mounted they were cut into strips using a manual Fletcher Terry 2100 then sized by reverse bevel cutting them apart (photo 5). Once mounted and reverse trimmed they were gathered and brought to the museum location for final assembly and installation.
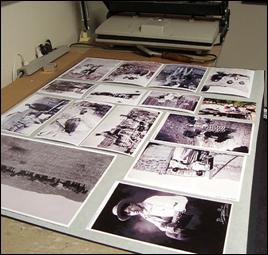 Photo 4
A black ³⁄₁₆" foam board is covered with ColorMount tissue and photos are puzzled to fit for maximum use.
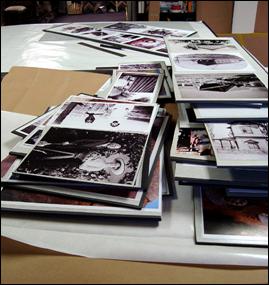 Photo 5
Once mounted they are cut into strips and reverse trimmed on a manual mat cutter.
Display Preparation
Though there are many possibilities as a solution for the display, the project was in crunch hour—two days prior to the opening—and there was a very limited budget. Gatorboard—aka Gatorfoam—seemed like the best substrate choice, since it was both rigid and lightweight. The covering needed to be a rustic, rough textured natural looking fabric—like course weave canvas. An old roll of CanvasMount was perfect as the quick and simple wrap over Gatorboard. Boards were sized from 8x18" to 18x24" for the story-telling photo collages and 10x40" tall panels to create the height needed to rest against the wood drying frame for the scientific photos of the rock art (photo 6).
 Photo 6
Mounted images are hot glued to sturdy wrapped Gatorboard panels, which lean against the lashed wood drying rack in the staged display.
The fabric was cut with a 1½" allowance around the panel. Since the light tack adhesive for image placement to the canvas had diminished over time, a strip of ATG held the turned flaps until heat-set by mounting (photo 7). When wrapping, press the fabric back to the ATG working from the center to the corners just as though stretching a canvas to bars (photo 8). This assures the fabric is cleanly wrapped with no gaps or twisting. The canvas was diagonally trimmed at the corners to reduce the bulk of the wrap and since the panels were to be floated off the wall and not hidden within a frame (photo 9). Make certain all edges are cleanly wrapped and smooth prior to final mounting in the press (photo 10).
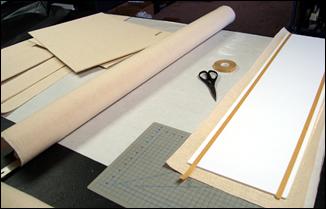 Photo 7
(L) Completed panels, (C) roll of 15 year old Seal CanvasMount, (R) sized Gator panel with ATG applied and HA canvas ready to prep for mounting.
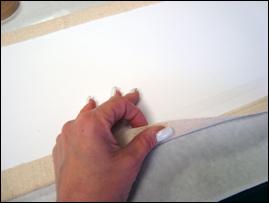 Photo 8
Attach the back flaps of the canvas to ATG from center to outside corners like canvas on a stretcher.
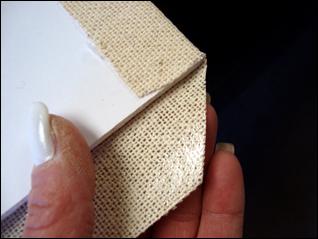 Photo 9
Trimming the canvas corners helps reduce bulk at the corners of the panels.
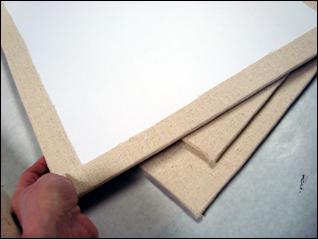 Photo 10
All the fabric should be cleanly aligned and tacked with ATG prior to final bonding in a press.
After preparation the panels were mounted at 190ºF, in two bites at 10 minutes each bite (photo 11). Using a the mechanical press gives immediate pressure when the heat is applied which assures the fabric did not shift once the ATG was warmed in the press prior to the vacuum being drawn. The extended mounting time was only added to insure the full activation of the fifteen year old adhesive to the veneer sided Gatorboar ds. Since no art was involved in this stage of mounting the added time would never hurt anything. The completed canvas panels were strong, visually rustic, solidly covered by the course canvas, and an affordable solution to the display problem.
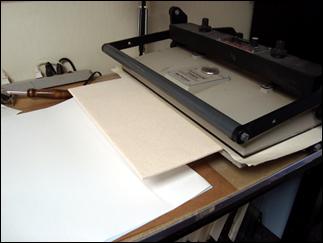 Photo 11
Panels were mounted in mechanical press for immediate heat and pressure.
Installation
As the framing consultant in charge of mounting, placement design and installation of all the photos there were a few challenges that surrounded this project. The original plan was to affix the mounted family photos at various levels onto the back wall of the showcases with 1" strip lifters behind allowing them to float off the wall, but the LED system has limited points of low level lighting in the front of the showcase which made the back wall darker than desired for display. Plus, there were a great many more images than originally planned for, which meant they had to be clustered and/or overlapped to help better tell the story of the families through the images without a story board of text.
The functional 3-D format that was able to be created by use of the CanvasMount covered boards proved to be the perfect solution. The ³⁄₁₆" mounted photos were hot glued to the wrapped Gator panels using a Polygun-TC and #3797-TC Jet-Melt glue sticks. And because of the rigidity of the panels the photos could be extended off the edges, stacked and lifted as needed for a full collage effect (photo 12). This also allowed for placing of the photos at various depths in the showcase capitalizing on the front lighting.
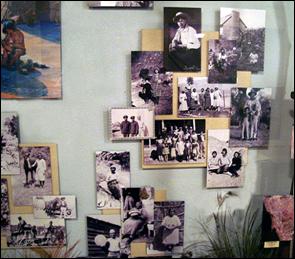 Photo 12
Family photos were grouped and hot glued to the wrapped Gator then mounted to the wall on 1" foam board lifters.
Strips of 1" wide ½" foam board strips were screwed to the walls behind the mounted panels to lift them from the surface. In some cases there were crisscross layers of 2 or 3 strips for additional lift. Then high tack indoor-outdoor sponge tape was applied to the lifter strips and the collage panels where attached to them. This allows for later removal and storage of the collage panels without damage to the photos.
Other Uses for HA Canvas
Since framers never throw anything away we all have old moulding, dusty mat boards and rolls of unused materials. It seems these old supplies always seem to get used one day, but the problem is not thinking of them when a solution is needed. The odds of there being much demand for in-house canvas transfers in these days of digital canvas printing is far less likely than the opportunity to use it as a backing inside a shadowbox or as a covered substrate for signage.
Another perfect use of unused canvas and fabric is a bulletin board. Mount the HA fabric to a ³⁄₁₆" or ½" foam center board and frame it with decorative discontinued moulding for a great way to use up older inventory. End cuts of fabric make wonderful tall, thin (6x20") boards for those narrow wall spaces between doorways in kitchens or alongside the door to the garage. Consider kitchen display panels for recipes hanging above the back splash or next to the stove. CanvasMount is neutral in color and with the right frame adapts to many interiors.
There are a great many uses for older products that have been pushed aside by technology, and there is no reason not to capitalize on them helping bring in a few profits. Charging $1.50 to $2.50 a united inch—depending on your selected substrate and canvas—is a pretty easy sell and will help use up more outdated products. We may be a state-of-the-art industry that embraces new products but sometimes the old standbys help pay the rent.
END
Copyright © 2010 Chris A Paschke
For more articles on mounting basics look under the mounting section in Articles by Subject.
Additional information on all types of mounting is found in:
The Mounting and Laminating Handbook, Second Edition, 2002,
The Mounting And Laminating Handbook, Third Edition, 2008 and
Creative Mounting, Wrapping, And Laminating, 2000 will teach you everything you need to know about getting the most from your dry mount equipment and materials as an innovative frame designer.
All books are available from Designs Ink Publishing through this website.
Chris A Paschke, CPF GCF
Designs Ink
Designs Ink Publishing
785 Tucker Road, Suite G-183
Tehachapi, CA 93561
P 661-821-2188
chris@designsinkart.com