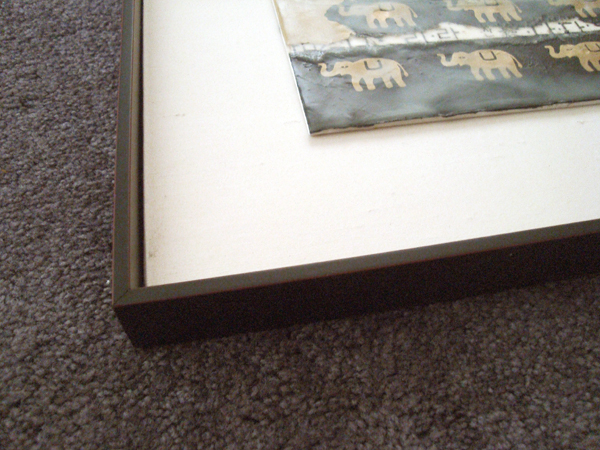
 Photo 1
An encaustic on 8-ply rag was glued with silicone adhesive to the middle of a silk wrapped mount board permanently glued to a short base of a float frame.
Encaustic artwork shown courtesy of Gwen Walker-Strahan.
Substances that breakdown or dissolve another substance are known as solvents with the most common solvent being water. Evaporating solvents are added to spray, paint, varnish, and plastic coating to keep them liquid for application. Once these solvents evaporate—after application—the liquid solution becomes a tough solid. Thermosetting adhesives—such as permanent dry mount tissues—are those that do not soften with the reintroduction of heat and require a chemical solvent to break the bond.
Chemical Solvents
Chemical solvents are caustic, flammable solutions that evaporate quickly when exposed to open air and readily dissolve most dry mount, spray, and pressure-sensitive adhesives after they have bonded. Common commercial solvents include: Oops!, Undu, UnStick, UnSeal, Bestine and Sanford's thinners, mineral spirits, naphthas (benzene, toluene, xylene), heptanes, and acetone.
 Photo 1
An encaustic on 8-ply rag was glued with silicone adhesive to the middle of a silk wrapped mount board permanently glued to a short base of a float frame.
Encaustic artwork shown courtesy of Gwen Walker-Strahan.
Since solvents may sometimes damage the artwork attempting to be salvaged, all inks and dyes must be tested with a Q-tip saturated with the selected solvent before use. Lightly touch each color ink to verify solvent tolerance. If any colorant transfers to the Q-tip the color is sensitive to that solvent. This is particularly important when working with digital images, but chemically based solvents will have no effect on water based inks or adhesives, and aqueous based solvents will not dissolve nor damage chemically based items. Chemical solvents are toxic and should only be used in well ventilated areas, and never on natural materials such as silk, leather, suede, or rubber.
To remove debris, test for solvent tolerance then saturate a Q-tip or fill an eyedropper to remove a label, pieces of surface paper, or adhesive residue from any photo or print. Let the liquid set a minute or two and then gently rub the surface with a clean, lint free rag to remove undesired reside. Solvents will also remove fingerprint oils from the surface of RA-4 photos; to clean press platens of adhesive build-up; and to remove old ATG tape.
Silicone Sealants (adhesives)
A sealant is a viscous material that changes into a solid designed for the prevention of air, liquid, dirt, et al. from passing from one side of a barrier to another. They are used most often to seal closed small openings and they are favored because of their insolubility, corrosion resistance, and adhesion. This is why they have been used as a bonding gel by framers for uneven surfaces such as the base of a small statue. However, use of silicone in enclosed framing packages has been frowned upon for nearly twenty years now, because of potential out gassing during curing and the oozing of oils into fabric and paper over time. That said, silicone still pops up as the adhesive of choice by some framers.
Research on silicone adhesives confirms they are highly elastic at low temperatures and tolerate temperatures up to 575°F for short periods. They cure at any humidity between 5% and 95% and at a temperature between 40 and 100°F. Curing begins with a formation of a thick skin.Curing of several millimeters of silicone thickness may take 24 to 48 hours, and a large thick glob can take many days to cure. As chemical adhesives go they are nearly inert and stable, but that does not necessarily make them a good choice for framing enclosures. Since the act of framing is to enhance and protect the art it stands to reason that anything done during framing shall be allowed to be undone. Which brings us to the rest of the story.
Float Frame Project
A custom float frame was recently brought to me with an encaustic painting on 8-ply rag that had been solidly fused to a fitted silk wrapped backing board, and in turn the backing was permanently adhered to the frame base using clear silicone sealant (photo 1). The wrapped backing board should have fit evenly into the float along all edges, but it was flush to one corner (photo 2) with an ⅛" gap at the opposite corner. The entire backing was twisted askew in the frame. My customer wished to reframe this original and wanted the float frame reserved for another project.
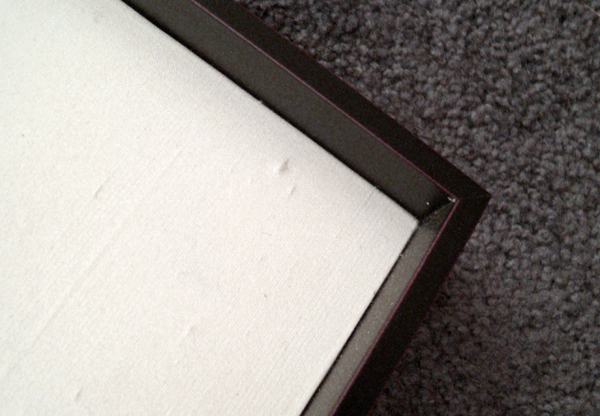 Photo 2
The silk wrapped backing is flush in this corner, but note the widening of the gap towards the top and bottom of the photo.
The silk fabric was also lifting from the backing board. In order to remove of the art from the linen a back layer of rag paper was torn from the art by the artist. Since silicone is known to creep oils over time it should never be used in conjunction with any original art, including encaustic. Even though tearing any layer of the 8-ply rag is ill-advised, in this case the removal of all silicone from the back of the art by removing that silicone saturated layer will most likely save it from future damage (photo 3). Upon examination of the linen wrapped backing it was evident it had been bonded using a spray adhesive which was indeed bubbling and was very easy to peel from the mount board (photo 4).
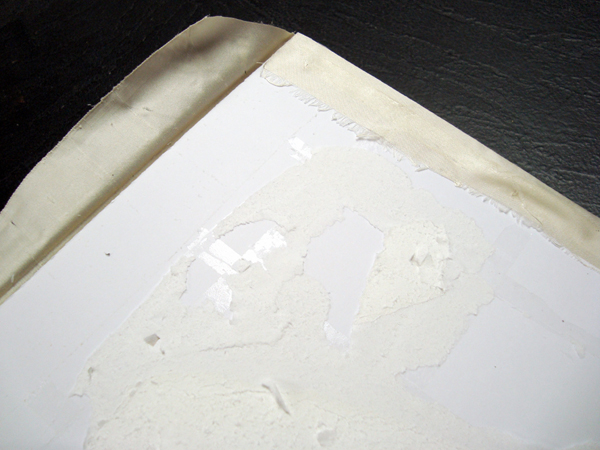 Photo 3
The 8-ply encaustic had been spot glued with large globs of silicone adhesive. Removal of the 8-ply from the linen tore the backing paper from the 8-ply and peeled the linen from the mount.
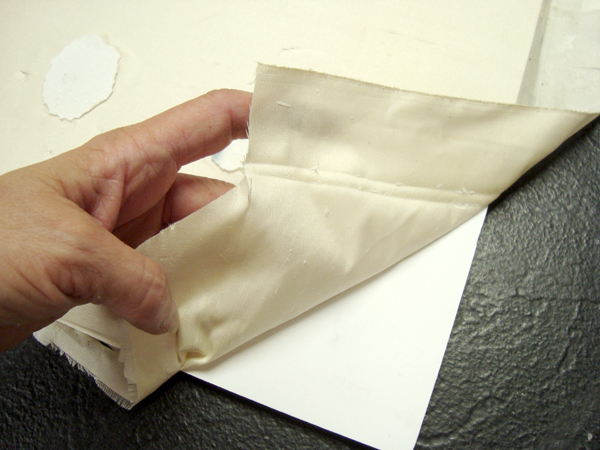 Photo 4
The bubbled linen easily peeled from the backing board when lifted as evidence of being spray mounted.
Removal of the hardware and dust cover exposed large silver dollar sized globs of silicone sealer had been used to hold the mount board into the frame at three inch intervals (photo 5). Removing the backing from the frame literally tore the backing board apart leaving large globs of adhesive still intact (photo 6). These remaining globs of glue could not be peeled off, and since the frame was to be reused it needed to be cleaned and salvaged using some sort of solvent.
GE's Solvents and Adhesives reference website states, "There is nothing that will dissolve silicones." And for painted and hard surfaces they suggest rubbing alcohol, a soft cloth, and elbow crease, but warn against mineral spirits, particularly on finished woods. So it was time to test mineral spirits, acetone, and the usual suspects mentioned previously.
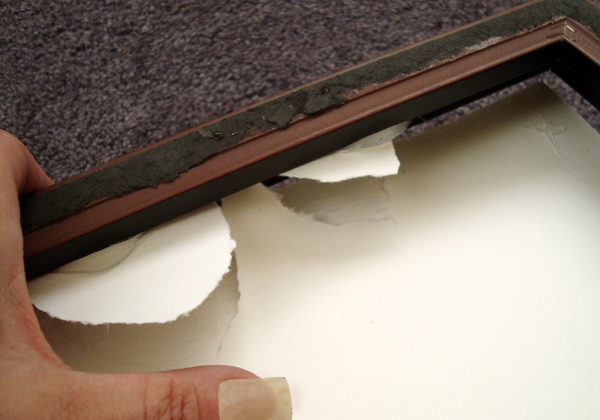 Photo 5
Removal of the dust cover exposed large silver dollar sized globs of silicone sealer used to hold the mount boards into the frame.
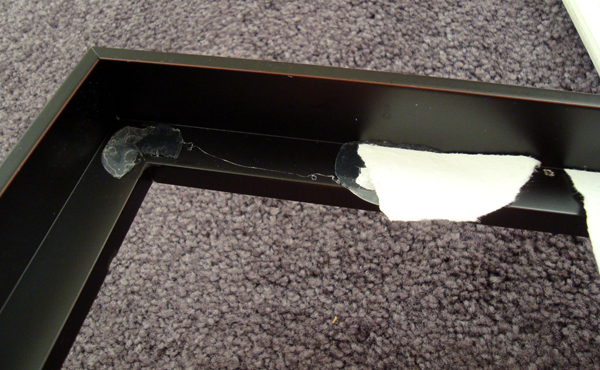 Photo 6
The remaining globs of glue could not be peeled off, and since the frame was to be reused it needed to be cleaned and salvaged.
Silicone Removal
After testing UnSeal, UnStick, Undu, and Bestine thinner, Oops! was the only product that even remotely softened the silicone, and none harmed the moulding finish. Eyedroppers of solvent were flooded over the remaining silicone then allowed to sit a few minutes (photo 7). Using a non abrasive sharpened bamboo knife—the kind used to slice Asian long fibered papers—the remaining silicone was scraped from the base of the float frame. This took muscle and perseverance along with repetition of the solvent/set/scrape routine to remove all possible silicone (photo 8).
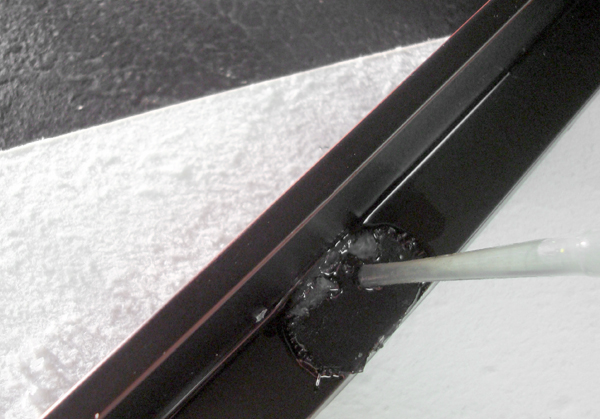 Photo 7
Eyedroppers full of Oops! were applied and let sit in an attempt to soften the cured silicone gel.
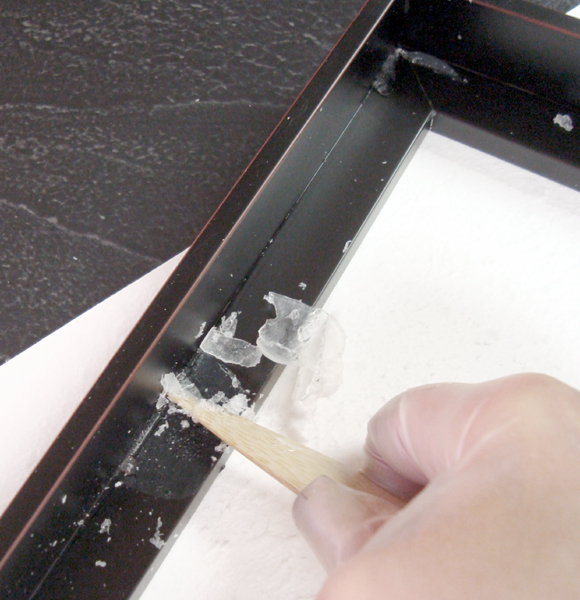 Photo 8
A sharpened bamboo knife was used to scrape the rubber from the moulding after saturating with solvent.
Once cleaned there still remains a bit of silicone saturation in the lacquer finish on the base of the frame. Another problem was the metal plate hangers had been screwed at ⅜" from the edge of the frame and the screws had come through into the float space. They were later filled with wood filler and touched up but the ghost of the silicone could not be covered (photo 9). A ¼" birch wood panel was cut to fit the frame as a platform spacer for new art to be glued to by the artist.
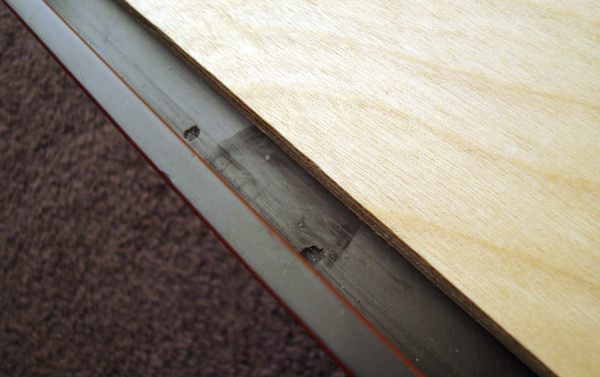 Photo 9
The screw holes from the hanging plate came through into the float space of the frame and there remains adhesive damage to the lacquer finish. This is not solvent damage. A ¼" birch wood panel was screwed to the frame as a lifter for the new art.
An 8-ply rag panel was cut to fit the frame allowing an ⅛" float space. This will visually cover the hanger holes and silicone damage to the frame base, while still allowing the artist the use of this custom frame for another encaustic original (photo 10).The float frame is Nurre Caxton #72504, antique black, short base Metropolitan float frame.
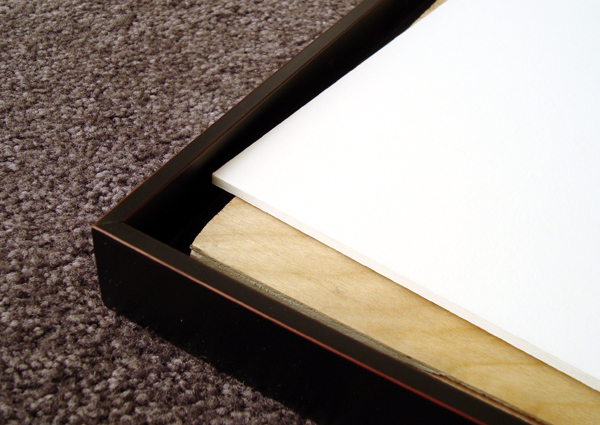 Photo 10
An 8-ply rag was cut to fit allowing for a ⅛" float space within the frame. Once the encaustic art is completed it may then be glued solidly to the birch wood platform. This is a Nurre Caxton #72504 short base antique black float frame.
Final Wrap
No mounting adhesive or technique should ever be done that cannot be undone. Though true that encaustic wax paintings are often applied to wood panels and Masonite hardboard they still deserve the respect of any original painting. When layers are torn apart in an attempt to remove art from a frame the adhesive proves its tear strength, but it should not be at the expense of the art it is protecting. Be careful when selecting silicone as your adhesive of choice, it just might bond too well.
END
Copyright © 2009 Chris A Paschke
For more articles on mounting basics look under the mounting section in Articles by Subject.
Additional information on all types of mounting is found in:
The Mounting and Laminating Handbook, Second Edition, 2002,
The Mounting And Laminating Handbook, Third Edition, 2008 and
Creative Mounting, Wrapping, And Laminating, 2000 will teach you everything you need to know about getting the most from your dry mount equipment and materials as an innovative frame designer.
All books are available from Designs Ink Publishing through this website.
Chris A Paschke, CPF GCF
Designs Ink
Designs Ink Publishing
785 Tucker Road, Suite G-183
Tehachapi, CA 93561
P 661-821-2188
chris@designsinkart.com