Paschke Online
Designs Ink Publishing Article Archive and Reference Library
Articles by Chris A. Paschke, CPF GCF
"Burnishing Edges is the Finishing Touch"
February 1992
"Burnishing Edges is the Finishing Touch"
There's more to executing a professionally well cut mat than simply using good equipment and avoiding hooked corners. The basics of quality precision mat cutting frequently involves a series of repetitive practices that ensure control over the end product. There are a series of points to check when problems arise concerning quality control and consistency. After all, knowing exactly what to expect from your mat cutter is what often sets the professional apart from the hobbyist.
Important check points which should always be a part of professional preparation, user maintenance and quality control include:
- Make certain the cutter base is level and well supported
- A non-slip surface for the cutter stabilizes it (either carpet or recessing the cutter into the work table)
- Using an unscored slip sheet adds support beneath the mat
- Support the entire mat board so as not to create unnecessary stresses, boards should be flat
- Blade depth should only slightly score the slip sheet
- Sharp, clean blades are essential
- Stand at the end of the cutter, even if walking down the side of an over-sized cutter, even pressure on the cutter head must remain consistent and not vary from blade entry to cut completion.
- Arm placement should always remain parallel to the slideway of required body positioning or size of cutter
- Pre-dry damp boards in a heat press to reduce blade drag
It is quite true any craftsperson is only as good as his tools and that it is your responsibility to monitor your mat cutter. Cleaning and lubricating it when necessary, changing blades regularly, making certain the blade is never over-extended and checking the slip sheet is not over-scored will help ensure precision accuracy, yet there still remains one last step that continues to set the polished professional apart from the rest.
Using a simple bone burnisher to smooth down the raw cut edges of the mat gives it a polished completed look. (Photo 1) Slight imperfections in the corner miters, such as a small overcut, may be somewhat visually reduced by using the bone burnisher.
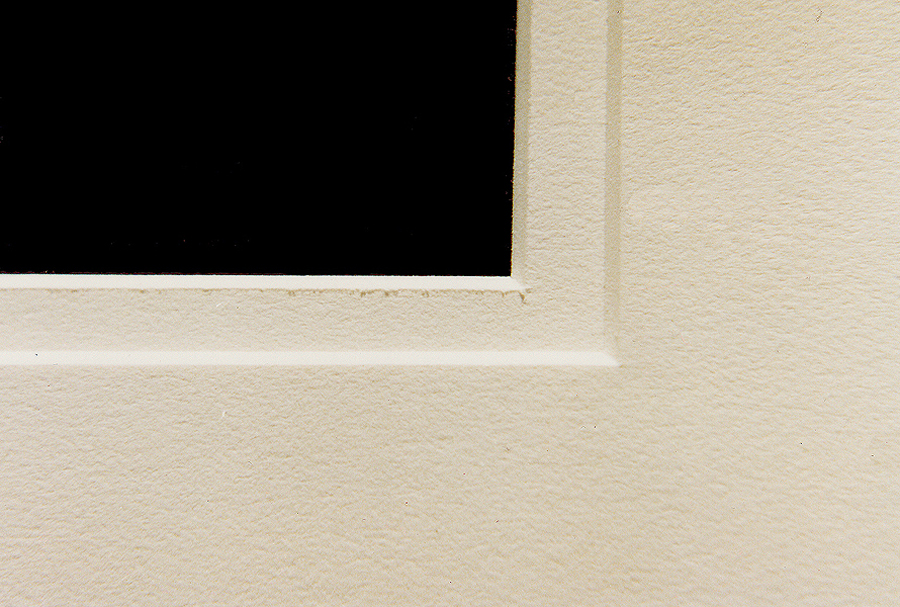 Photo 1
Burnishing the mat esge polishes and completes the professionally cut mat. Burnishing will not remedy a poorly cut mat due to a dull blade or overscored slip sheet. Note the difference between the top burnished mat and the bottom unburnished mat.
Burnishers come in a variety of sizes and shapes (Photo 2) and are used extensively within the craft of making and restoring hand sewn books. You may wish to treat a new burnisher by seasoning it with a little oil, much like you would a new gourmet sauce pan. Apply a natural vegetable oil to the bone and rub off any access residue with an absorbent clean cotton rag. Let the new bone sit a day or two to absorb completely. Since it is a natural material (make certain you are not dealing with a synthetic or plastic facsimile) the oils will readily absorb. The original color of the bone will be darkened very slightly after oil impregnation but now it will glide very smoothly along paper or board. Although untreated bones will work, they will have a slight sticky feel at times, and just as we strive for smoothness in our mat cutters a smooth, gliding burnishing bone boarders on almost sensual.
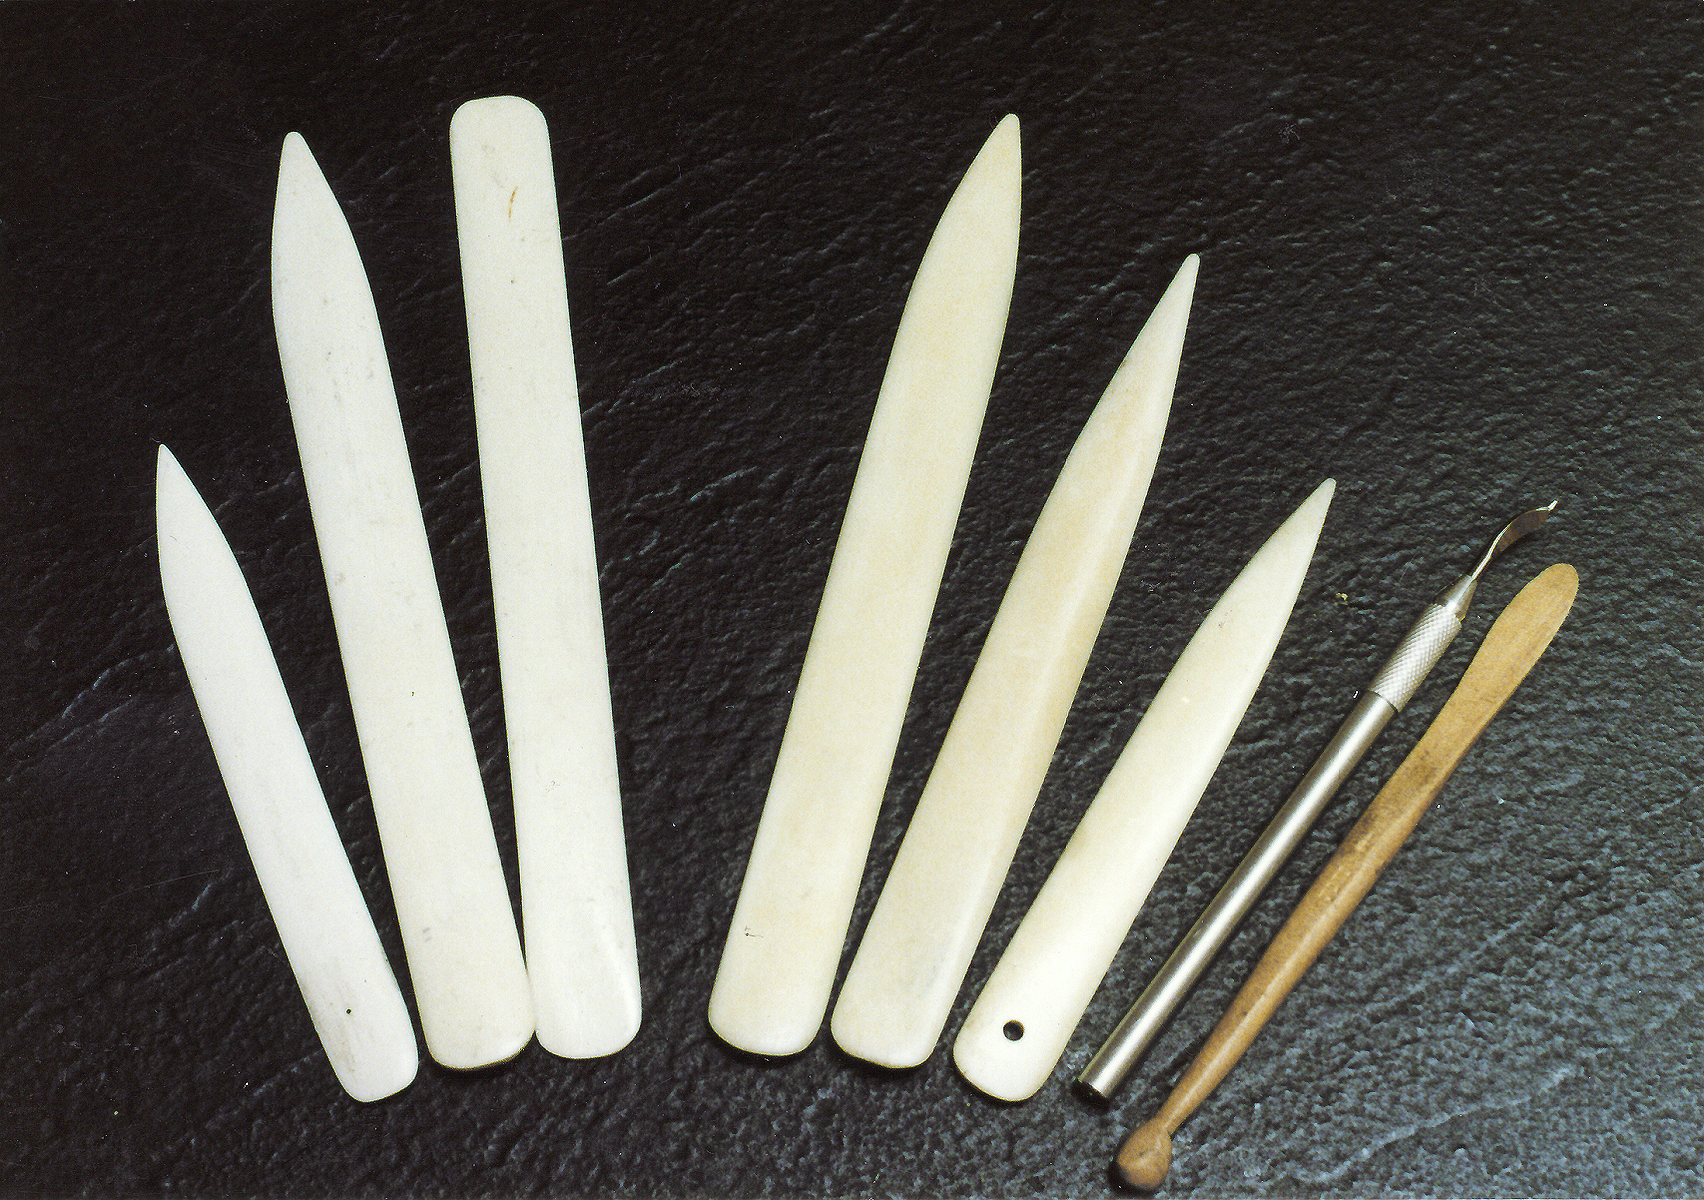 Photo 2
Burnishers come in a wide variety of sizes, shapes and materials. Bone burnishers (not endangered species ivory and not synthetic acrylic or plastic) are definitely the "tool of choice". The three "sensual bones" on the right have been oiled and dried and are ready to use. The three on the left are unoiled and therefore, are slightly whiter. They should be treated prior to use. Metal can sometimes lightly transfer silver to white board. Wood is sometimes soft and can also readily pick up and transfer dirt to a clean bevel (far right).
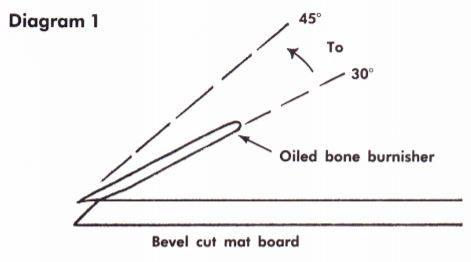
Very little pressure is required to smooth the cut edge of the mat, (Photo 3) and this is an extremely important factor. Too much pressure may not only dent the board by may remove the crisp, clean contrast between the mat surface and the bevel itself. Remember you are only removing the newly cut raw paper look, not redefining the mat bevel! Getting into the habit of burnishing mat edges is simply that...a habit you must get into. The time involved in the quick once around of the burnisher is negligible in relation to the polished over-all professional look achieved in the completed framed unit. Don't forget to work at a 30° to 45° angle to the edge. (Diagram 1)
 Photo 3
A smooth, even pressure (relatively light) is quite adequate for removing the rough or raw mat edge. Hold the bone at about a 30° to 45° angle to the edge of the bevel, with your finger about an inch away.
Any time a step as simple as burnishing can make a visual impact doesn't it deserve a fraction of your time? Remember too that often the unconsciously seen perfections of quality are a great potion of the subtleties which make them perfect. By that I mean often the viewer never realizes why the matted picture looks better...it just somehow does. Consider for a moment the impact this could all have on the professional image you have with your clients.As quality picture framers not only interested in promoting the precision of our craft, we are also always in search of the additional little elements that set us apart from the other kids on the block. Burnishing may not only allow you to charge that extra percentage but may also give you the edge in technical execution during a framing competition...also good for business. Lightly burnishing mat edges may not be the solution to that hooked corner but it most definitely is the finishing touch.
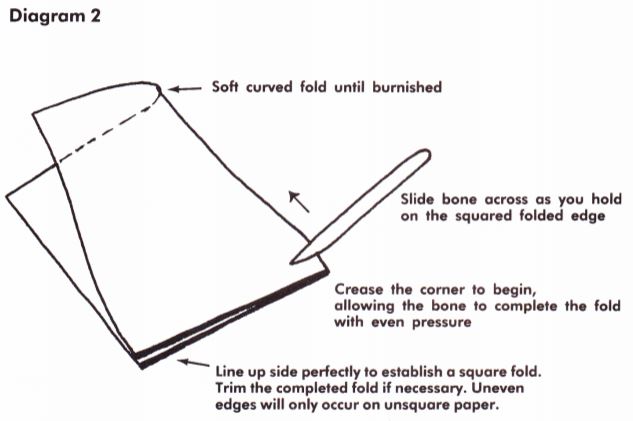
Note: As an aside, bone burnishers are also wonderful for folding paper (i.e. invitations, full sheets, etc.). Always line up the edges, matching the sides perfectly. This gives you a square side from which to work. Fold the paper from that side across. Never begin flattening the paper fold in the center as this may increase the chances of damaged paper. This is a perfect formula for your son's (or daughter's) paper airplanes!
END
Copyright © 1992 Chris A Paschke
For more articles on mounting basics look under the mounting section in Articles by Subject.
Additional information on all types of mounting is found in:
The Mounting and Laminating Handbook, Second Edition, 2002,
The Mounting And Laminating Handbook, Third Edition, 2008 and
Creative Mounting, Wrapping, And Laminating, 2000 will teach you everything you need to know about getting the most from your dry mount equipment and materials as an innovative frame designer.
All books are available from Designs Ink Publishing through this website.
Chris A Paschke, CPF GCF
Designs Ink
Designs Ink Publishing
840 Tucker Road, Suite H-190
Tehachapi, CA 93561
P 661-821-2188
chris@designsinkart.com