 Diagram 1
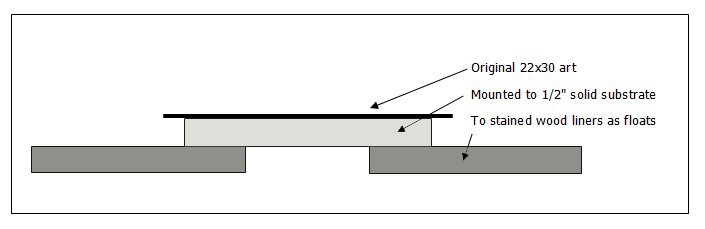
Original sumi-e on rough watercolor paper mounted to solid substrate, then mounted to 3-4" wide flat liner material to create the illusion of a frame. Effective but does not protect the art with no glazing.
When I attended the LA Art Show this year in February I couldn't help but notice the good, the bad, and the seriously wrong use of float frames, but regardless of technique, they and unframed cradled boxes dominated the framing presentations. And with many prices ranging averaging from $5,000-$25,000, that seemed almost an insult to the art. The good use of float frames had the art set back from the face of the art surface with beautiful moulding perfect for the image; the bad had the art higher than the float frame face looking both wrong and not protecting the art at all; and the seriously wrong sadly included two lovely pieces of original sumi-e ink painting on textural 22x30" watercolor paper.
These paintings were floated with the deckle edge of the paper overlapping what appeared to be a ½" solid substrate, probably starch paste as the gallery was from Korea. This was then mounted to a liner frame of ½" x 3" wood that had been whitewashed with a lovely pale grey. There was nothing wrong with the float unit framing other than there was no glazing of any kind to protect the original art from dirt, pollution and human elements, it was just out there to touch. (diagram 1)
Diagram 1
Original sumi-e on rough watercolor paper mounted to solid substrate, then mounted to 3-4" wide flat liner material to create the illusion of a frame. Effective but does not protect the art with no glazing.
As an artist I do understand sometimes wanting to push the framing boundaries, but as a professional framer we must always remember one of our rules is to protect the art, and that may include sometimes educating your client, especially if they are the artist. This should have been behind glass, or to maintain its more uncontained look in an acrylic box. And then you have the Faux Float, see below.
Float Frames
Float frames are designed for use with stretched and cradled painted canvases as a narrow contemporary outline frame with base support and protection, with most moulding companies carrying a floater line. Over the years the basic undecorated ¼" float face has evolved into sculpted decorated faces, assorted wood stains and unusual profiles, but even then there is still more that can be done with float frames making them a very functional profile. (photo 1)
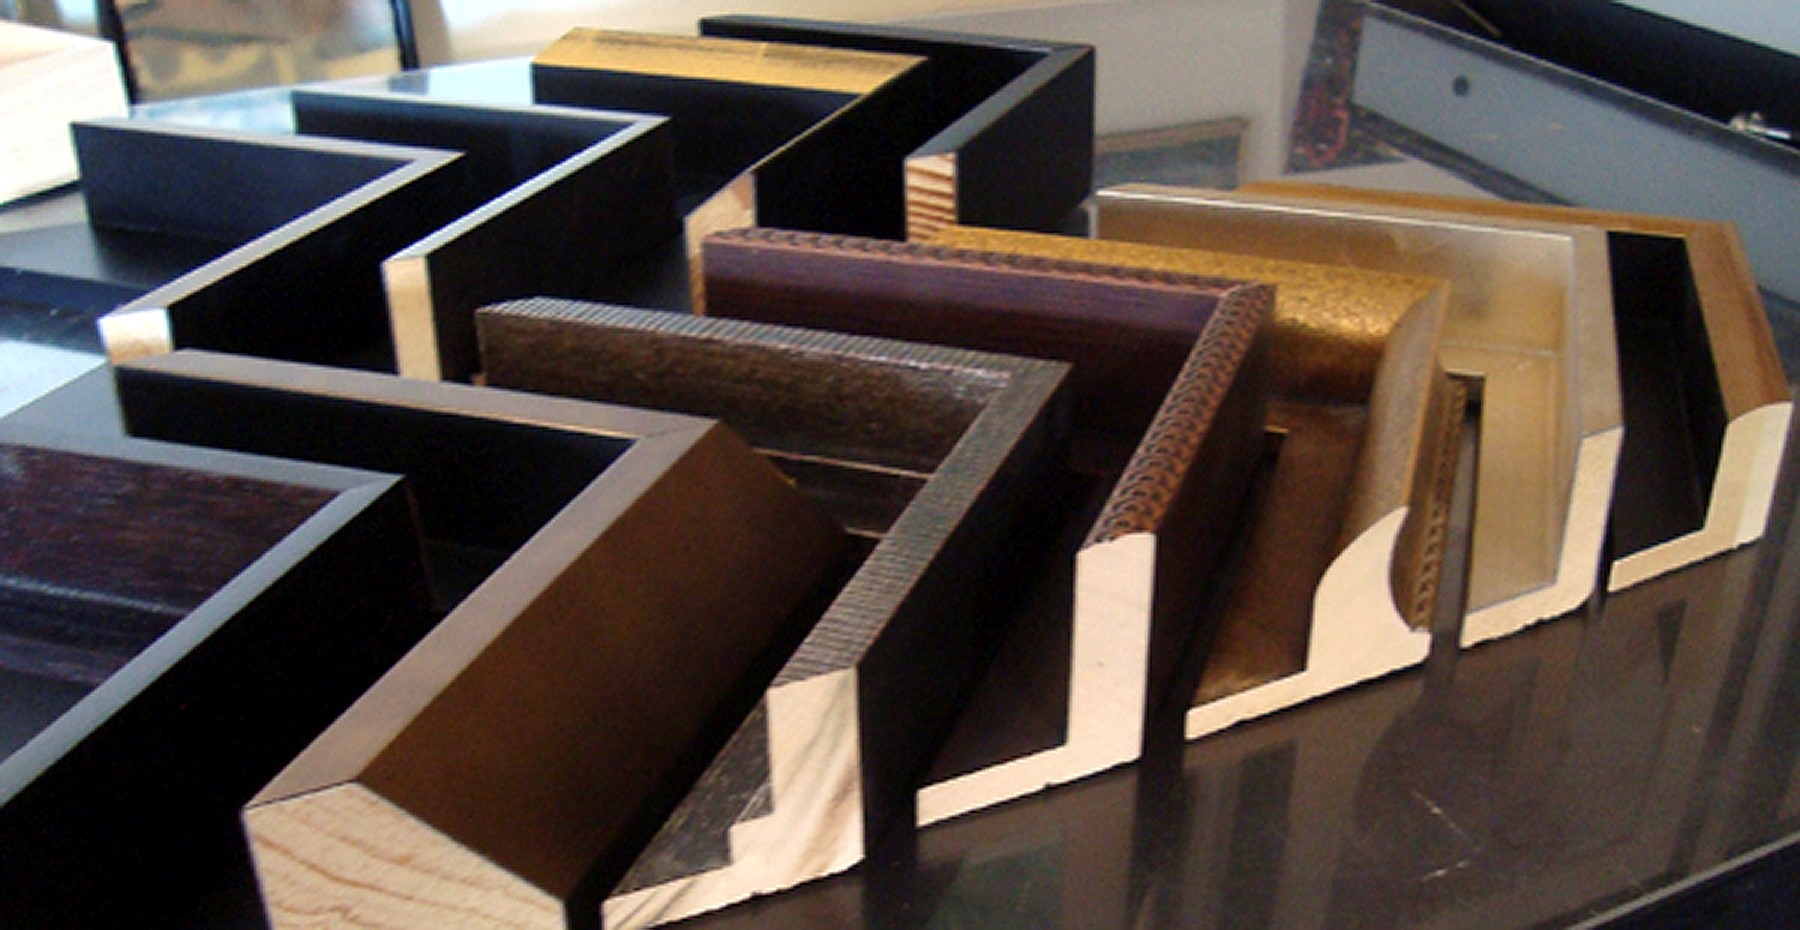 Photo 1
Assorted traditional, step, decorative, and contemporary profiles of short and long base float frames from numerous distributors.
Basic float frames for canvases of oil, acrylic, and mixed media use ragboard, rabbet liners, foamboard or Coroplast backing, and hardware, and come both long and short "L" shape and stepped. Contemporary digitally printed canvases might be stretched on bars or strainers, gallery wrapped with no frame, or mounted to ³⁄₁₆" low temperature MountCor Canvas—which may or may not require a float frame at all. Encaustic—on Baltic birch and related mixed media—may be screwed to frames, or attached with Velcro to change out the images. (diagram 2)
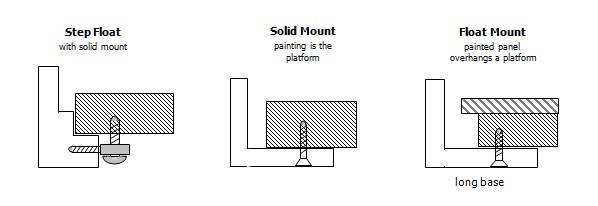 Diagram 2
A variety of mounting possibilities with stepped and L-shaped float frames.
Placement
The placement spacing from the face of a float frame traditionally was ⅛-¼" from the top and side which is why many step floats are that narrow. Then contemporary encaustics allowed greater surface and side space to visually allow what looked optically correct. (diagram 3)
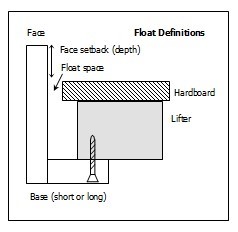 Diagram 3
Float definitions and spacing.
A recent client presented a 30x40" original oil portrait of her and her horse Rambo. It had been painted around the sides as a gallery wrap, not requiring a frame. She lived with it in her office for two months and called me on-site to consult with what to do. We selected a beautiful red edged deep, long based float frame. The black picked up the jacket and hat and the red picked up the saddle. We opted not to lift it in the frame and to add wider spaces to allow the frame to make a more complete statement. (photos 12A, B, C)
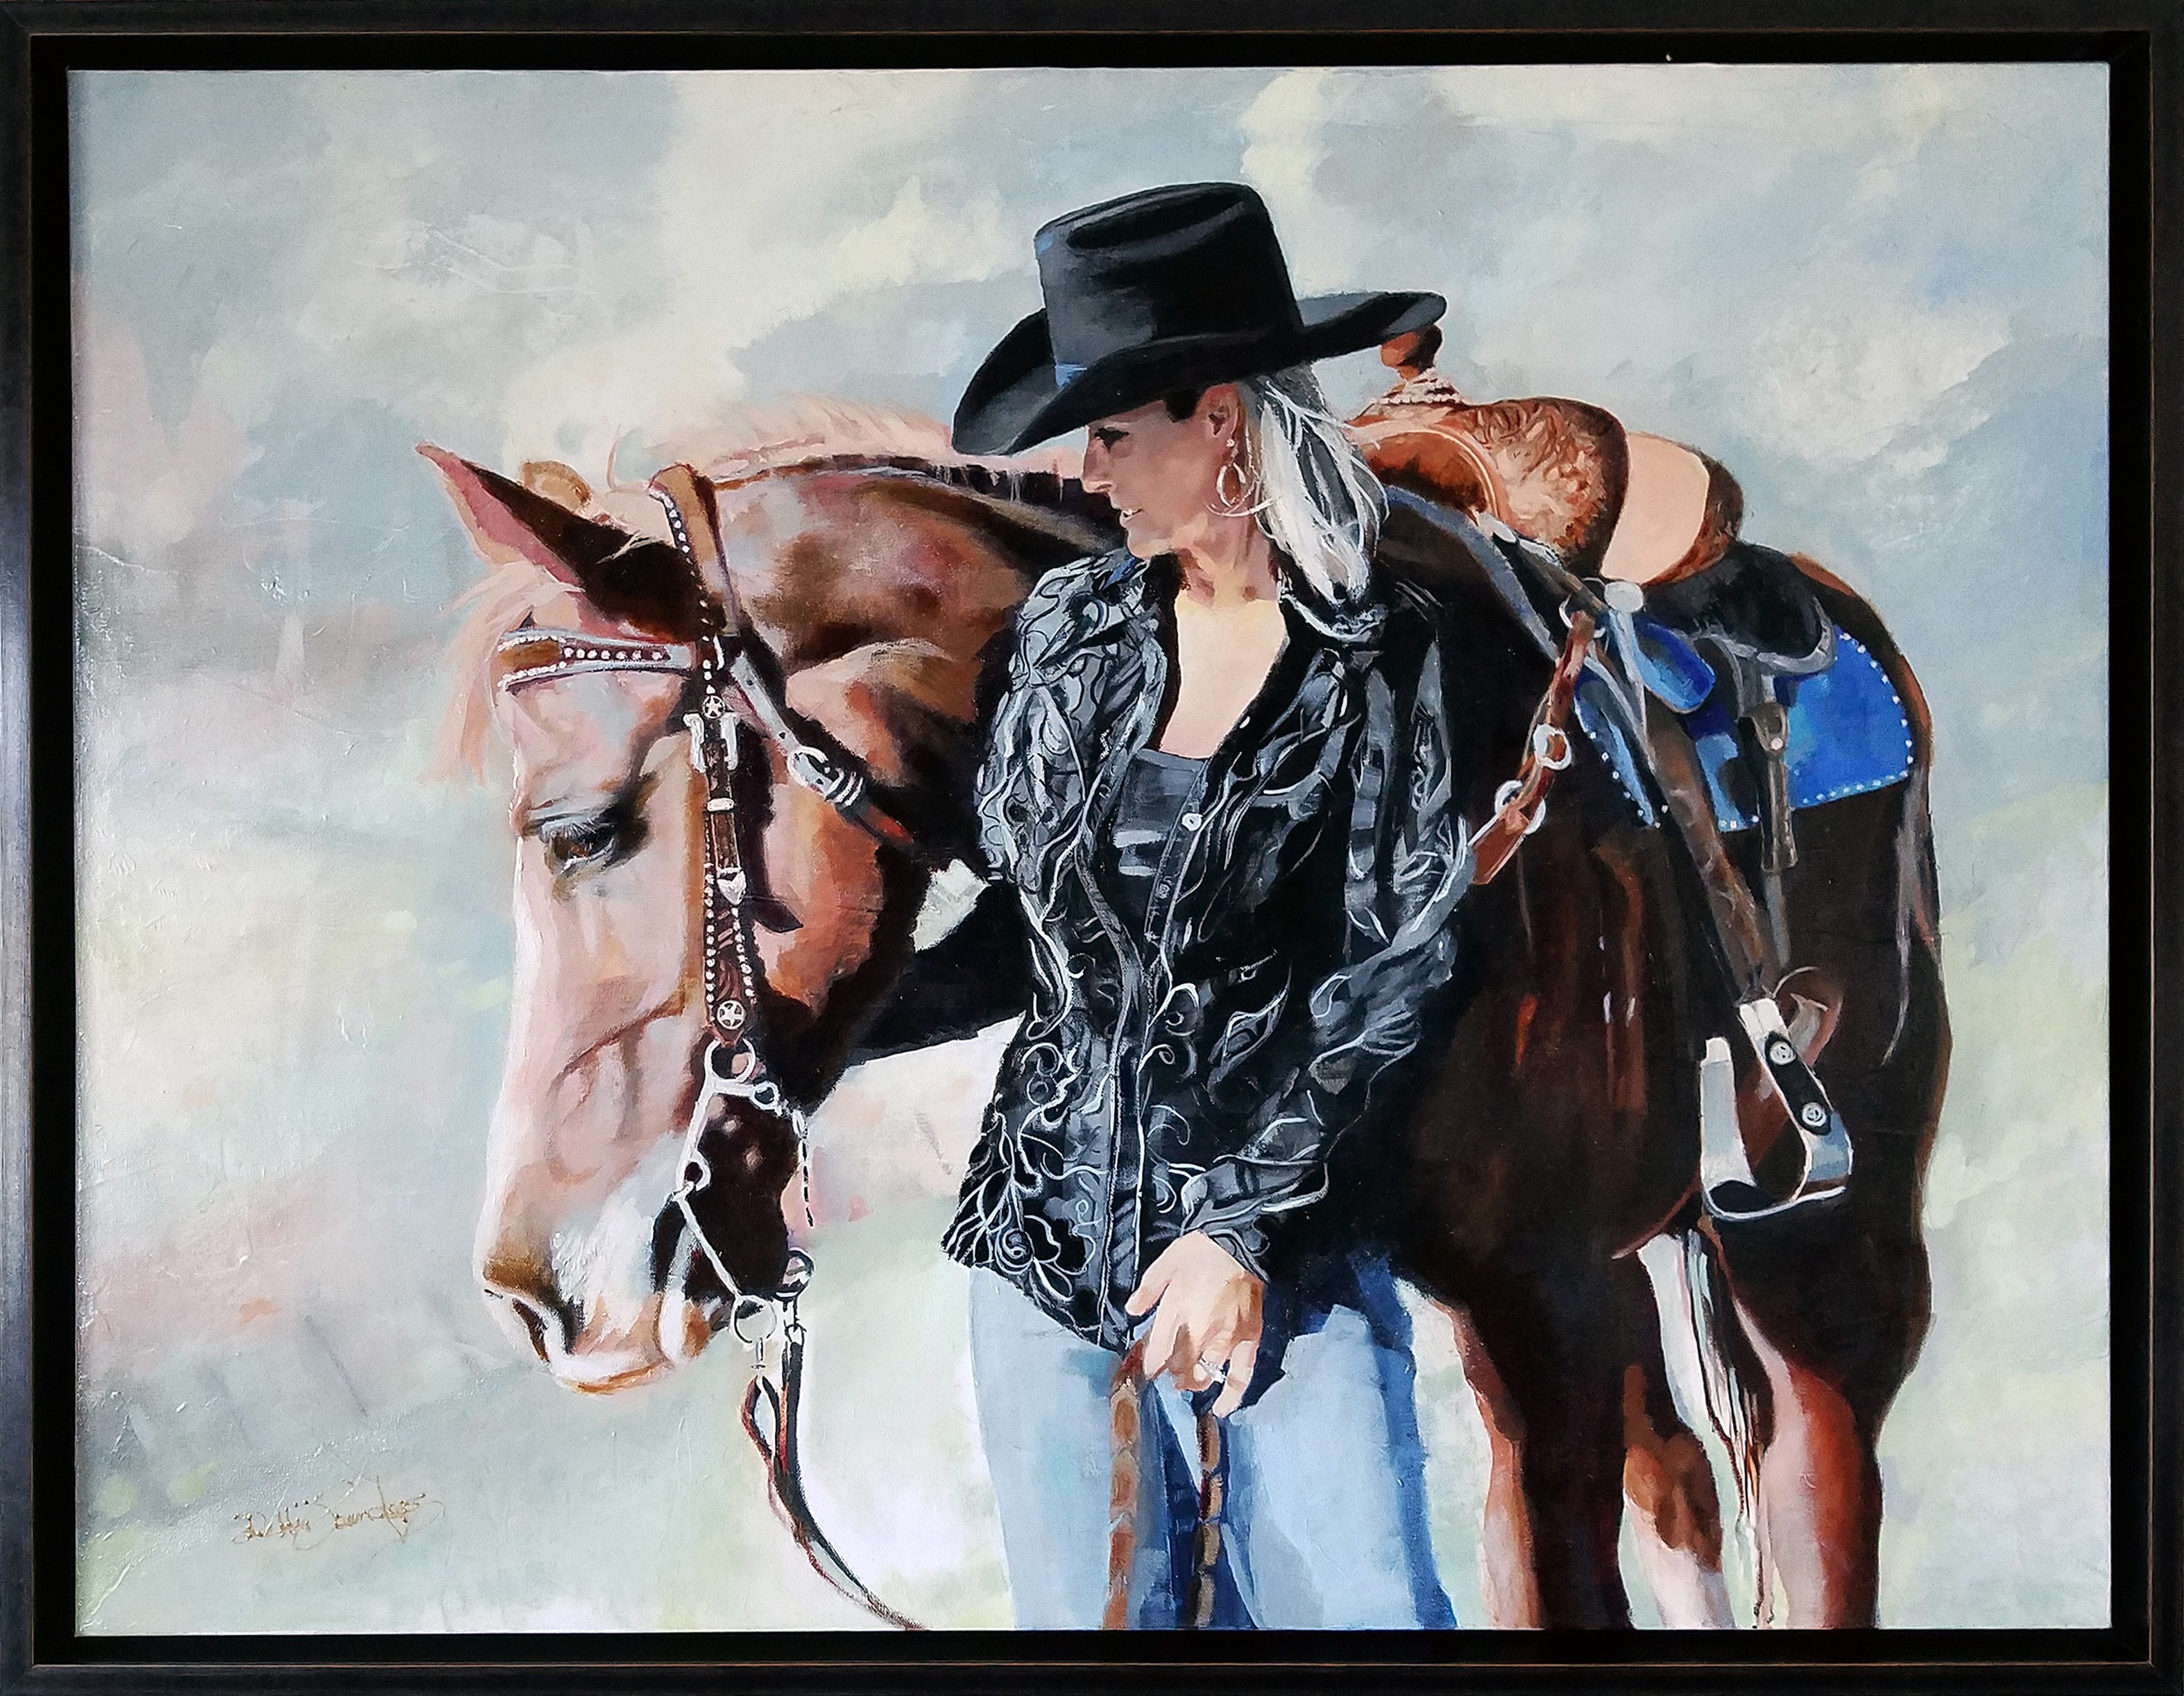 Photo 12a
Andover Black float frame with ⅜" side space, set to back. Photos courtesy of K. Bowe, CA
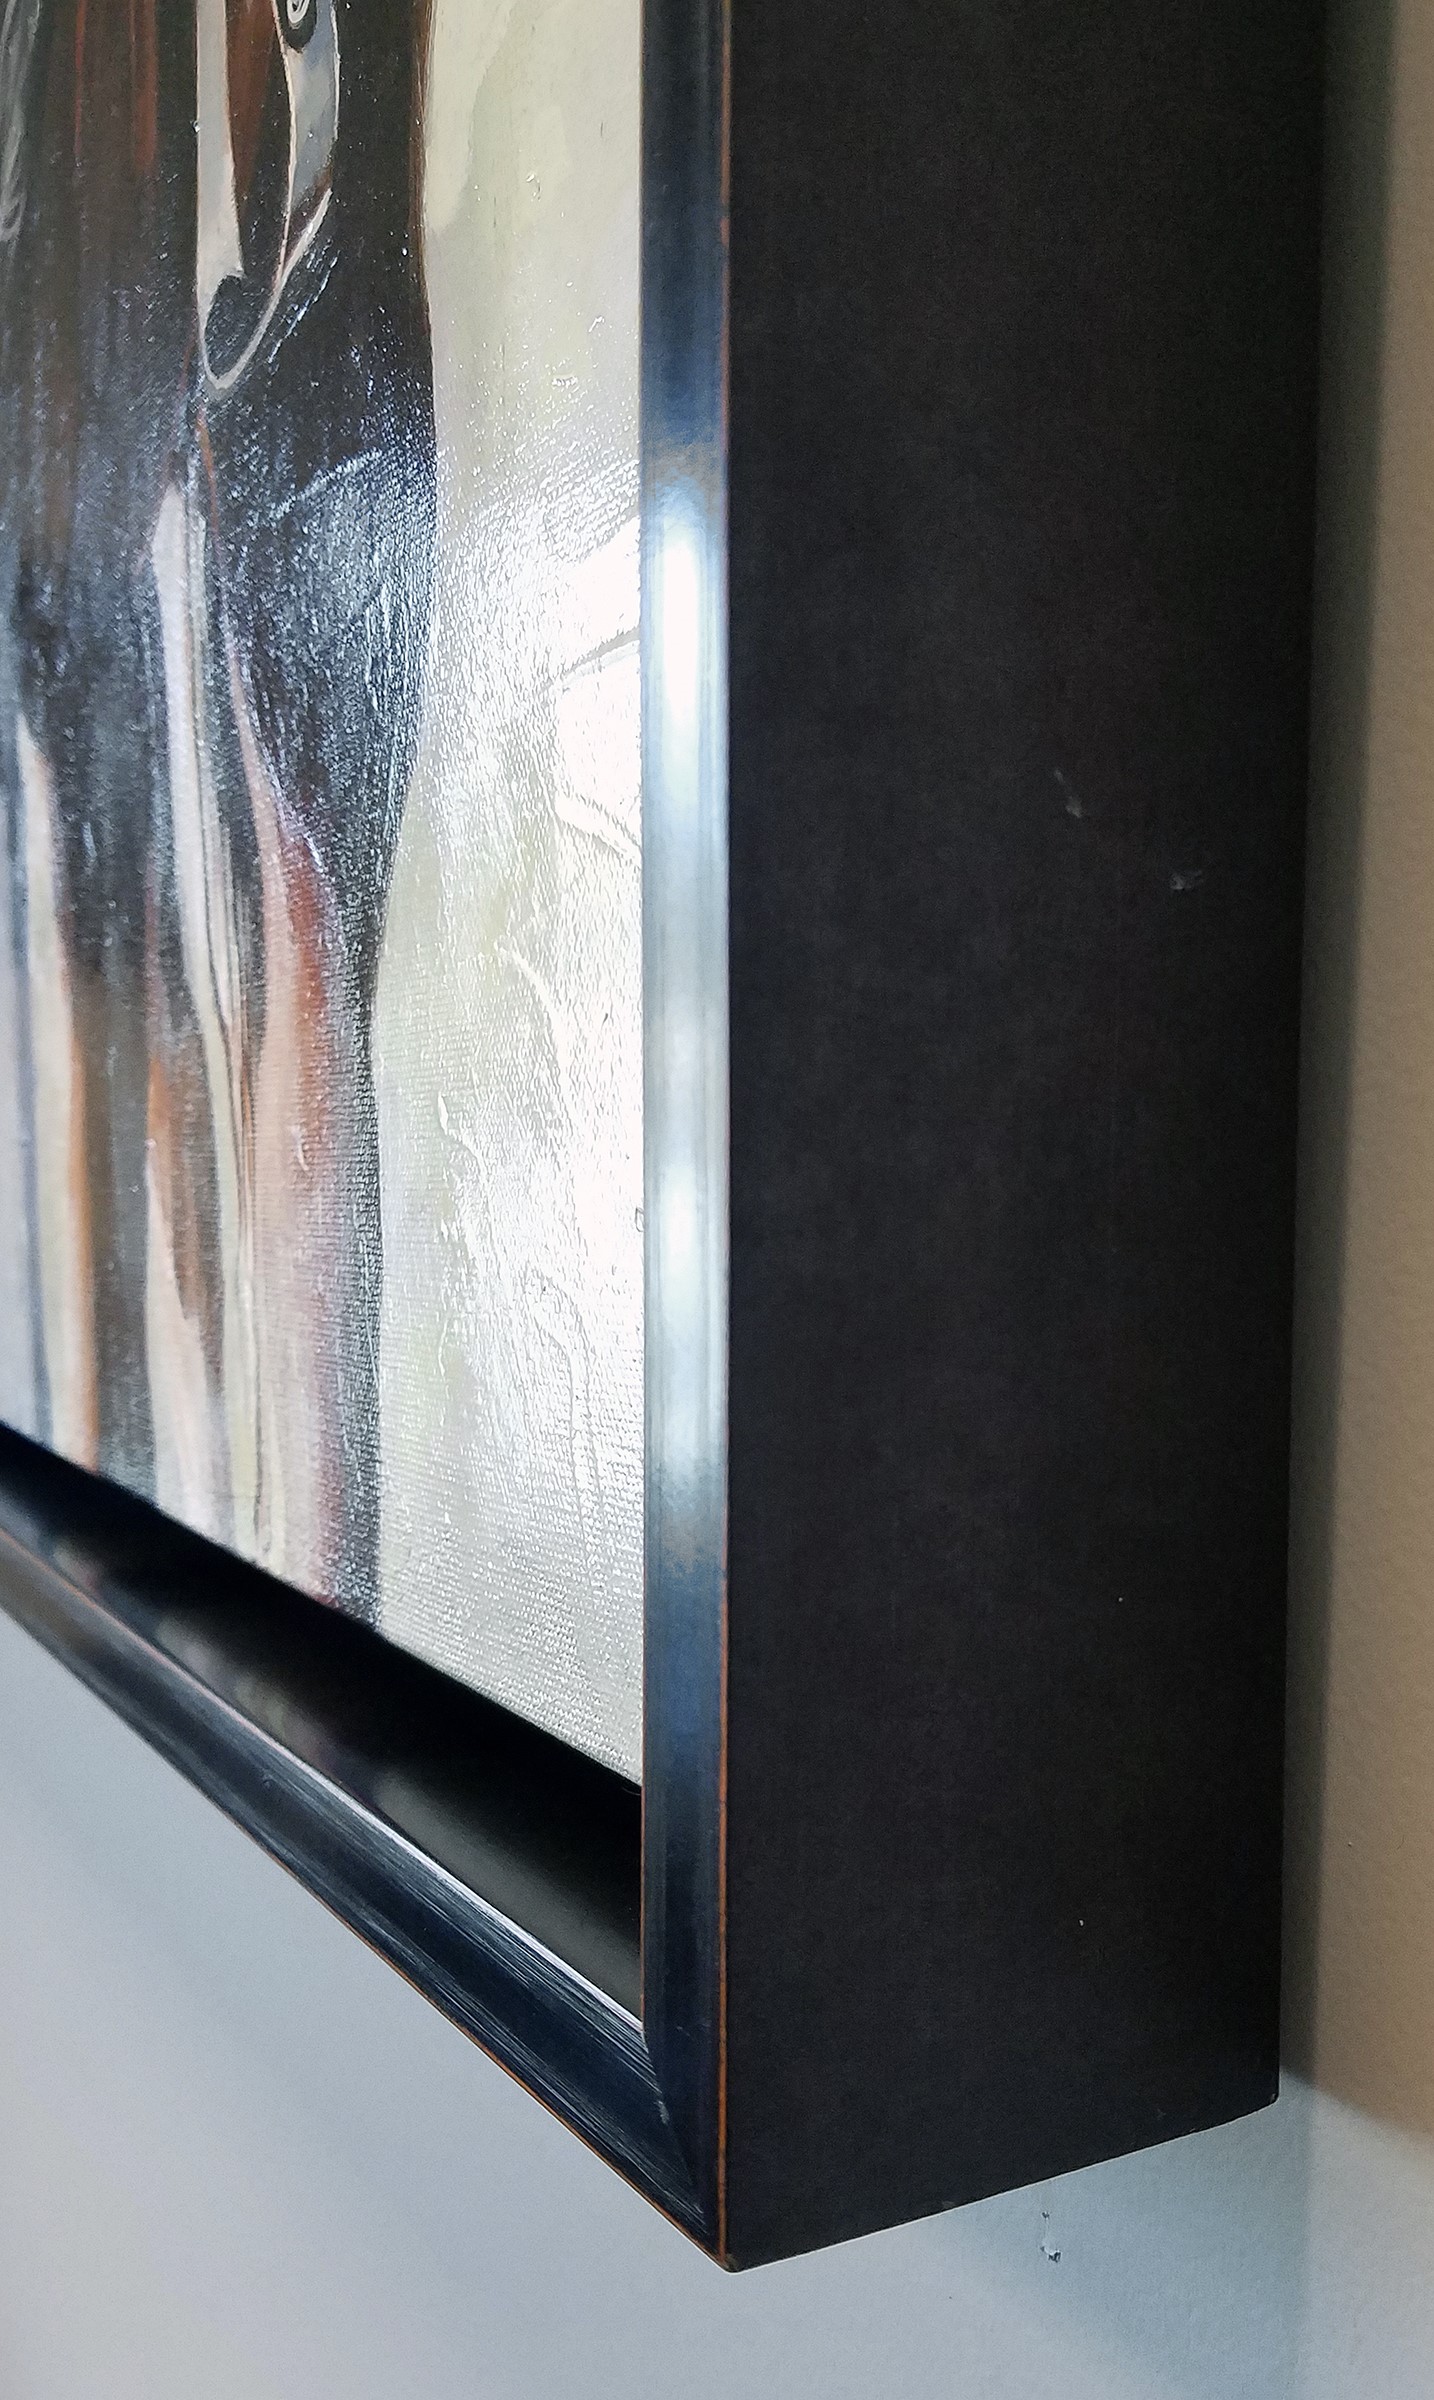 Photo 12b
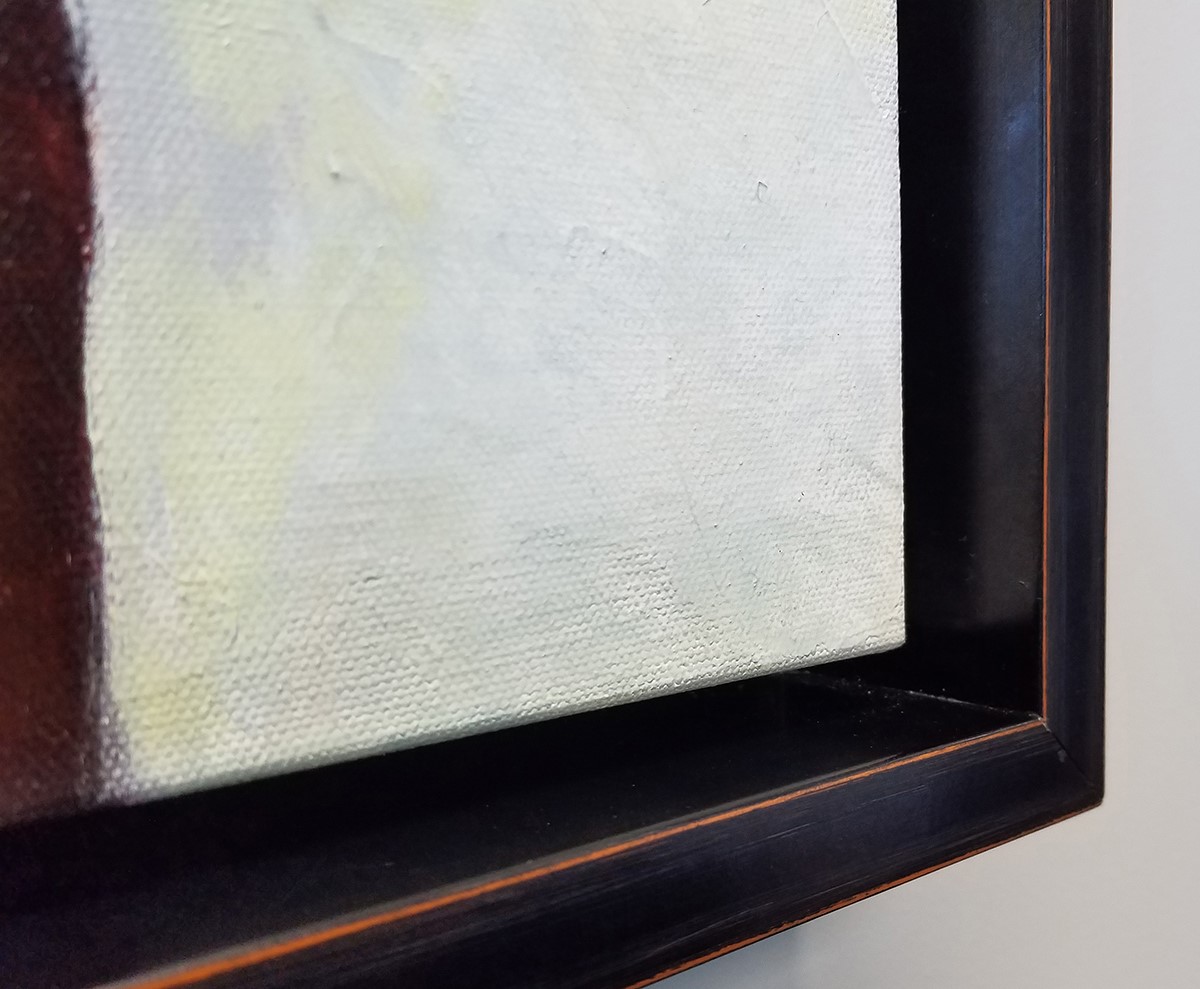 Photo 12c
Faux Float
A faux float is a wide flat strainer or strip of fine lumber to accompany a cradled box or art on hardboard panel, such as encaustic, acrylic or oil. A small block matching the wood enhances the faux profile as an alternative to a traditional or manufactured float frame. (diagram 4)
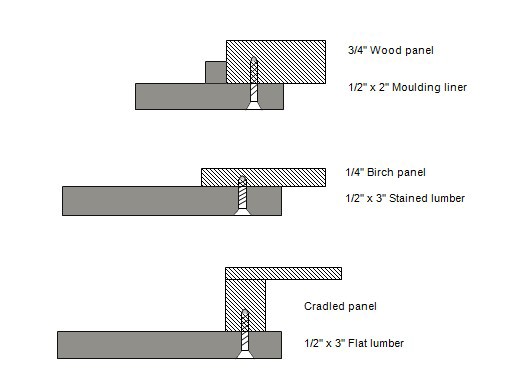 Diagram 4
Basic faux float with wide flat strainer and small accent block to enhance the profile, and others.
Trends in custom framing are often driven by what is seen in the home décor market. Stretched digital canvases have been around for years promoting the gallery wrap as a complete look with no need for a frame. This kept retail prices down and has been a source of frustration for custom framers. More recently the wall décor market has seen the addition of the faux float gallery wrap by simply applying a solid straight panel behind the painting as a Faux Float, giving it the illusion of a simple accent frame. (photo 2) Then by the addition of another small square block the illusion is enhanced to look even more like a multi-level profile, while still just being a flat wood strip and block. (diagram 5)
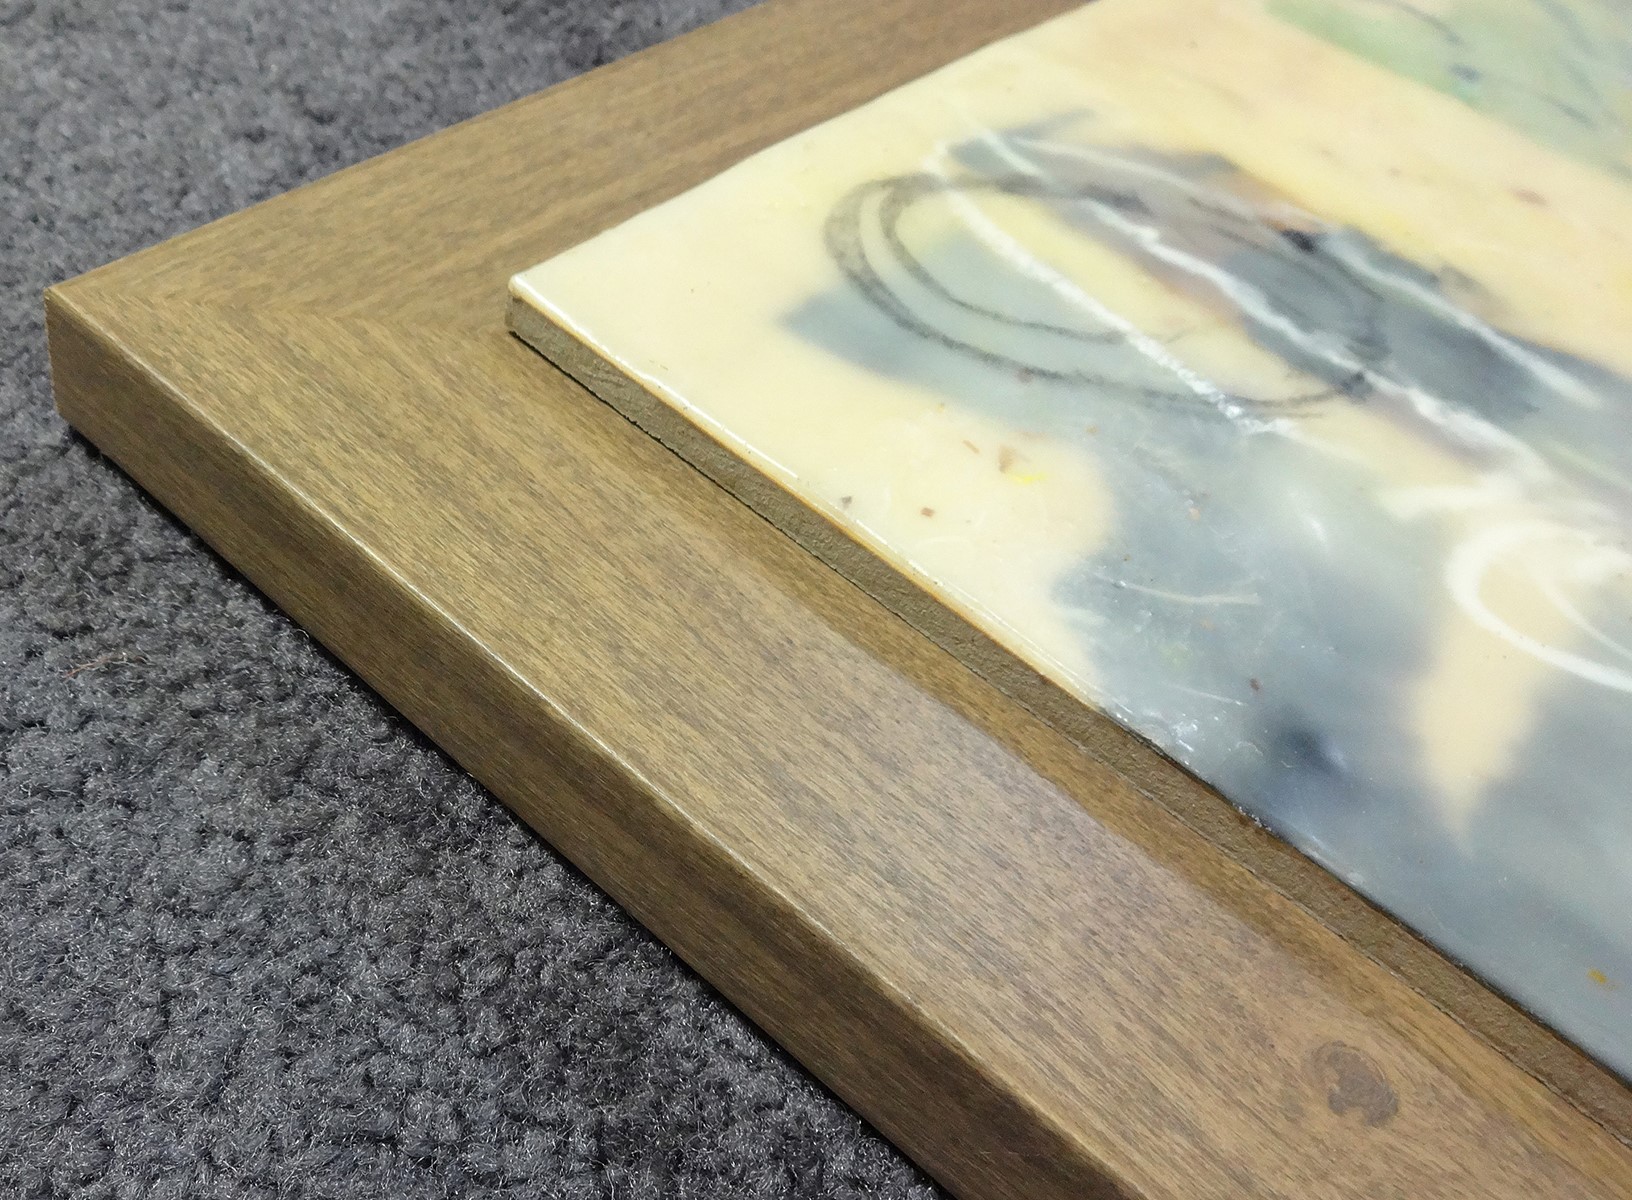 Photo 2
An encaustic on ¼" thick Baltic birch is screwed to a wood liner for the illusion of a frame. Since encaustic does not require glazing this would be acceptable, but not as much as a float that would protect the face.
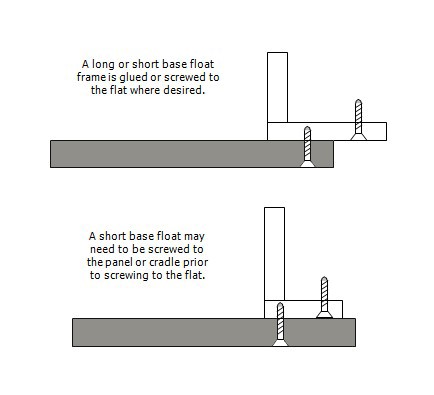 Diagram 5
Basic flat float liners with traditional float frame.
Flat Float
A flat float is another derivative from a traditional float by using moulding liners—often ½" thick and 2-3" wide—most often used as a liner for a non-glazed painting. These come in wonderful stained woodtones and colors that can be a good source for creativity. In addition to fine mouldings already in our industry, domestic hardwoods of cherry, walnut, oak, poplar, and exotic woods purpleheart, African mahogany, and red oak may be purchased as unstained ½" to 1" thick x 3" wide, length lumber from specialty cabinet companies online like Rockler, or Woodworkers Source (photo 3). Though many originals do not require glazing, their face is not as protected as they would be with a float frame.
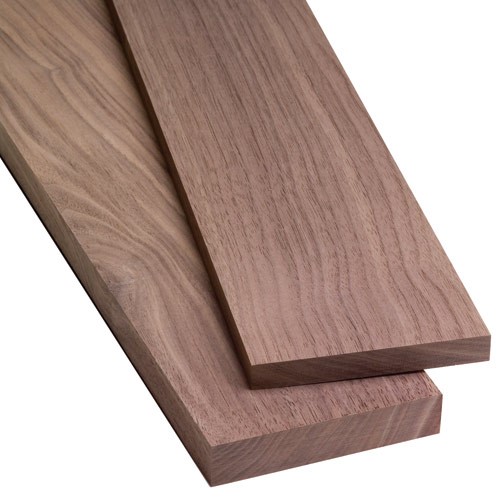 Photo 3
Unstained, length lumber from Rockler.com.
Capped Stack
Cap stack is a phrase to label the use of a traditional rabbet lip profile with a float frame tucked inside. As you can imagine, the possibilities are endless when you begin to play with corner samples, but there are a few things to always keep in mind when stacking mouldings as float frames:
By setting the art deeper into the sample frame allows more visibility of the black float insert which becomes an accent liner under a lighter whitewashed tall cap. (photo 4) Notice how the contrast between the black liner and the white cap helps showcase both the light and dark in the painting.
 Photo 4
A white washed 3" deep cap is stacked over a 2" deep black float, which would accommodate up to a 1½" cradle.
Wide vs. Deep
An original 6 x 12" encaustic painting on 8-ply ragboard is already framed using a shallow black float frame. By tucking it inside a wider cap it becomes a 5" wide frame. Since paintings are not matted like paper art the added width of the stacked frame becomes a visual substitution for decorative mats. Though a wide frame profile could overpower a small encaustic, this stacked wide float becomes the substitute for mats, and could also work well with an oversized 4' x 6' painting (photo 5). A wider capped float frame is more dramatic and in some cases may even better fit a client's décor.
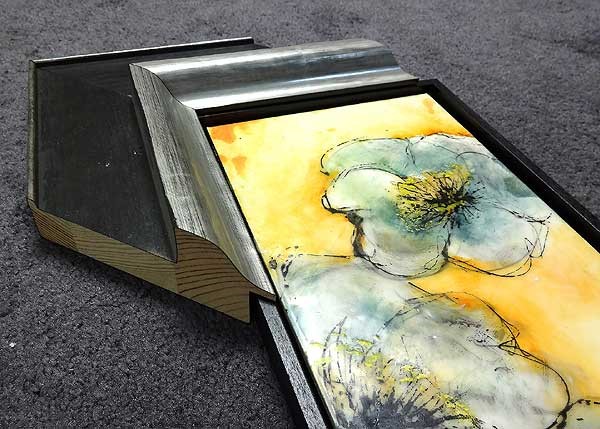 Photo 5
Wide 3⅝" contoured cap over a shallow black Garrett horizontal black float.
The cap moulding is 5" wide by 1¾" deep. This Italian wood has the strength for a heavy mirror or the depth for a 1" deep float frame. The dark walnut float frame color matches the cap maintaining the visual appearance, creating a wide face floater. (photo 6A-B)
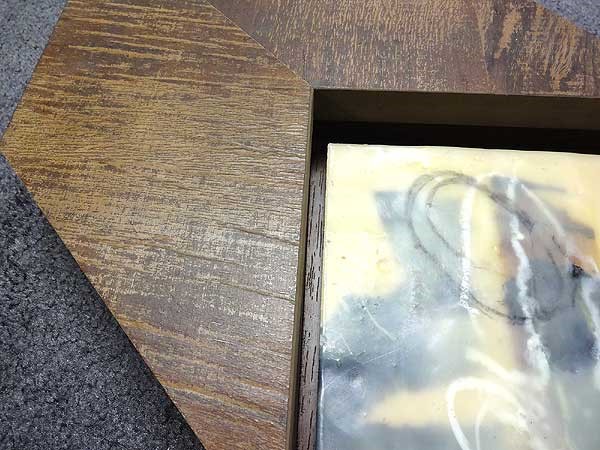 Photo 6a
Stacking like colors creates a wide face float frame.
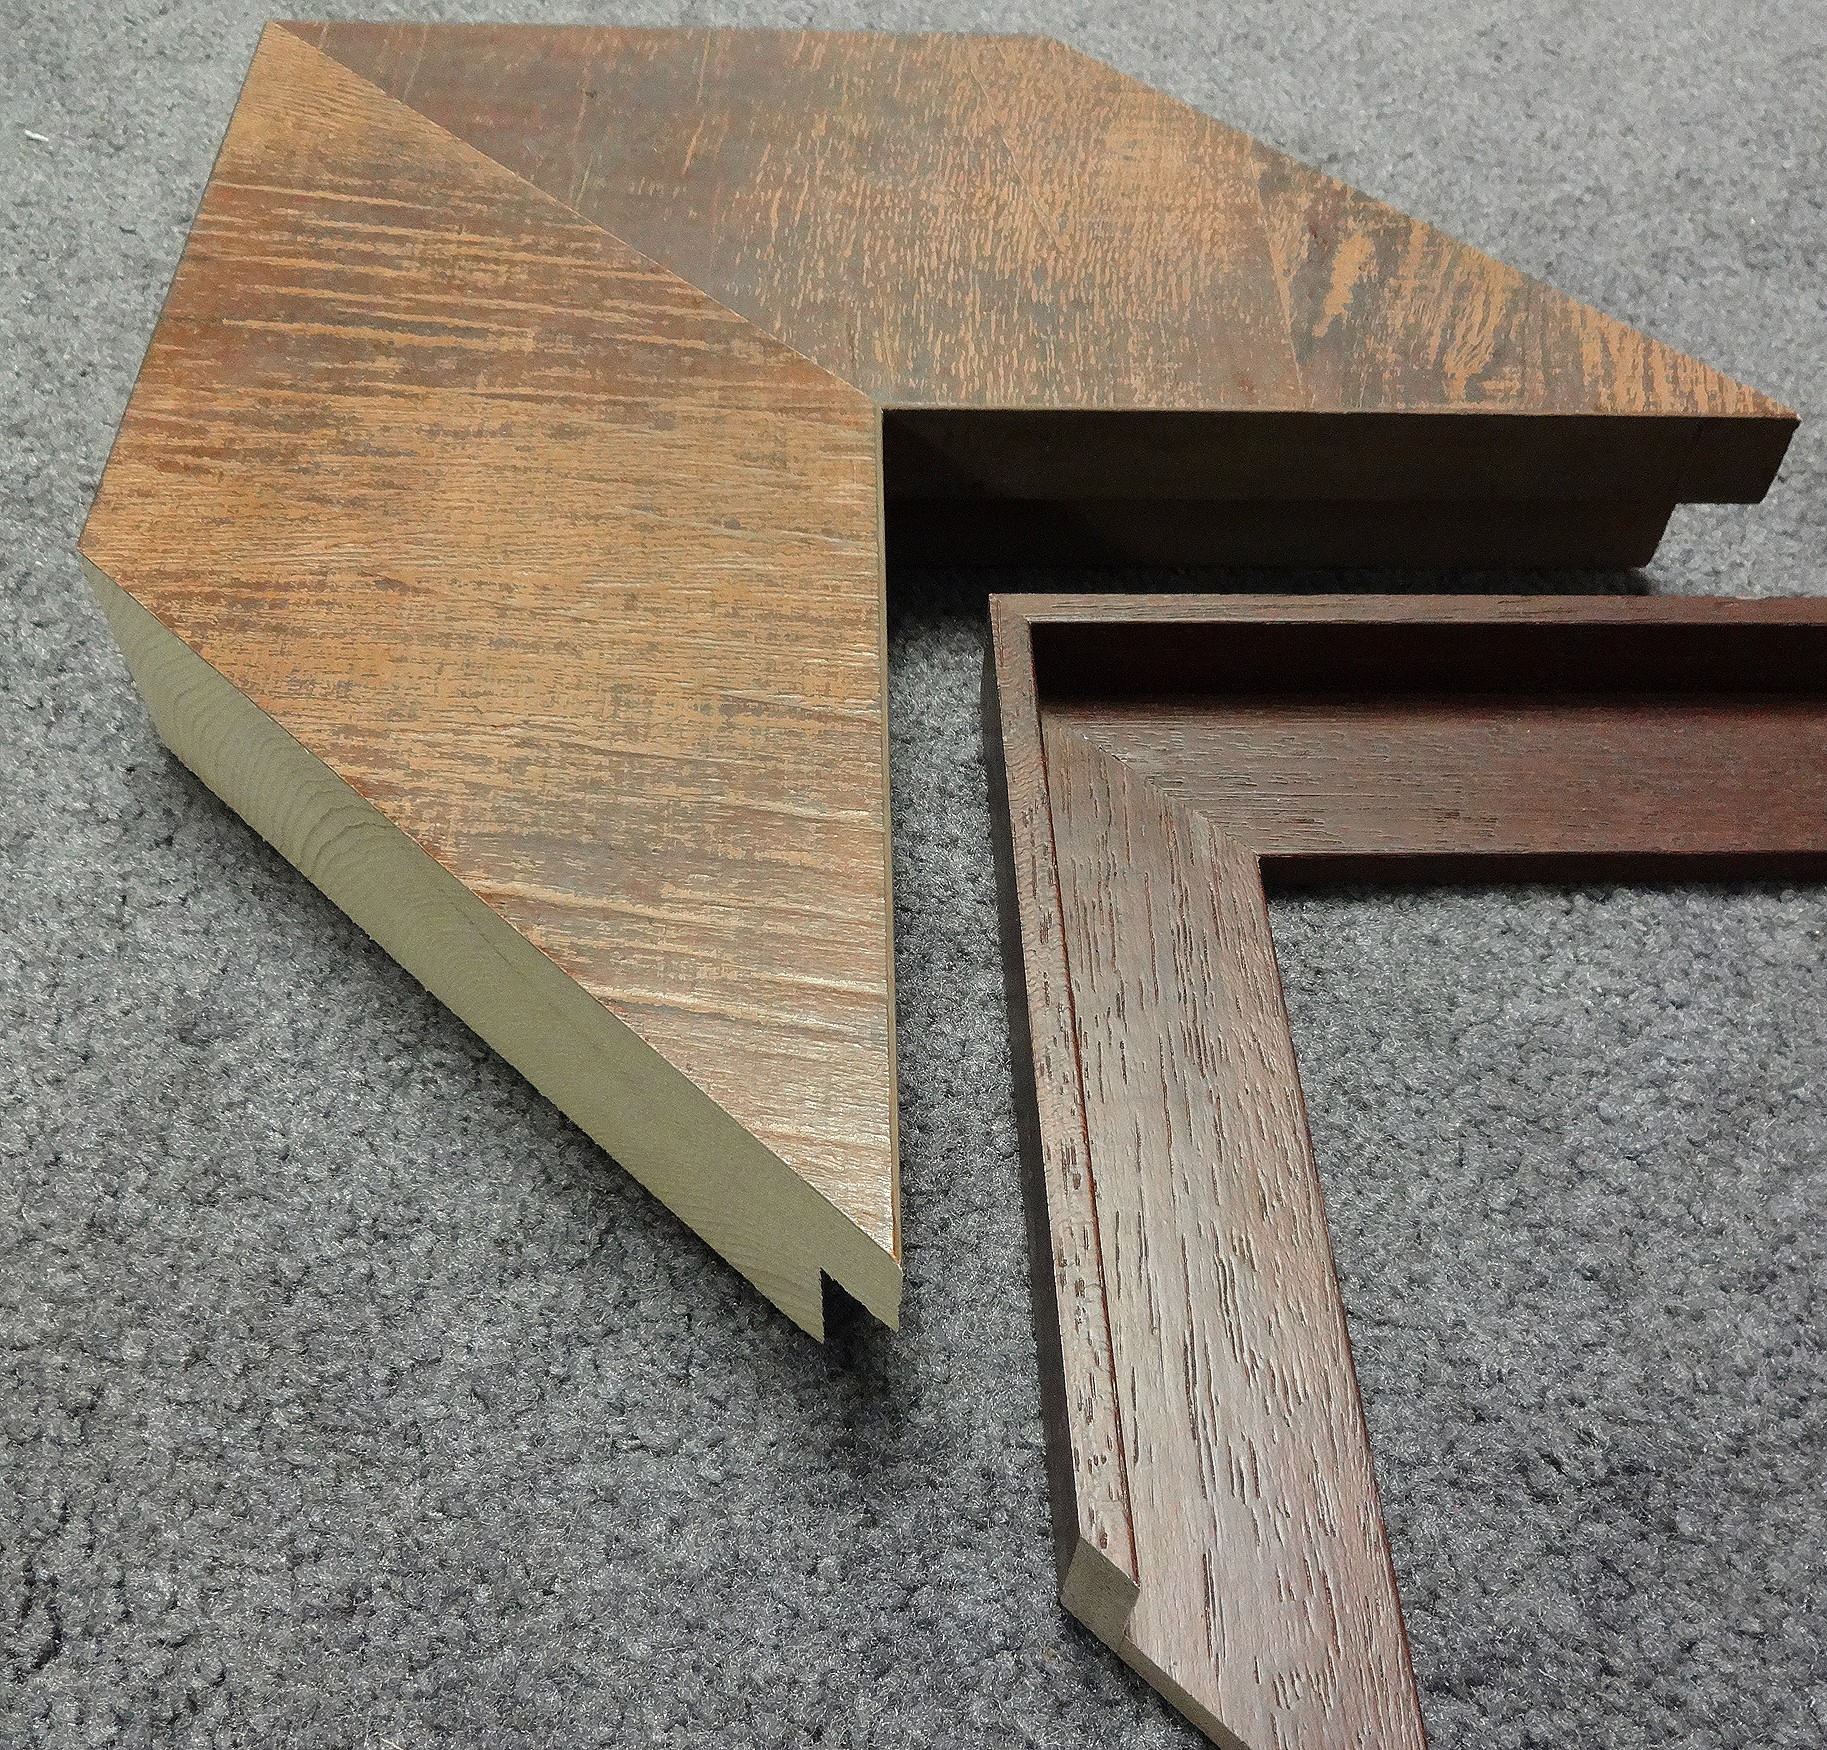 Photo 6b
Stacking like colors creates a wide face float frame.
Use of Color
The float does not have to match the cap frame to create an appealing and unique design. A carved cap is paired with a 1" deep natural white stained float Nurre Caxton. Though a white painted or stained float by itself can be a little unexciting, when stacked with a darker cap it can prevent a dark float space from swallowing the painting. The lighter space surrounding light art gives the viewer's eye a place to rest between the art and the carved cap, plus the lighter coloring in this sample matches the encaustic medium which expands the art to appear larger than it actually is. (photo 7)
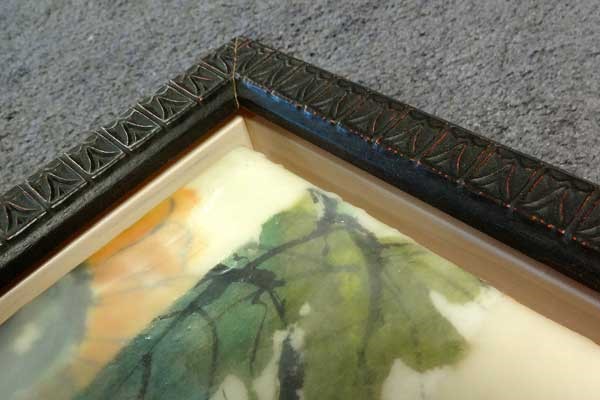 Photo 7
A lighter colored float expands the visual size of the art and prevents a cavernous float space.
Multiple Floats
Float frames may also exhibit more than one piece within one frame and have endless possibilities. A diptych float works for stretched or cradled art rather than two separate frames, and you won't be losing money because it won't be cheaper. (photo 8 +diagram) And if a diptych, why not more like 4-up, or 9-up? (photos 9 and 10 +diagrams)
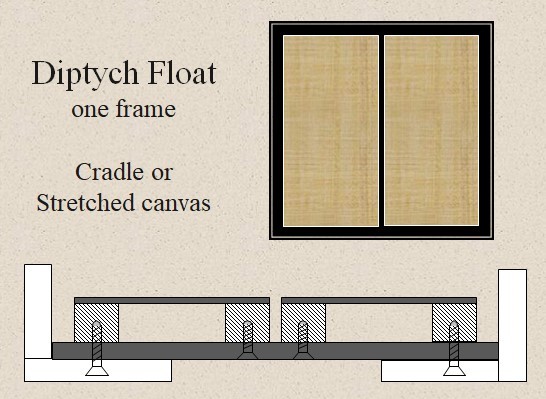 Photo 8
Multiple Image Floats are all self-explanatory.
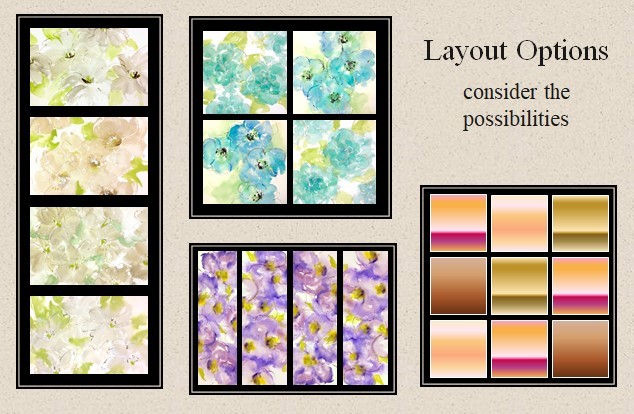 Photo 9
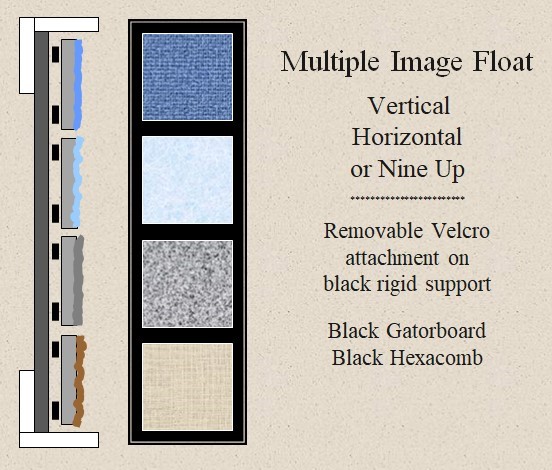 Photo 10
Think stable rigid substrate—maybe fabric covered—with spacers of wood, Gatorboard, or cradles, simply screwed together. The outer float frame may require a stacked cap for added strength and/or cross bracing but all of that is just added shop time. And then consider multiple heights, like a gallery wall within a frame. (photo 11 +diagram)
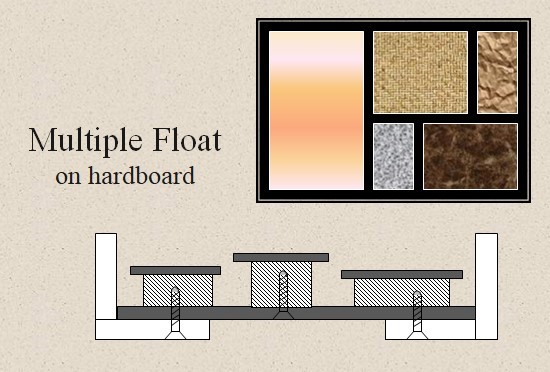 Photo 11
Hardware & Limitations
Most floated art has wood involved—stretchers, cradles, panels—so the preservation comes with sensible use of hardware, which should be hidden and as non-invasive as possible. Screws should be countersunk and both long and heavy enough to securely hold. (diagram 6) Hardware isn't difficult, but you may end up with every offset clip available and a flathead screw assortment you never imagined.
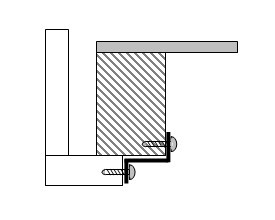 Diagram 6
Hardware should be hidden and as non-invasive as possible.
You are only as limited as your design imagination. A basic float frame is a contemporary frame for a gallery wrap, a faux float adds width while also the option of color, but a stacked float frame allows for depth, width, color, contrast, texture and greater profit potential.
END
Copyright © 2024 Chris A Paschke
For more articles on mounting basics look under the mounting section in Articles by Subject.
Additional information on all types of mounting is found in:
The Mounting and Laminating Handbook, Second Edition, 2002,
The Mounting And Laminating Handbook, Third Edition, 2008 and
Creative Mounting, Wrapping, And Laminating, 2000 will teach you everything you need to know about getting the most from your dry mount equipment and materials as an innovative frame designer.
All books are available from Designs Ink Publishing through this website.
Chris A Paschke, CPF GCF
Designs Ink
Designs Ink Publishing
840 Tucker Road, Suite H-190
Tehachapi, CA 93561
P 661-821-2188
chris@designsinkart.com