 Photo 1: Dry Mount
The image is mounted to an over sized sheet of tissue to the mount board (substrate). This is the faster than flat mounting.
The process of mounting includes an image, the application of some form of adhesive, and a substrate all bonded together to hold art flat for framing. Materials vary as do the techniques required depending on the design and display. Standard adhesives fall into wet, spray, pressure-sensitive and hot dry mount categories, all unique to themselves, but the possible techniques and applications may utilize more than one type of adhesive.
Flush, flat, float and plain mounting are all techniques involving how an image is applied to a substrate. The image type and size—lithograph, RC photo, digital print—will most often dictate the type of adhesive or method for the mount, but the design and display will determine the technique used. Prints could be heat sensitive (over 150°F), too large for dry a mount press, or being layered as a collage display, allowing multiple adhesive options, all of which may be achieved using any mount method.
Dry Mount
When the edges of a mounted image will be covered by a window mat—as a visual resting place for the eye, to cover an uneven edge, or as a spacer to suspend the art from touching the glazing—the tissue does not need to be even or trimmed to fit behind the art prior to mounting. (photo 1) To dry mount, cut a sheet of tissue 1" larger than the print, tack to hold in place to the substrate, mount, cool under a weight, and book hinge a window mat to the mount. (photo 2)
Photo 1: Dry Mount
The image is mounted to an over sized sheet of tissue to the mount board (substrate). This is the faster than flat mounting.
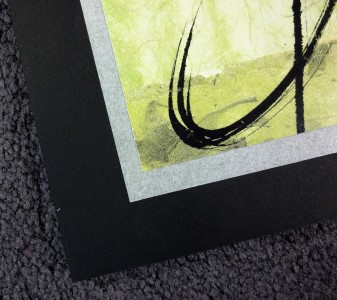 Photo 2: Tissue Mount—corner detail
When mounting to cover with a mat the tissue does not need to be even or trimmed to fit behind the art. Simply mount and book hinge window mat to the backing.
Mounting with tissues that don't need to be hidden or when using heat-activated (HA) foam boards allowing the adhesive is remain visible—as a tissue or the gloss of a mounted HA board after mounting—requires use of a window mat or flush mount trim for display. (photo 3)
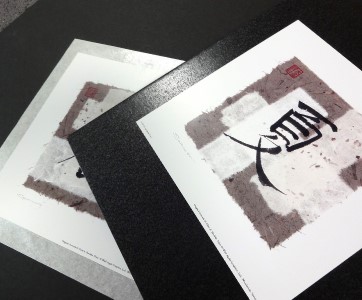 Photo 3: Basic Mount
A basic dry mount may be tissue (L), film, or HA board. Since the adhesive is visible in these cases through color or surface gloss they require a window mat or flush mount trim for display.
Flat Mount
Flat mounting is when an image is mounted directly to a decorative backing board, usually a colored mat, which functions as an economical border that replaces the window mat. (photo 4) This method—also known as plain mounting—is a little more time intensive if boards are cut to size first and the image must be properly aligned, tacked and mounted. If no Finished mounts are placed directly against glass when placed in the frame. This is an economy method of framing not intended for fine art.
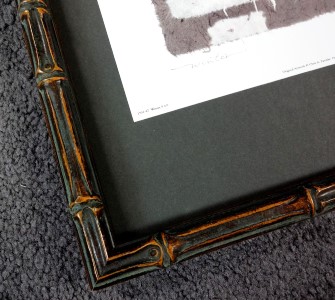 Photo 4: Flat Mount Corner
The image is mounted directly to the center of a decorative backing (mat) eliminating the need for a window mat. This is an economy method of display not intended for fine art.
Generally flat mounts are dry mounted with a permanent adhesive, but images may be wet glued, spray or p-s mounted as long as the adhesive application is controlled. Care must always be taken in the selection of the adhesive method to ensure compatibility between inks, printing technique and media prior to mounting. Media is the material a digital image is printed onto and not a mounting substrate. Flat mounted images are also candidates for vinyl laminates in a hot press or polyester roller lamination, both used as a glass substitute. (photo 5)
 Photo 5: Flat Mount
The image ready for glazing and framing or may be laminated to eliminate the need for other glazing.
Flat mounting is the technique of choice when photographs are submitted into competition. The idea being the elimination of frame, glazing, mat or anything that distracts from the photo itself. Competition boards are frequently 16x20", ⅛" to ³⁄₁₆" thick, with 11x14" - 14x17" photos permanently flat mounted with tissue to the center. Since wet and spray adhesives are best controlled when they are applied to the substrate rather than directly to the art, it somewhat limits the use of wet and spray adhesives when flat mounting.
Premount
Unlike basic dry mounting, when flat mounting, all the tissue must be covered by the image, and it should be extended to the very edge of the print to prevent lifting or peeling not precut ⅛" smaller than the print. Premounting is a method of mounting the adhesive to the verso side of the image, trimming the outer edges to exact size and shape, then mounting that adhesive-coated image to the selected substrate. (photo 6) It is a technique required for centering or randomly placing images on decorative substrates as when flat mounting to sized substrates. Once backed with adhesive, images may be mounted as a single image, multiple image collections, or overlapping as photo and image collage, though edges may show through thinner digital prints.
 Photo 6: Premount and Trim
Premount the art to sheet adhesive for flat or flush mounting. Then trim the image to the exact size, tack and mount a final time to bond. (clockwise from top) Unmounted image, premounted to adhesive, trimmed and flat mounted to decorative mat.
When needing to pre-mount numerous pieces in a large project, bulk premounting can save material and time. Cut a single sheet of tissue to accommodate the images that require premounting, align loose images, tack in place, mount in heated vacuum press. (photo 7) Trim to size and shape after cooling.
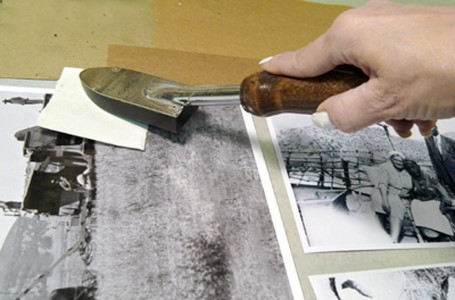 Photo 7: Bulk Premount Tacking
A single sheet may premount numerous images that may be puzzled onto it for maximum use. Align, tack and mount.
Premounting fuses the adhesive to the back of the photo or print first and once trimmed to final mount size and shape will never show even after bonding to the substrate. Commercially presized tissue sheets (8x10", 16x20"…) may be slightly larger or smaller than their designated cut size, and hand sized sheets—cut to match exactly—can expand in the press and although not visible before mounting may show a thin white edge after bonding.
Flush Mount
Flush mounting is the bonding of an image to a mount board that is trimmed to the outer edges of the art after mounting using a straight blunt square cut. This method eliminates the need for a window mat as the art covers the entire board. (photo 8) Flush mounting is popular for economy framed prints and images that are to be laminated as a glass substitute. By selecting black or white foamboard, or color coordinating 8-ply solid core boards the edging becomes a finished look that goes with the art if used as an unframed sign or temporary display. (photo 9)
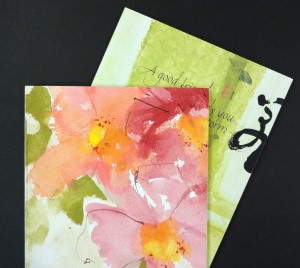 Photo 8: Flush Mount
Trimming to the outer edges of the art after mounting eliminates the need for a window mat as the art covers the entire board. Pressure-sensitive mount (L), dry mount (R).
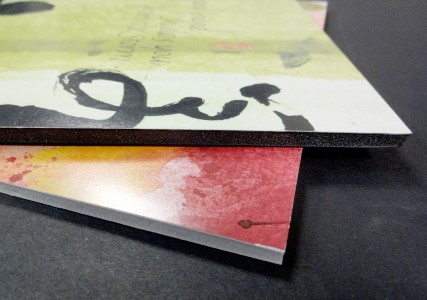 Photo 9: Float Substrates
Select black or white substrate as needed when flush float, whichever is most decorative or required for the design. Foam is pictured, but 8-play rag is an option.
Bilk flush mounts may also be created by mounting multiple pieces on a large single 40x60" foamboard ³⁄₁₆" or ½" thick, blunt cut into individual signs or prints using a straightedge or wall cutter. It is efficient saving both time and money. This process also works with high-tack pressure sensitive and rollers.
Plaques
Art that is flush mounted to wood then laminated it is known as a plaque. Though the image isn't required to be clear to the edges it is generally the case. The substrate is MDF, hardboard, pine, sanded plywood or other wood product that has a finished edge that could be decoratively routed, blunt or bevel cut. The raw wood is sanded and stained or painted to complete the look. (photo 10) The mounting and lamination may be heat-set vinyl or polyester and rollers eliminating the need for other coating or surface protection.
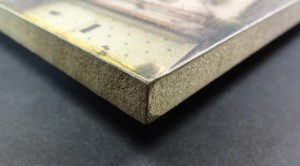 Photo 10: Flush Plaque
The raw wood edges may be routed into a decorative trim and stained or painted to finish the look.
Plaquing has been commercially popular throughout Canada and in chain stores selling inexpensive wall décor. They are also popular for signage, but not fine art.
Float Mount
As an alternative to starch hinged float platform mount, this float mount is a more commercial version used for images that are replaceable open editions and non-collectibles. Invasive float mounting uses adhesives rather than starch, but implements a similar concept of lifting the image from the support backing making it appear to float within the window or box frame. (photo 11) Align tissue or place images on HA board, tack in place and mount. Once cool, cut each image from the large mount board using a straight blunt cut, reverse bevel cut, or traditional bevel cut, to create the finished look similar to the above flush mount. (diagram 1) The float mount is then centered within the window mat--with added spacers and lifters--and mounted to the selected decorative substrate with a white glue or neutral pH 3M Jet-melt polygun TC and pH neutral #3797 glue sticks. (photo 12)
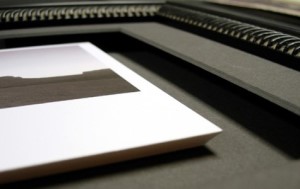 Photo 11: Float Mount Reverse Bevel
Securing of art to a rigid substrate that is then blunt, bevel or reverse bevel trimmed at the outer perimeter off the art so all edges are visible.
 Diagram 1
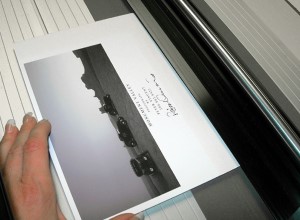 Photo 12: Flush Float Trimming
When trimming for a flush float use your manual mat cutter or hand held cutter to align and trim to the edge of the art.
If a solid decorative edge is desired a single 8-ply or mounted double 16-ply solid core board may be created with a color edge to enhance the art. Trim the image face up from the opposite side of the print to best align the blade to the edge. If using computer mat cutter, you will need to experiment with the setting to determine the alignment of the trim, and you may be limited to the maximum thickness of the substrate of your float mount.
In Review
Many people believe that flush mounting, flat mounting, plain mounting, and float mounting are all different words to describe the same mounting technique, but they are not. Flush mounting is when the image is mounted as a bleed clear to the edge of the substrate. Flat—or plain—mounting is the clean, fully bonded image placed somewhere on a decorative board with no visible sign of adhesive eliminating the need for a mat. Float mounting is the securing of artwork to a thick rigid substrate, trimmed to the outer edge then placed within the opening of the window mat so that all of its edges are visible.
Substrates vary and media vary, we are not always mounting paper to paper anymore. 21st century images could be mounted to aluminum composite material (ACM), honeycomb panels, foam, acrylic and more. All the techniques mentioned have their place in framing and understanding them as well as adhesives will better arm you with the knowledge to handle more projects that cross your design table.
END
Copyright © 2016 Chris A Paschke
Resources—Items
http://gilmanbrothers.com—HA, P-S and dry mount boards
http://kooltack.com—HA, P-S and dry mount boards
http://encoreproducts.com—HA, P-S and dry mount boards
http://nbainbridge.com—HA, P-S and dry mount boards
http://codamount.com—Laminators, Cold-Mount Gatorboard
http://dkgroup.com—Expression Wide Format Laminators, P-S and dry adhesives
http://drytacusa.com—JetMounter Roll Laminators, P-S and dry adhesives
http://neschen.com—PSAs, Neschen gudy 871, 830, 802
For more articles on mounting basics look under the mounting section in Articles by Subject.
Additional information on all types of mounting is found in:
The Mounting and Laminating Handbook, Second Edition, 2002,
The Mounting And Laminating Handbook, Third Edition, 2008 and
Creative Mounting, Wrapping, And Laminating, 2000 will teach you everything you need to know about getting the most from your dry mount equipment and materials as an innovative frame designer.
All books are available from Designs Ink Publishing through this website.
Chris A Paschke, CPF GCF
Designs Ink
Designs Ink Publishing
840 Tucker Road, Suite H-190
Tehachapi, CA 93561
P 661-821-2188
chris@designsinkart.com