 Photo 1
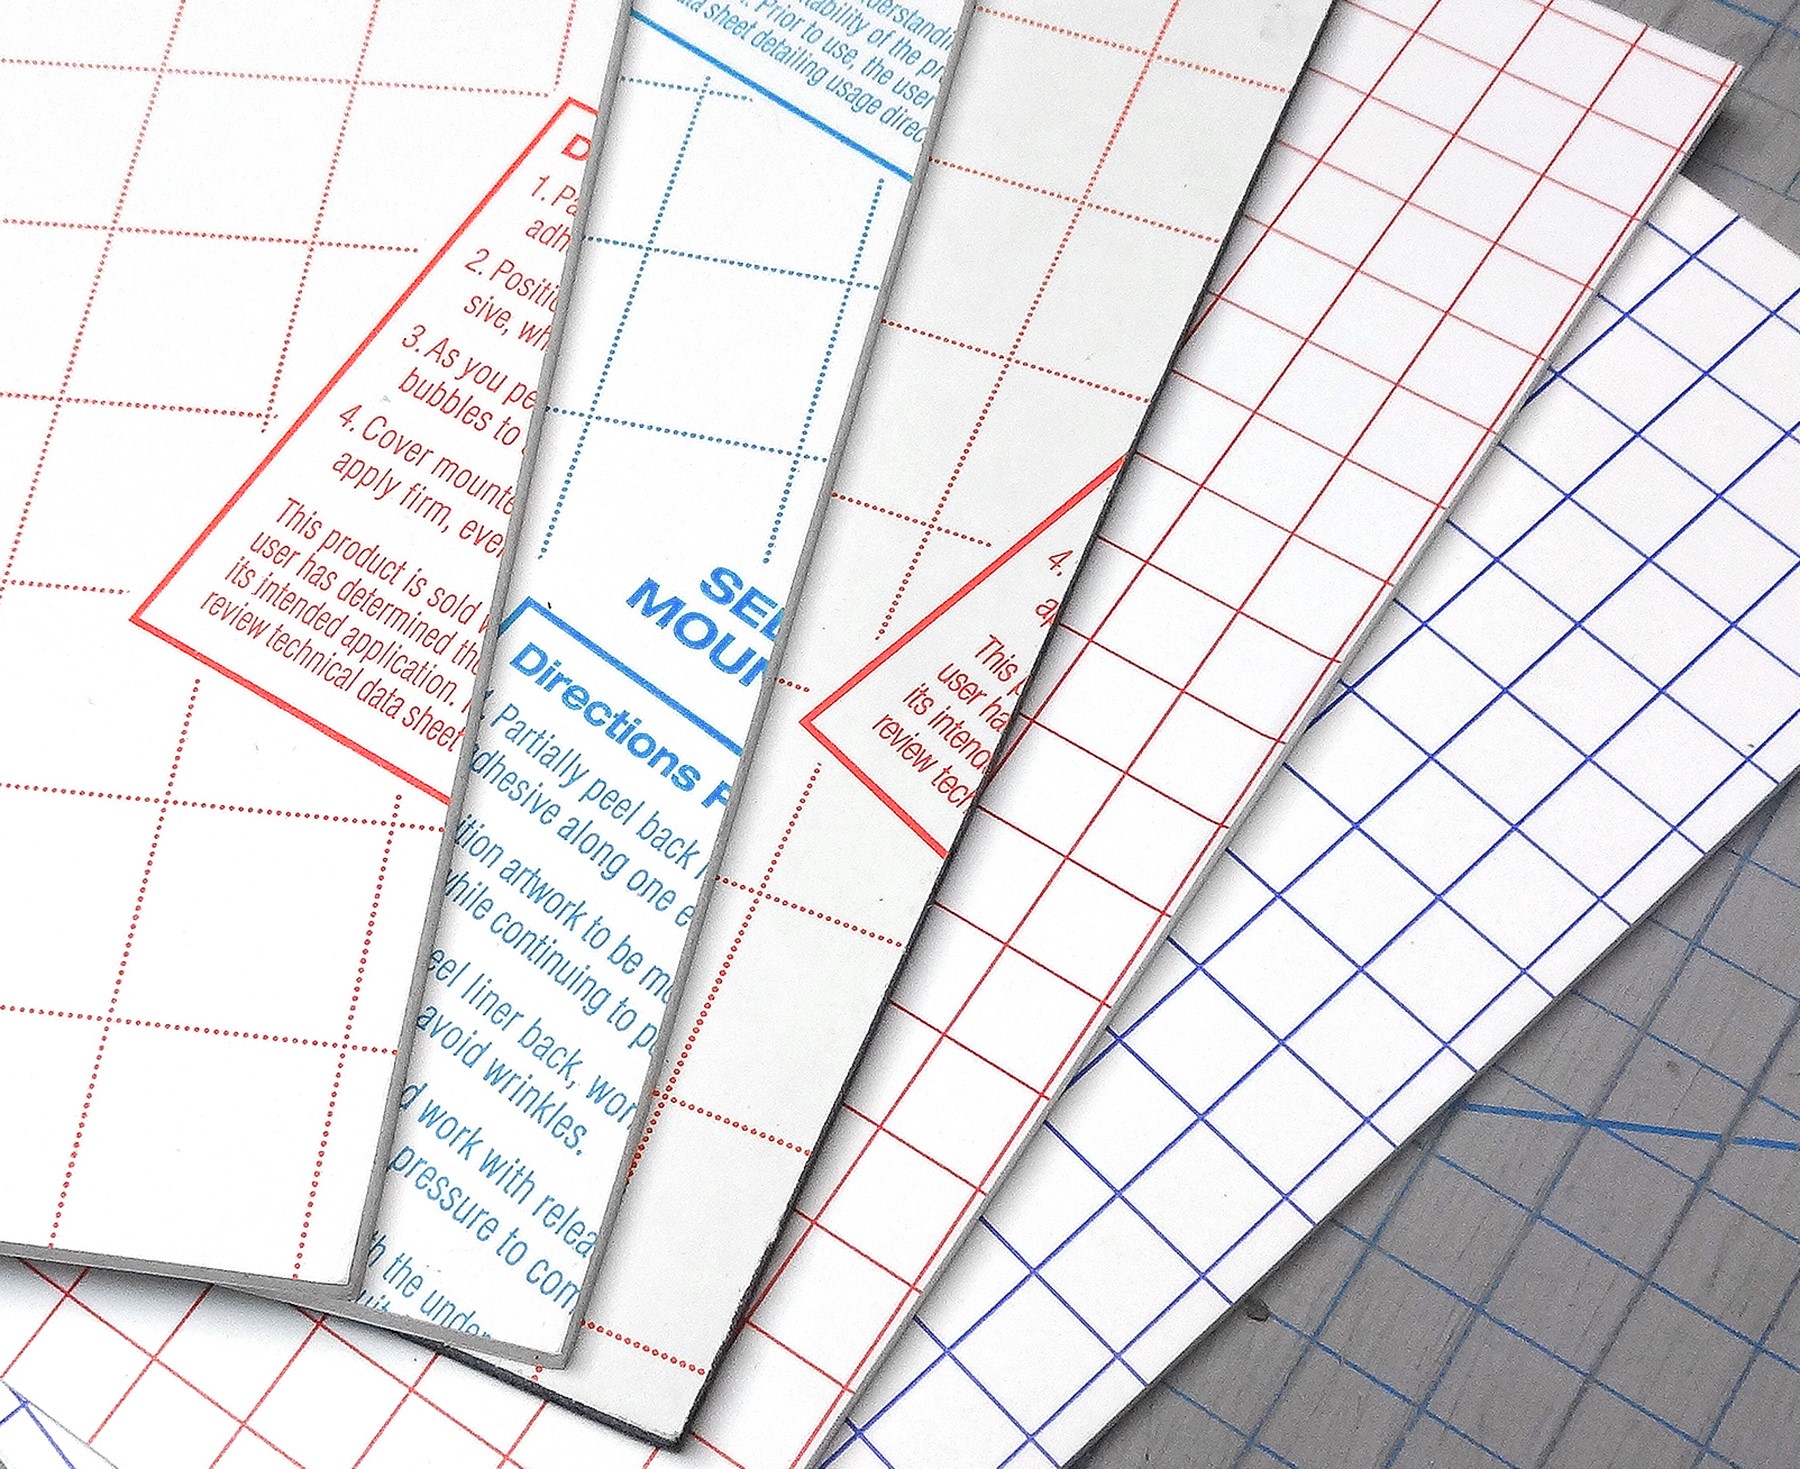
Gridded liner PS boards 3A Fome-Cor HT (red), LT (blue), and 3A Gatorfoam Self-Adhesive; and heat-activated MountCor (red) and MountCor Canvas (blue).
Gridded products have been around for decades, from drafting board covers to self-healing mats to release liners for adhesive boards and films. Ready-to-use mountboards are available as both PS and HA products. Fome-Cor® Quickstik (LT and HT) is a cold mount pressure-sensitive by 3A Composites. The low-tack version is repositionable—prior to weighting and curing—and features a blue gridded liner for easy identification. The high-tack version has a red liner and either may be mounted manually or with a roller laminator. As with the red liner Quickstik, 3A Gatorfoam® Self-Adhesive has a red liner, permanent bond, high-tack P-S adhesive, and the rigidity of Gator with a black core. Heat-activated (HA) boards with gridded liners include Gilman MountCor® (red liner) and MountCor® Canvas (blue liner) with permanent, 130ºF low temperature adhesive. (photo 1)
Photo 1
Gridded liner PS boards 3A Fome-Cor HT (red), LT (blue), and 3A Gatorfoam Self-Adhesive; and heat-activated MountCor (red) and MountCor Canvas (blue).
Grid Assistance
Manufacturer marketing teams have lauded to benefits of gridded liners for cutting and ease in alignment for a long time, and this is never truer than when a multiple opening window mat has been designed. A recent project for a new construction company included before and after multiple opening photos of their original company location and their beautiful new offices twenty-five years later.
The project was straightforward enough; a double rag mat with three openings with ¼" reveal, UV glass and black frame. The original photos are 1990's vintage and were discolored and faded. The ones for mounting were the scanned, cropped, color corrected, digital reproductions (all completed in-house), which were to be mounted to low-temperature digital safe HA board, which does indeed feature a gridded liner.
A template was created for the completed design so it could be verified for mat widths, proper placement, and proportion. When manually cutting mats from the back remember the window flips to the reverse once it is face up. Rather than cutting templates from Kraft paper or 1ply board, I always use a 4ply flawboard to replicate the bottom mat which has the actual window dimensions once cut to double check window sizes and overlap. Since the the window mat is a reverse of the placement, the template should be laid face down against the grid to trace the inside of the window openings on the slightly oversized mountboard. Using a pointed Sharpie works well on release liner papers and makes it easy to see the layout pattern.
Next the photos were aligned on the HA board beneath the gridded paper by lifting only one side of the liner and not removing the whole sheet, allowing the tacky adhesive to maintain contact with the liner for perfectly aligned closure. (photo 2) The felt pen outlines on the grid were drawn using the innermost bottoms of the bevels, so the photos will be larger than the outline, as they should be. (photo 3) The liners are lightly translucent and you can see most images through the liner, so make sure all look centered, then, gently close the still attached liner against all images. This indeed works no matter how large or how many images you are mounting. Now square up the cut template over the gridded liner with temporarily placed photos beneath to check all is perfect.
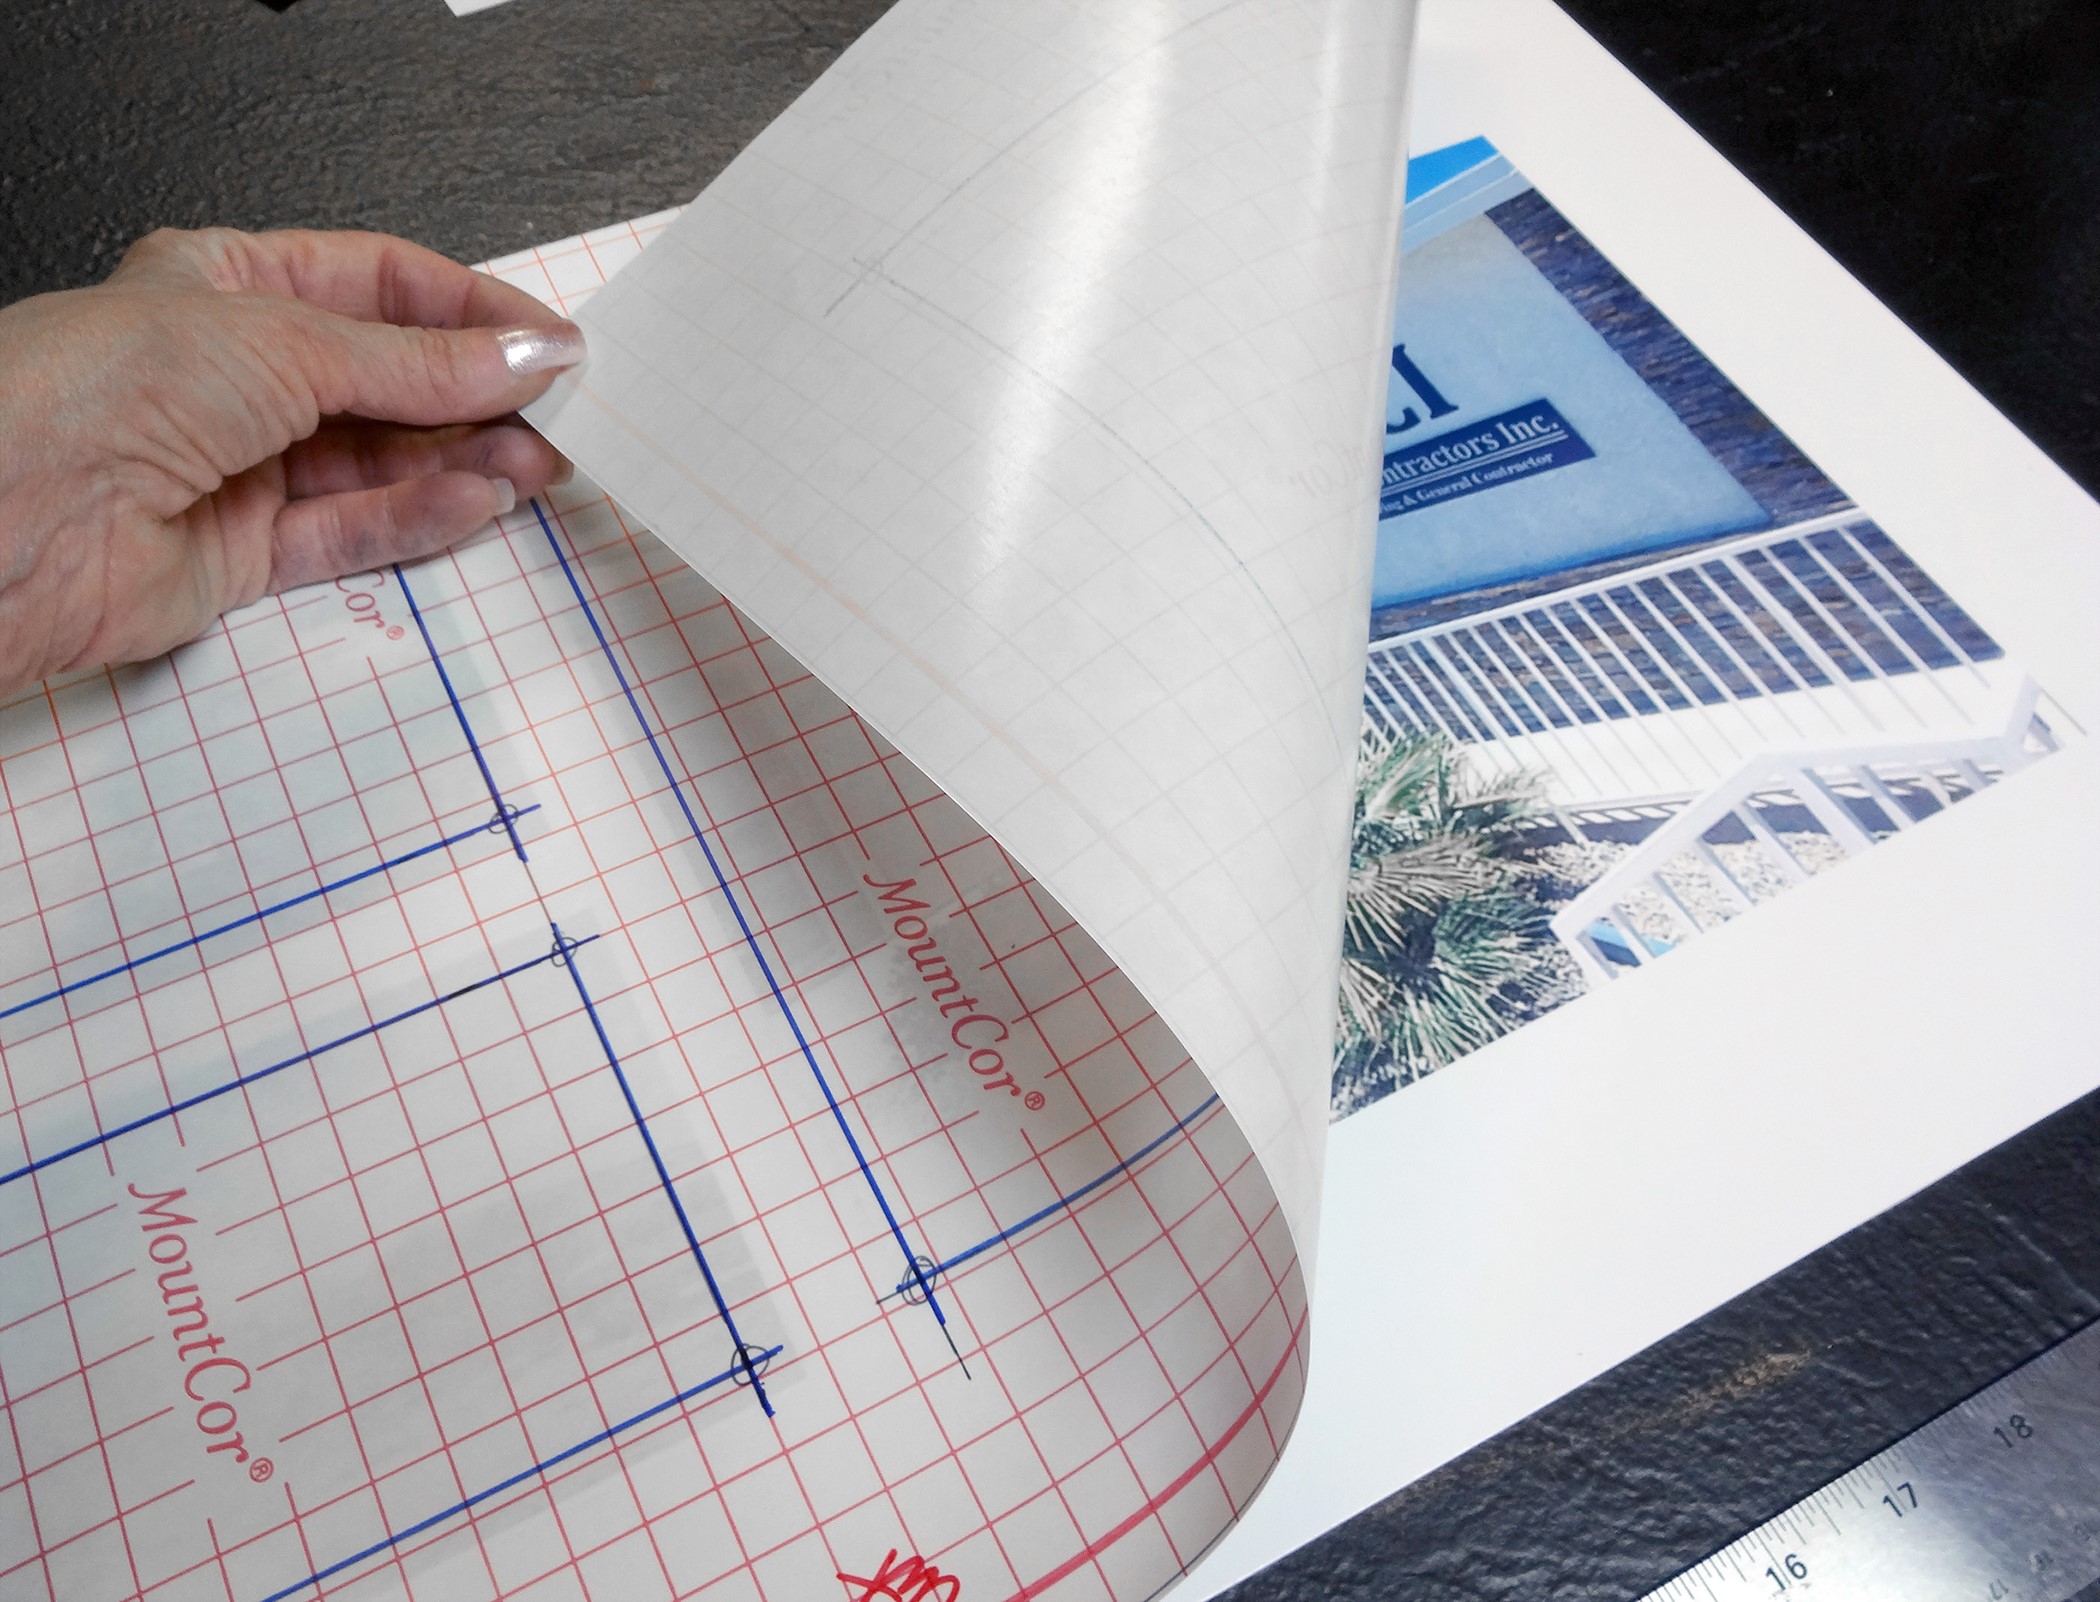 Photo 2
Properly aligned photos on the HA board beneath the gridded paper by lifting only one side.
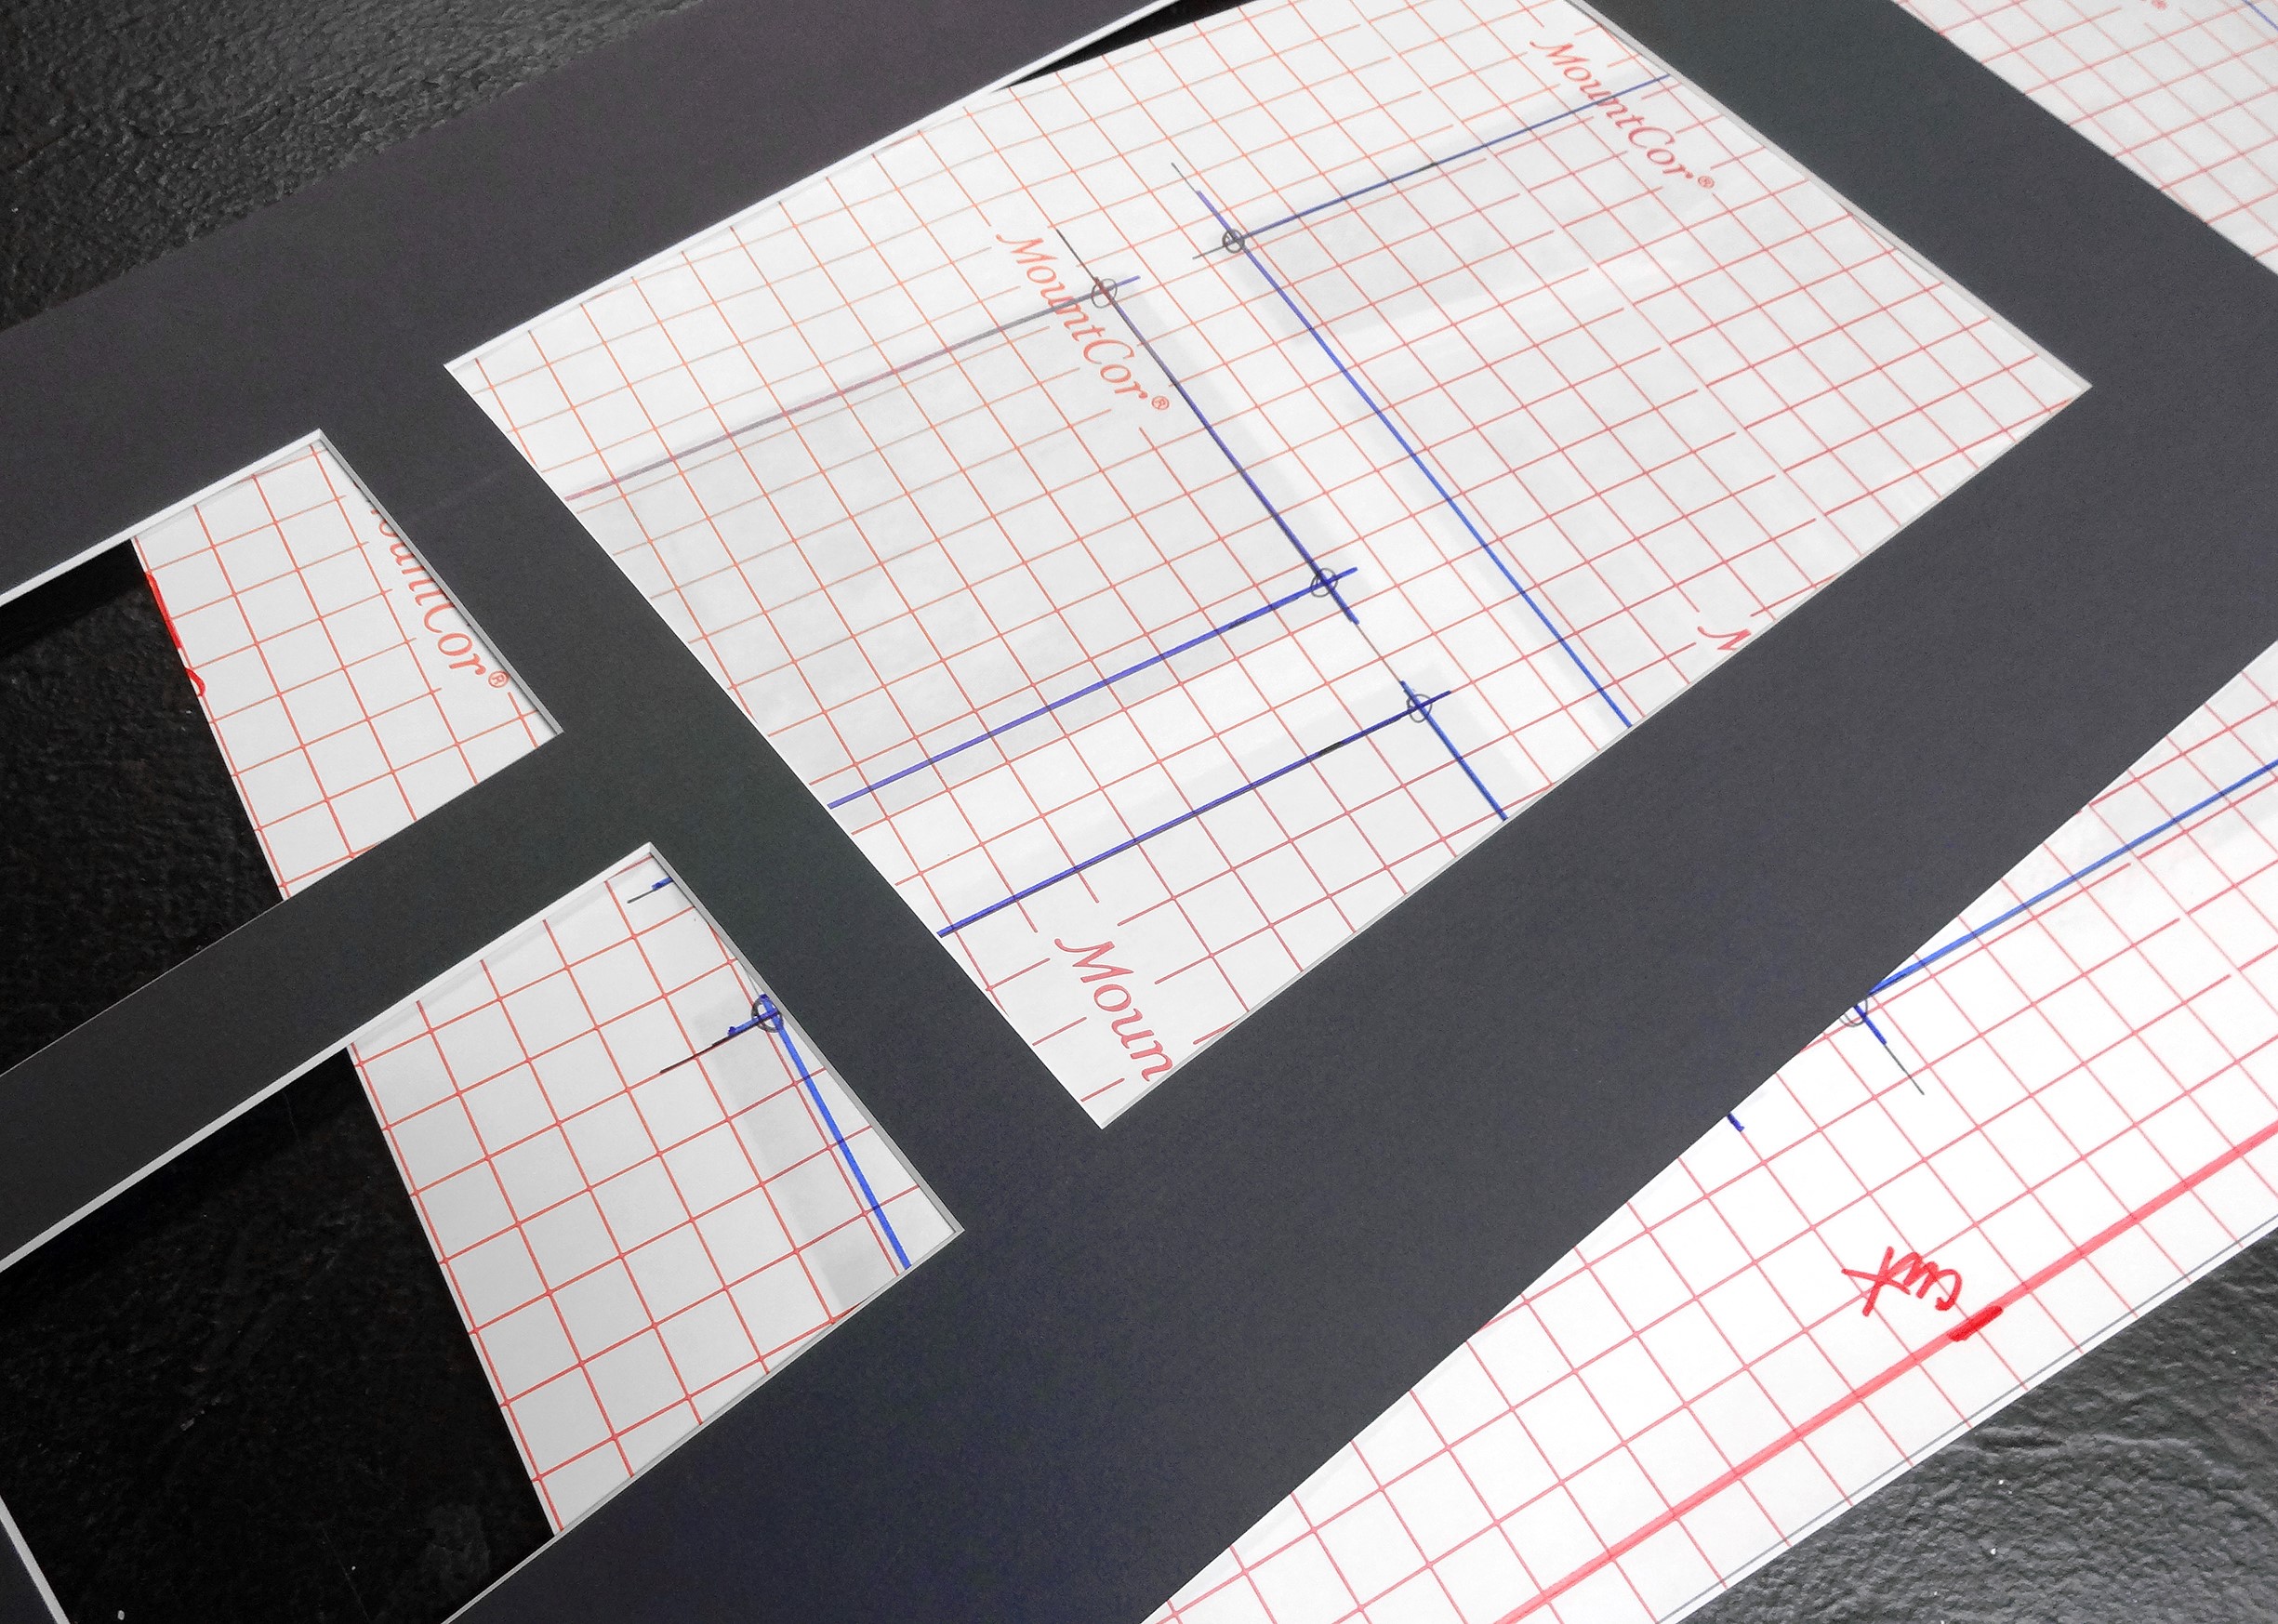 Photo 3
Felt pen outlines allow for final verification of proper placement for multiple opening mat.
Mounting Tips
Generally, I demand a cover sheet be used when mounting using multiple bites in a mechanical press, until I don't. The reason to use a release board as a cover sheet is to prevent an incorrectly adjusted press from damaging the mount by denting the image. If the press has been properly set to the perfect 45 degree handle to the table, for a 3/16" foamboard and release paper, and then a 4-ply release board is additionally placed into the mount package, it will be set too tight and could damage the image. In this case I did not use a release board, since I bonded in two reverse bites, but only mounted the larger on on the right then the two smaller on the left when rotated. (photo 4)
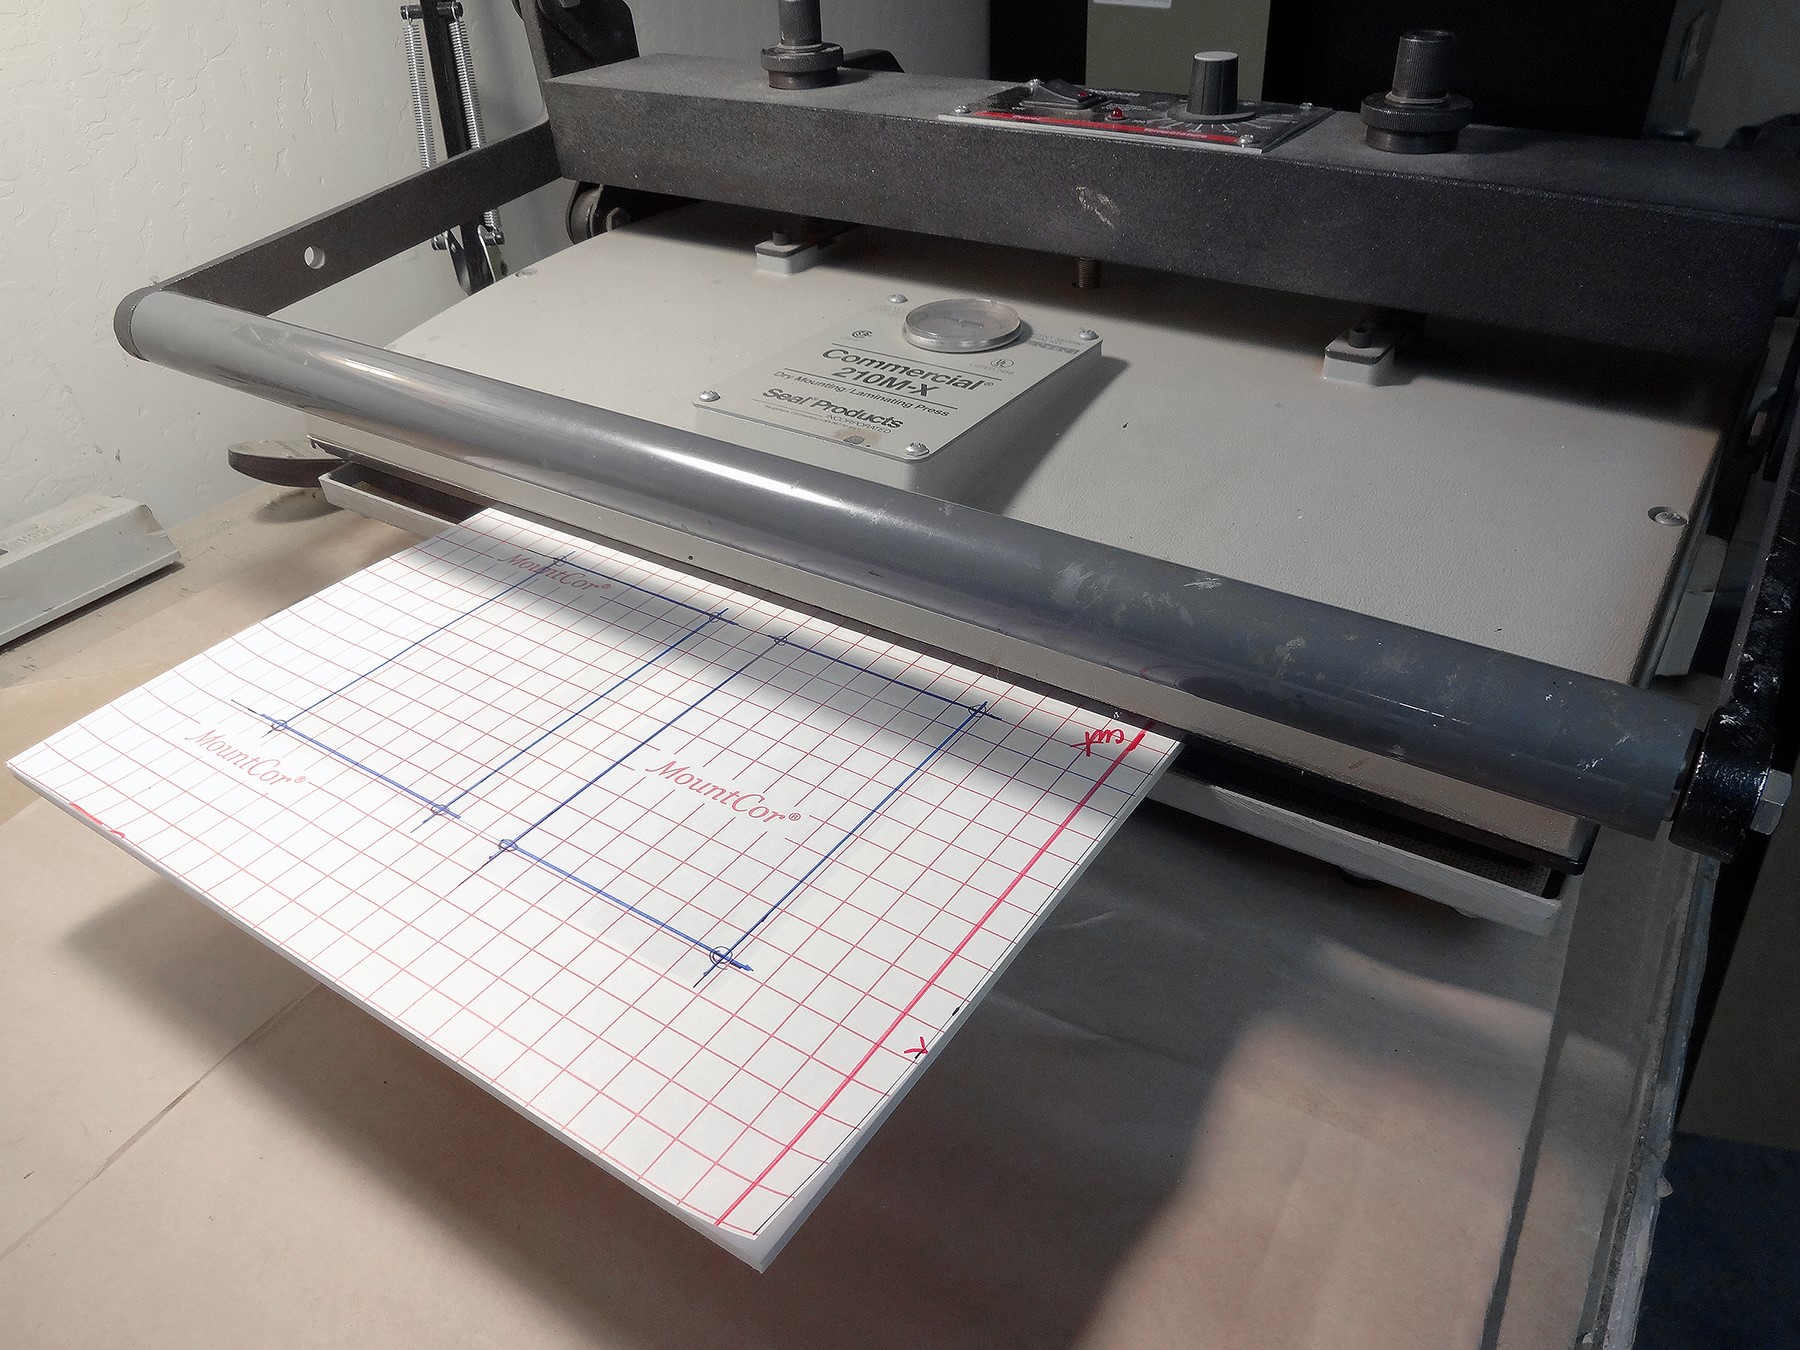 Photo 4
A release board is not necessary when press adjustment is correct and edge of the platen doesn't cross photo.
Once mounted and cooled under a weight, the liner may be removed and the real mat aligned for final fitting. Since the mountboard was cut slightly larger than the finished size, and MountCor has a surface tack designed to hold items in place until mounted, the final mat may be aligned and firmly pressed into position to stay as the edges are trimmed away. My mount backing is always the same size of the finished mat, so I always hinge the mat to the backing board with a book hinge on the longest side to prevent shifting. Some people may use the remaining tack of the HA or PS board as adequate adhesive to hold the final layers together, but I'm not a gambler. (photo 5 and photo 6)
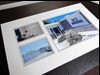 Photo 5
Final mounted, matted double mat ready for fitting and finishing.
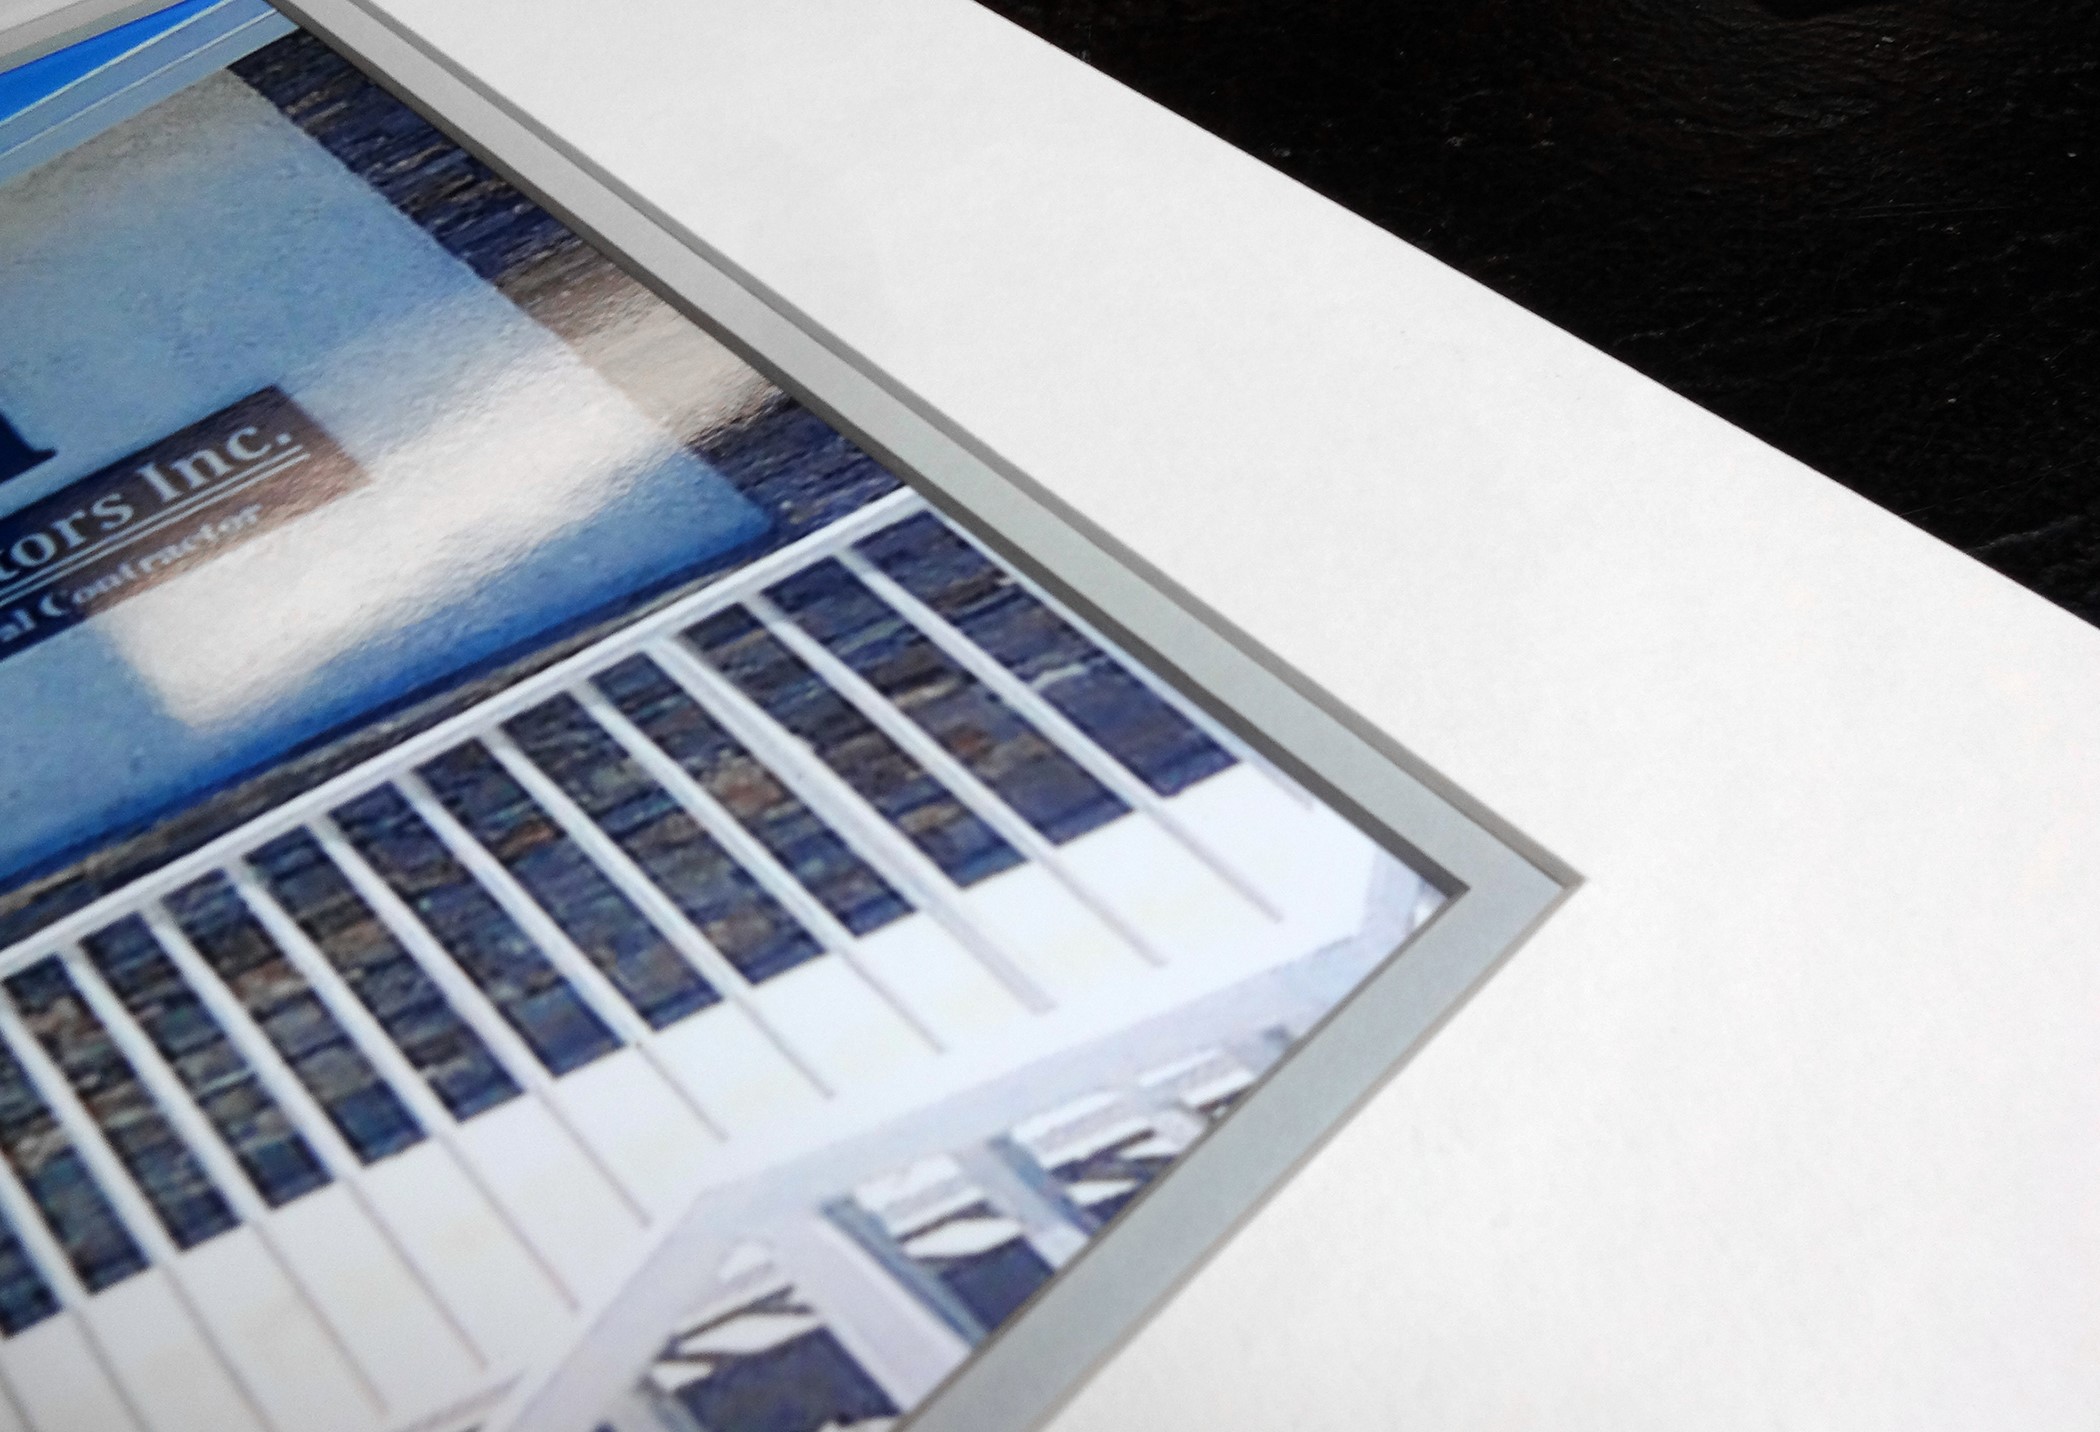 Photo 6
corner detail
Why Grid Mount?
Multiple opening mats are not new and with computer mat cutters are done quite often with fabulous success. Double, triple or more mats are layered with precision and look fantastic, but that is only half of the project. Mounting whatever is being showcased must also be preservationally and efficiently displayed whether collectible cards, family memorabilia, or photographs. And if there is a way to build a better birdhouse using tools supplied by manufacturers, then why not take advantage of it.
The key thing here is that you are mounting these keepsake photos for the long term…probably for generations. So, they should be properly attached to a backing board and not taped or glued to the back of the windows, both of which we have all seen done. Yes, these are digital prints, that are not technically originals, but the files and technologies are guaranteed to change in years ahead so we must attempt to care for these as best as we currently can.
Permanent Adhesives
The gridded boards currently offered have pressure-sensitive or heat activated adhesives which are considered permanent—not removable or reversible—meaning the art or photo may only be removed via chemical solvents. Some digital photos are chemical solvent sensitive depending on the printer used, so they could be destroyed during any attempt to remove them. Removable adhesives reactivate when reheated and layers may be pulled apart, though always leaving a degree adhesive absorption behind. Reversible adhesives allow the art to be removed and brought back to its original state with no adhesive residue remaining, this is also preservation mounting.
Yupo Incident
A client of mine paints with alcohol ink on Yupo, and insists she paint on unmounted paper first, then has me mount it afterwards. Though I preach this practice should never be done, she is a friend I've known for years, and, well, sign this release for me first. And then it happened. She is a gallery artist and I have framed dozens of pieces for her but it only takes one incident to truly prove my point.
She works exclusively on fairly heavy synthetic Yupo—which is and not prone to cockling—and although a adhesive products will lightly bond to synthetics, the only proven mounting substrate for most all synthetics is MountCor because of its tear strength bonding properties and low temperature. I used the above gridded alignment method, and although there was a slight buckle in the top half of her paper, I did not think it would be a problem, but it was. A 3" long, hard vertical crease occurred in the center top of the original. Because of the placement it couldn't be covered by a mat, nor cropped. It had been mounted to a permanent HA board and only a chemical solvent could remove it, but I wasn't willing to attempt it with alcohol ink, and the clear fixative spray she always uses to assist with UV protection. (photo 7)
 Photo 7
Original alcohol ink on Yupo created a 3" crease center top vertically into the art. Note the blotches of artist applied UV sealer.
After our discussion about the pros and cons of removal, solvents, and technique, she decided to tackle the removal process herself. I warned her about not getting solvent on the face of the art and that the lifting and feeding of droppers of solvent beneath might work, but would be very time intensive for this 36 x 28" artwork. She did get it off after eight hours and a can of Oops! but ended up with corduroy damage lines from pulling on the Yupo. I had warned her about that, but interestingly enough there were numerous areas where this occurred—the mule's mane, draped fabric—which almost made it appear as an intentional textural addition.
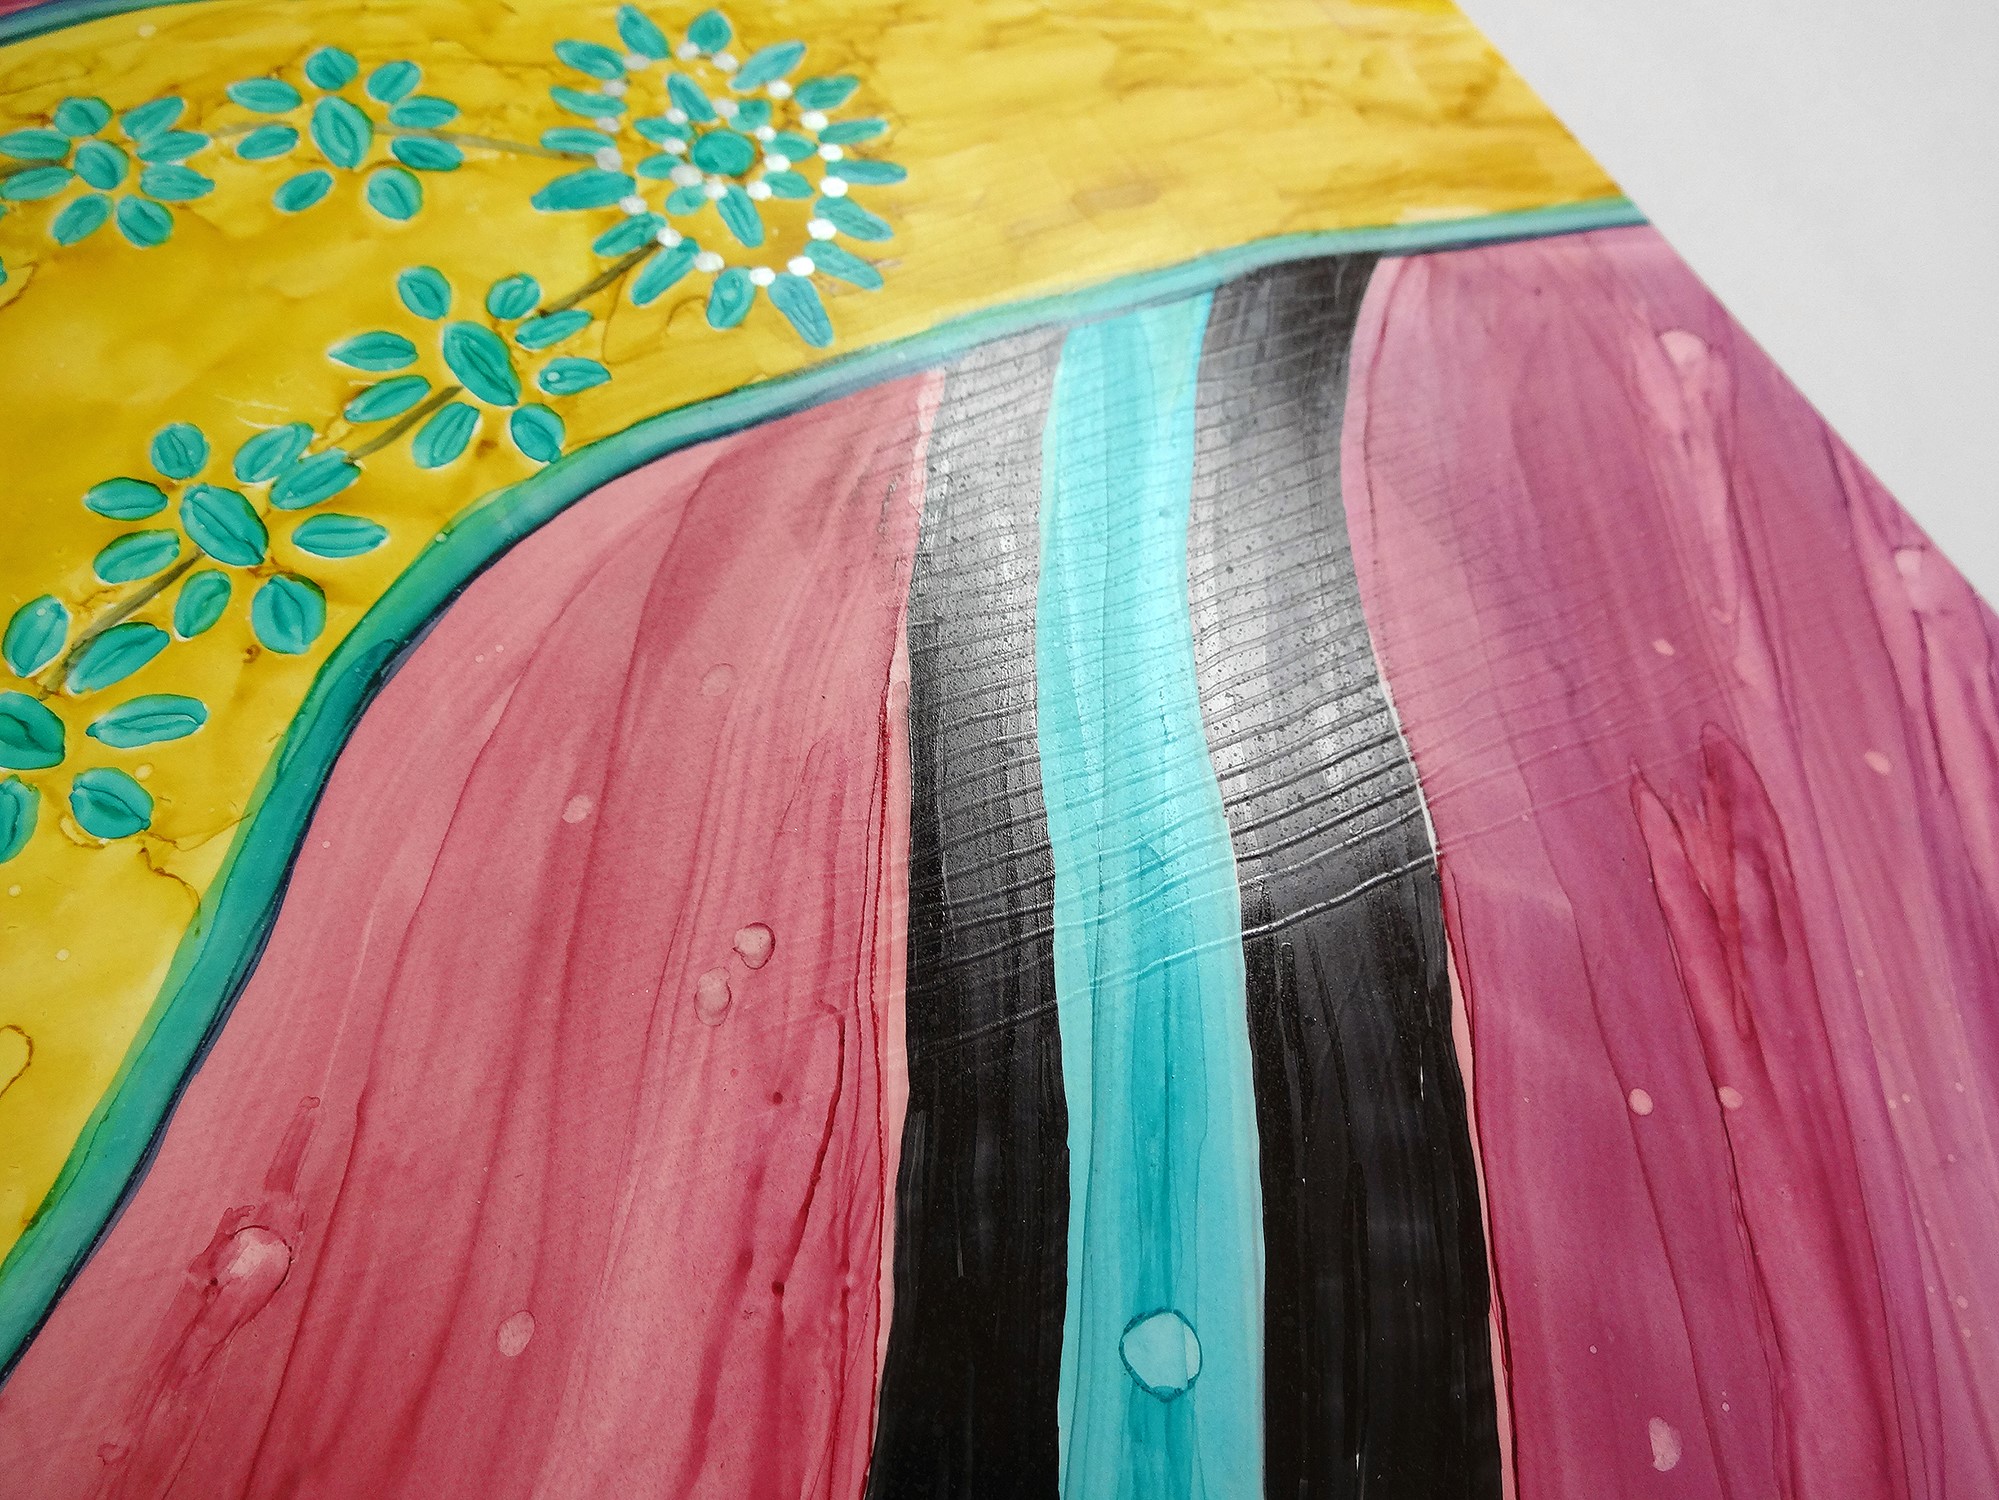 Photo 8
Corduroy line damage from pulling the paper during Opps! chemical solvent removal.
The Lesson
I framed the piece for her at no charge and she did indeed display it at her next show to good reviews. This is a story I never want to hear from a framer, but these things do happen, even when we know better. And I warned her that she could make the damage much worse by attempting to get it off only to remount it, which we did. I also told her the hard creased damage could never be healed, even when remounted, which was better but not gone. And the lesson for both is probably mount first, paint later.
END
Copyright © 2023 Chris A Paschke
For more articles on mounting basics look under the mounting section in Articles by Subject.
Additional information on all types of mounting is found in:
The Mounting and Laminating Handbook, Second Edition, 2002,
The Mounting And Laminating Handbook, Third Edition, 2008 and
Creative Mounting, Wrapping, And Laminating, 2000 will teach you everything you need to know about getting the most from your dry mount equipment and materials as an innovative frame designer.
All books are available from Designs Ink Publishing through this website.
Chris A Paschke, CPF GCF
Designs Ink
Designs Ink Publishing
840 Tucker Road, Suite H-190
Tehachapi, CA 93561
P 661-821-2188
chris@designsinkart.com