Sink mounting is the technique of creating a noninvasive, reversible, preservation support system of a sink mat which surrounds and houses art to be held in place by the edges of a top window mat. They are akin to edge strips and are a versatile option for many mounting dilemmas from magazines, and books to wax saturated encaustic papers. All framers should already have the sink mount in their mounting repertoire as an alternative technique when other mounting methods are not suitable or just will not hold.
The Basics
A traditional one piece sink mat features a blunt cut opening in a solid sheet of sized foam center or rag board as a perimeter border that supports thick items beneath a window mat(s) (diagram 1). It may be cut from a solid 4- or 8-ply board, ⅛" or ³⁄₁₆" foam board (photo 1), or as side strips assembled in a pinwheel design as the exterior support with the same end result. When a solid foam center board is used the borders should be lined and blunt cut using the straight edge side of the cutter. Overcutting the corners a good inch helps insure a clean inner corner when the fallout is removed.
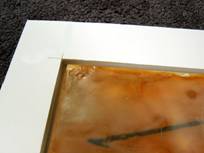 Photo 1
A ³⁄₁₆" foam center board is window cut with a blunt edge for this ¼" birch plywood panel with encaustic.
The top window mat may be blunt or bevel cut for maximum overlap, as it serves as the stay which holds the art inside the sink mount. See PFM "Sink Mounting", November 2006 or http://DesignsInkArt.com/library.shtml to review this earlier article.
Thin and Saturated Paper
Though sink mounts are most often thought of for thicker art that need more support behind a window mat, thin collectables requiring preservation mounting methods are also good candidates for this technique. As when using preservation edge strips, single sheet art must be strong enough to support its own weight when standing on long end in order for a sink mount to be used. If delicate art is placed in a sink mount it can buckle and become damaged at the lower corners as gravity drags it down.
The supporting window mat should barely touch the art housed in the sink mount with a gap of no more than ¹⁄₃₂" to ¹⁄₁₆" space (diagram 2). If lightweight art is strong enough for corner pockets or edge strips, but is placed too loosely inside too deep of a sink mount, it may also ripple or cockle damaging the art or collectable in time (photo 2). An unbeveled—blunt cut—thinner sheet of clear acrylic or 4-ply board should be fitted inside the mount to lift the paper and prevent cockling (photo 3).
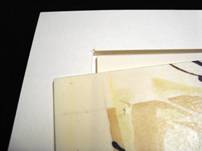 Photo 2
A single sheet of paper in a sink mat sandwich that is too deep for the sheet allows the sheet to bow at the corners which could allow damage over time. A 4-ply lifter or filler would have helped prevent this.
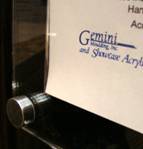 Photo 3
The calligraphy has a square format allowing it to be sink mounted with window mat and 4-ply lifter. Since wax saturation makes wax translucent the selected lifter board should color enhance the art, this one is crème.
Wax saturated paper cannot be hinged using traditional starch paste because nothing will stick to the wax besides more wax (photo 4). These have been traditionally mounted with corner pockets or edge strips, but sink mounts are a nice alternative method for display. Once again the paper should just kiss the back of the window mat for proper depth (diagram 3). It must never allow the art to sit above the edge of the sink mount spacer.
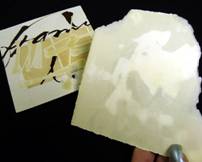 Photo 4
Two encaustic wax soaked 90# papers, square (left) and free form (right).
A free form shape may also be sink mounted (photo 5), and may require a lifter with coordinating color to showcase the art and visually fill the square. An ochre colored 4-ply board was fitted as a lifter behind the wax soaked free form portrait in photo 6 allowing for a color contrast accenting the shape while filling the sink mount void.
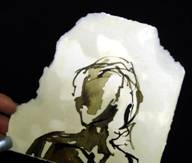 Photo 5
The free form sample needs a lifter with proper color to best showcase the art and fill out the square.
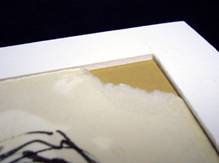 Photo 6
An ochre colored 4-ply board was fitted as a lifter behind the paper as a contrast to accent the free form edge and fill the sink mount.
Pinwheel
The pinwheel is an alternative technique for the same result as the one piece unit above, but allows for scrap strips of board to be fitted for the boarder. The strips are attached with PVA glue or ATG tape to the backing board aligned around the art then topped with a window mat cut with ¼" overlap to hold the art in place (diagram 4).
Cut four strips the length of the longest side of the backing. Apply ATG tape to the back of the strips and begin alignment in a pinwheel fashion at a random inner corner of the pattern. Butt each successive strip against the previous one, making certain the strips are flush with outer edge of foam base. Turn sink unit face down and cut the protruding strip ends so they are flush with the sides of the backing board.
Sink mount strips should be level with the surface of the art so the window mat barely rests on its edges, but is not held up by the thicker art. There should also be no gap between the window mat and the art placed behind it. A sink mat should have only a tiny amount of room side to side for paper expansion. Though any number of decorative mats may be included in the design, the bottom mat is the only one that holds the art or collectable in place. This method also uses no adhesives, clips or permanent fusing, making the process 100% save and used by conservators around the world.
Contemporary Sink Mounts
Traditional sink mounts are comprised of rag mats and/or foam center boards, but contemporary versions—Essential Acrylic Frame Enclosures—have been recently launched by Gemini Moulding using acrylic sheeting (photo 7). There are three layers sandwiched as ⅛" acrylic top, center sink mat (mount), and back panel in clear or opaque options. When both front and back are clear it allows for viewing from either side (photo 8). These enclosures may be constructed with surface sheets as regular clear acrylic, UV OP3, or Optium acrylic for a variety of preservation requirements and are hung by saw tooth hangers glued to the back. They may also be fitted with stands for tabletop display.
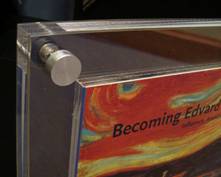 Photo 7
A sink mat is sandwiched between sheets of 1/8" clear acrylic backed with opaque black. Photos courtesy of Gemini Moulding.
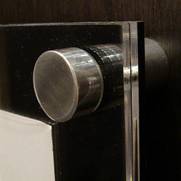 Photo 8
By adding sink mats the basic acrylic sandwich easily accommodates books and magazines.
When the item being framed is thicker, such as a book, additional inner layers deepen the sink mount to accommodate a full range of item thicknesses from magazines to books. Two ⅜" sink mats are fitted between clear ⅛" front and back sheets for the book in this enclosure (photo 9).
 Photo 9
Two ⅜" sink mats are fitted between clear ⅛" front and back sheets for the book in this enclosure.
Glazed and Unglazed Art
Though mixed media encaustics may need glass, but full wax coated paper and panels do not require glazing. The beauty of using a sink mount for encaustic is that sized window mat blanks may be laminated with a vinyl heat-set film first then widow cut and will not require glazing (photo 10). A laminated sink mount window mat is best when blunt cut mat to eliminate any visual unlaminated bevel. A reverse bevel should not be used because of lessening the overlap required to support the panel in the sink mount.
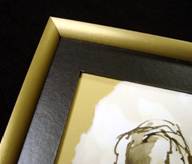 Photo 10
By heat laminating the window blank prior to blunt cutting the window, glazing is not required for encaustic soaked paper.
Sink mounts are a safe, protective way to handle any dimensional art or collectible. Though not considered a shadowbox design, they may require a deeper moulding to properly support the additional thickness of unit construction. As illustrated they may be comprised of clear acrylic sheeting or cotton rag boards and are a solution to many mounting challenges. The integration of laminates also allows for a contemporary look desired by many of today's artists and interior designers.
END
Copyright © 2010 Chris A Paschke
For more articles on mounting basics look under the mounting section in Articles by Subject.
Additional information on all types of mounting is found in:
The Mounting and Laminating Handbook, Second Edition, 2002,
The Mounting And Laminating Handbook, Third Edition, 2008 and
Creative Mounting, Wrapping, And Laminating, 2000 will teach you everything you need to know about getting the most from your dry mount equipment and materials as an innovative frame designer.
All books are available from Designs Ink Publishing through this website.
Chris A Paschke, CPF GCF
Designs Ink
Designs Ink Publishing
840 Tucker Road, Suite H-190
Tehachapi, CA 93561
P 661-821-2188
chris@designsinkart.com