 Photo 1
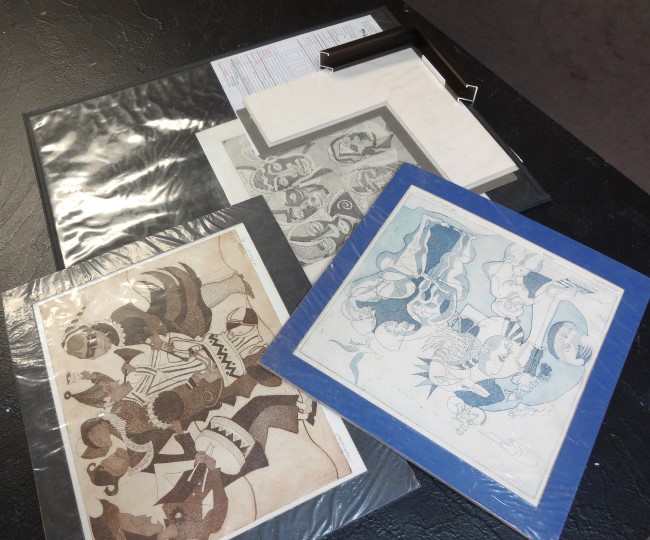
Three original Hartwell Yeargans prints from 1975-1979, matted with single 1" wide paper matboard and shrink wrapped. "Memories", 12 x 12½", blue inks; "Tribal Heads", 12 x 11¾", gray inks; and "Carnival", 15 x 12½", brown inks.
It has been touted for decades that art of value and in personal collections need to be reviewed every 5-10 years, but unfortunately that doesn't always happen. Sometimes it's the framer who hasn't stressed the need for them to return, but most often it is the client who doesn't realize the importance of taking care of the collectable. This is one of those stories.
Yeargans Etchings
Recently I received a call from a man who was the executor of a friend's estate. His friend had an assortment of interesting art he wished to donate to someone who might be interested in it, so I obliged. Much of it had been badly stored and/or ignored and was victim of foxing, water damage, curling and dirt. Some was matted with a single 1" wide window, backed with corrugated cardboard, and shrink wrapped. There are three etchings with plate marks that are very interesting, all with foxing damage, but salvageable nonetheless. All three are numbered, dated 1975-1979, and signed by the artist Hartwell Yeargans (1915-2005).
Yeargans was a contemporary African American painter and printmaker, who studied woodcut printing during the 1960s and 1970s, and was included in exhibitions of African American art at the Karamu Gallery, Cleveland, Philadelphia Civic Center, and at the Whitney Museum, New York, and at major international institutions in Paris, Copenhagen and Stockholm. Today his prints and paintings are found in such permanent collections as the Ballerup Raadhus, Denmark; Frederiksberg Skolen, Copenhagen; Bibliotheque Nationale, Paris; Georgetown University, Washington D.C.; and the DuSable Museum, Chicago.
Period and Condition
All three were originally purchased for $60 each--as designated by the attached labels, but as collectables today are currently valued around $1500 each depending on condition and size. Based on the dates and materials used--very yellowed bevel paper matboard, masking tape and Kraft paper backing--they were framed using state-of-the-art methods from 1979. The limited edition prints were affixed to the back of somewhat color coordinated 1" wide window mats with brown water-activated tape, and hinged to the aged corrugated backing board with the same, and all have foxing damage. (Photo 1)
Photo 1
Three original Hartwell Yeargans prints from 1975-1979, matted with single 1" wide paper matboard and shrink wrapped. "Memories", 12 x 12½", blue inks; "Tribal Heads", 12 x 11¾", gray inks; and "Carnival", 15 x 12½", brown inks.
Foxing is an age-related process of deterioration that causes brown spots commonly seen on old paper documents. The reddish-brown color is a reaction to moisture caused by mold spores and fungal growth. The markings are caused by the creation of a perfect environment upon the paper, as it degrades, it becomes more acidic and absorbent, and the level of humidity upon the surface attracts mold. (Photo 2)
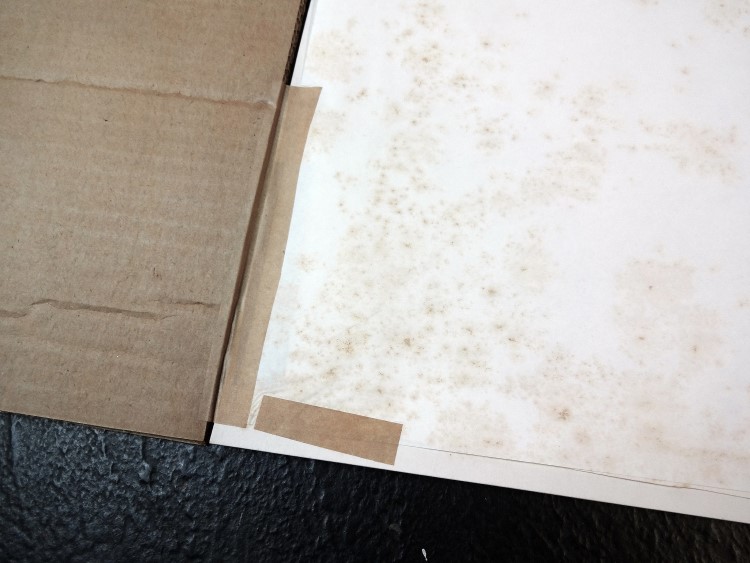 Photo 2
Original print back of "Memories" showing much foxing, taped to corrugate backing from 1979.
Foxed documents may be repaired by reputable conservators or trained professionals, using sodium borohydride, proprietary bleaches, or diluted hydrogen peroxide, but each method risks side effects or damage to the paper or ink. Once treated, the art requires being kept in a dry environment, avoiding any future humidity. Since treatment of mold or foxing is not something a regular framer is trained for, the decision to contact a conservator is the first discussion, and the client/owner of the prints decided against using such heroics.
Design & Process
Since the originals had no glazing or frame, they were designed from scratch to best enhance the art and for the pieces to be displayed together. But, since they are three different sizes and colors ("Memories", 12 x 12½", blue inks; "Tribal Heads", 12 x 11¾", gray inks; and "Carnival", 15 x 12½", brown inks) each needed to maintain its own color palette. A triple mat using the same proportions for each would maintain design similarity and using the same Nielsen 117 series metal profile unified them, even with two different colors Frosted Walnut and Frosted Pewter being selected. A 3/8" border of original paper was left exposed allowing them to properly display the etching name, number and signature. The mats are sized 2" top, 2¼" middle, 2⅞" liner allowing for 2", ¼" and ⅝" reveals respectively. (Photo 3)
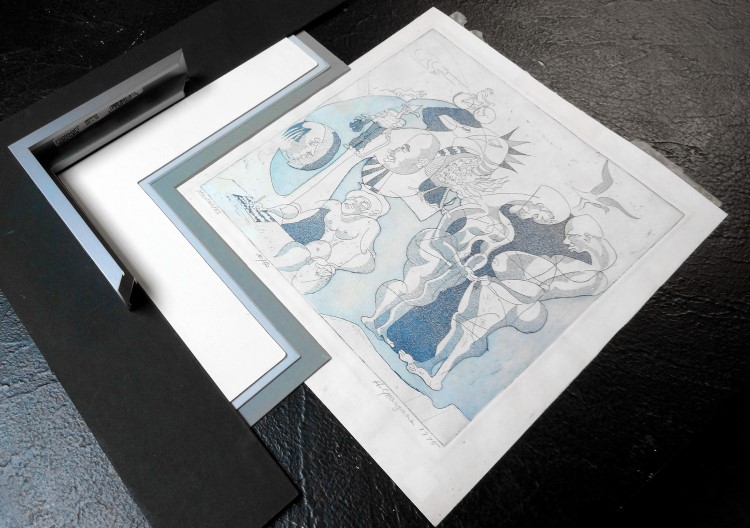 Photo 3
A ½" border would allow all three to properly display the etching name, number and signature. The mats are 2" top, 2¼" middle, 2⅞" liner allowing for 2", ¼" and ⅝" reveals respectively.
The first step was tape removal. This lightweight brown ½" tape is a moisture activated tape--also known as gummed tape, Kraft paper tape, wet tape, licky-sticky tape is water-soluble and doesn't leave a gummy residue once removed. Using distilled water, a soft brush, and tweezers the tape is easily softened and cleanly removed. (Photos 4A and 4B) Once all tape had been removed the pieces were wiped clean to remove dust and particles, and allowed to air dry with polyester interfacing (Pellon), blotter, and light weight to encourage the moistened edges to remain flat. Since the etchings are about 90# stock, preservation Mylar corners were used to affix to ragboard.
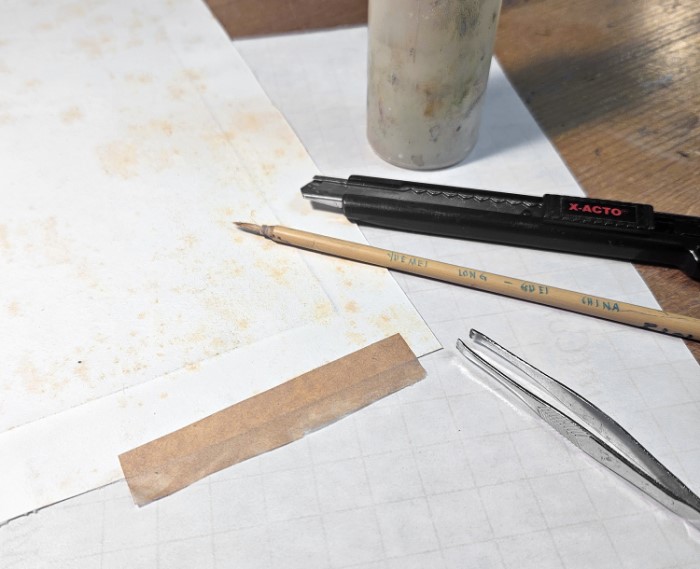 Photo 4a
Distilled water in small bottle, small soft natural bristle brush, tweezers.
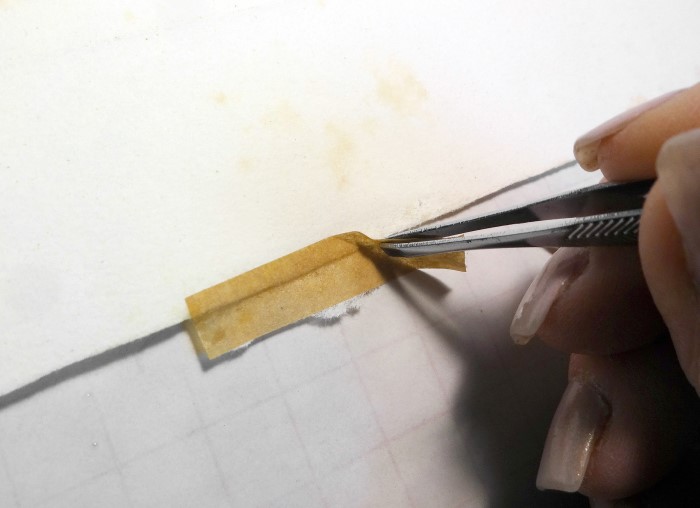 Photo 4b
Tape easily cleanly peels from etching with no damage after being moistened and softened.
Non-Invasive Mounting Review
Since these are etchings that continue to escalate in value, non-invasive mounting must be used in the new design. Options include starch hinges, Mylar corner pockets, edge strips, or maybe a sink mount. Mylar is a polyester film made from polyethylene terephthalate (PET), all are totally reversible and will do no harm.
Corner pockets may be commercially purchased or may be simply constructed of rice paper strips and mounted using starch paste. In photo 5 (clockwise) the upper left version is a small piece of ½" x 2" hinging paper folded to form a ½" x 1" triangle corner; Lineco Mylar Photo Corner; ½" handmade mulberry folded strip; and polypropylene cut away pocket. Lineco Mylar Photo Corner; ½" handmade mulberry folded strip; and polypropylene cut away pocket. Moisten a narrow line on long fiber hinging paper then pull a strip to feather the edge. Once dry, flatten if necessary, fold, and glue with cooked starch paste to hold the art. (diagram 1)
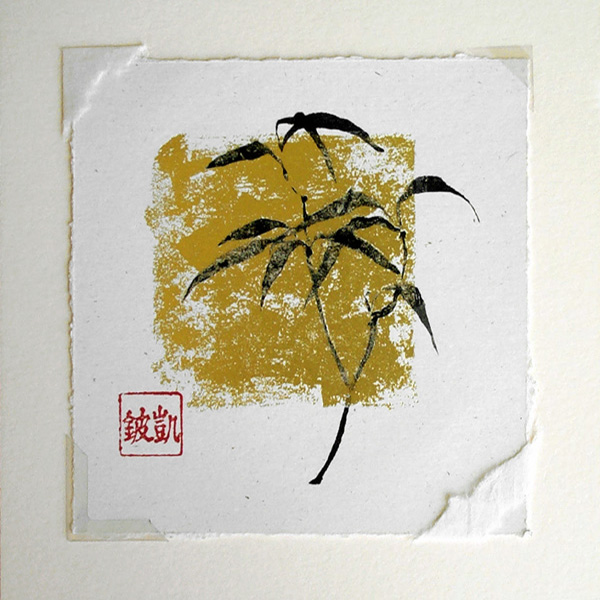 Photo 5
Clockwise from upper left is a folded mulberry corner pocket; Lineco Mylar Photo Corner; 1/2" handmade mulberry folded strip; and polypropylene cut away pocket.
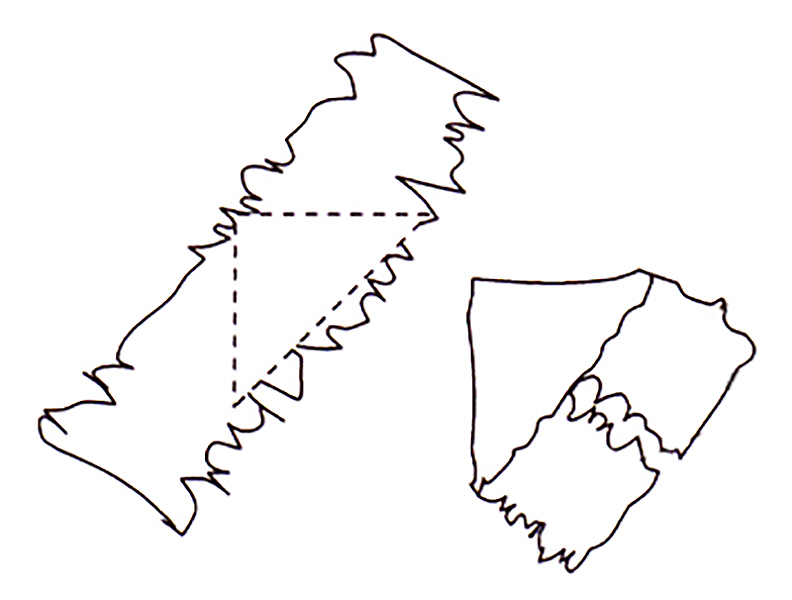 Diagram 1
A moistened, pulled paper strip is dried and folded to form a corner.
Edge strips are four folded neutral pH, archival, cotton rag paper strips in which a folded trough holds the art along the entire perimeter, fully supporting it. (photo 6) Slits are made at the exterior overlap so the strips can slip through one another at the corners that are then secured outside the crossovers with an approved tape. The National Gallery suggests using water-activated gummed linen tape as exterior support tape rather than pressure-sensitive. This sample is from my teaching kit so the strips are a bit wider than necessary. For items with little or no border, the edge strip paper may be counter folded creating a narrower top Z-shape support trough rather than just bi-folded allowing for less overlap. (photo 7) All edge strips are finally covered by the top mat.
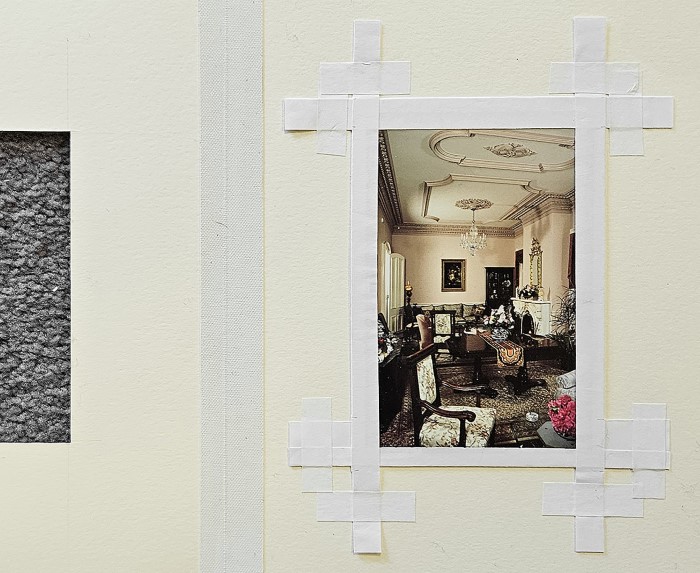 Photo 6
Edge strips are folded neutral pH, rag paper in which the trough holds the work along the entire perimeter, designed to fully support art.
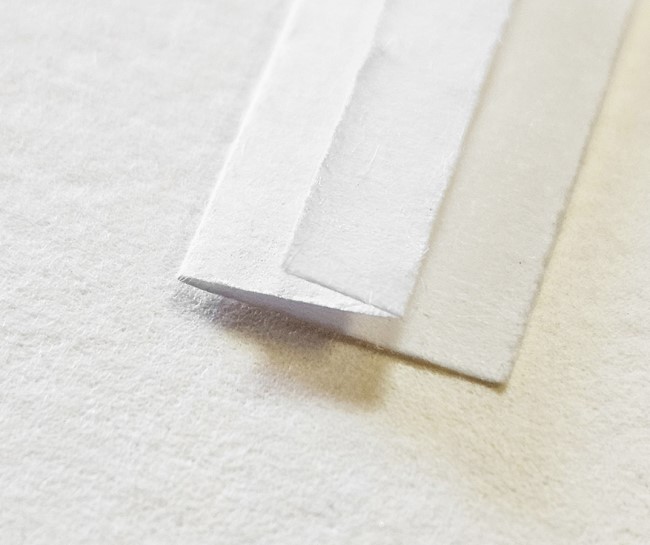 Photo 7
For items little or no border, the edge strip paper can be z folded rather than just bi-folded to allow for more flexibility while still being secure.
Sink mounting is the technique of creating a noninvasive, reversible, preservation support system of a mat which surrounds and houses art to be held in place by the edges of a top window mat. They are akin to edge strips and are a versatile option for many mounting dilemmas from magazines and books to wax saturated encaustic papers. All framers should already have the sink mount in their mounting repertoire as an alternative technique when other mounting methods are not suitable or just will not hold. (diagram 2)
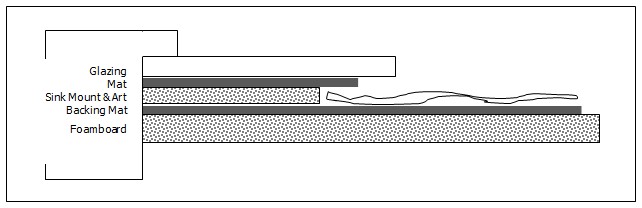 Diagram 2
A noninvasive, reversible, preservation support system of rag mat or wrapped foam surrounding art held in place by the edges of a top window mat. Image top to bottom inside rabbet: Glazing, mat, pinwheel sink mount, backing, filler foam.
A one-piece sink mat features a blunt cut opening in a solid sheet of sized foam center or rag board as a perimeter border that supports thick items beneath a window mat. When a solid foamboard is used the borders should be lined and blunt cut using the straight edge side of the cutter. Overcutting the corners an inch helps insure a clean inner corner when the fallout is removed. A commonly used alternative to a solid sheet is a pinwheel which may be cut from solid 4 or 8-ply board, ⅛" or ³⁄₁₆" AF foamboard as side strips assembled into a pinwheel design as the exterior support with the same end result.(photo 8/diagram 3)
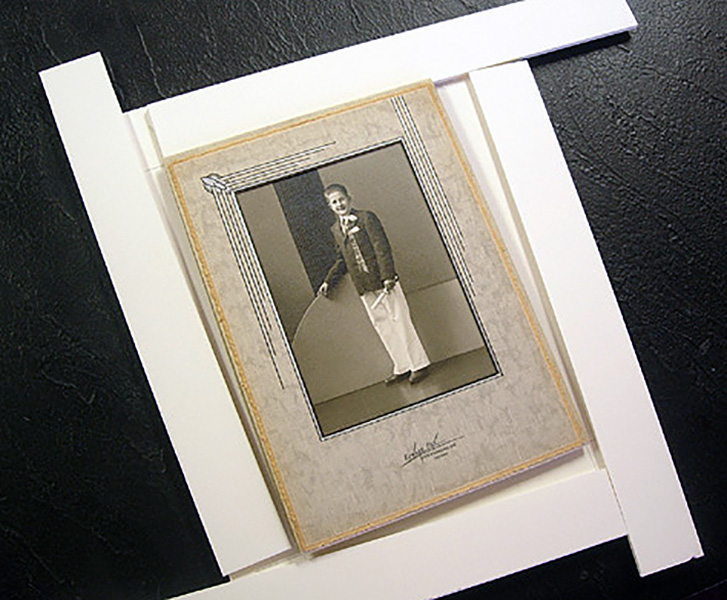 Photo 8
A pinwheel design used to support a vintage graduation photo in a think binder.
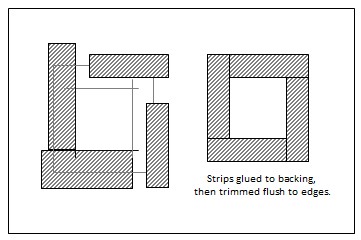 Diagram 3
Solid 4 or 8-ply board, ⅛" or ³⁄₁₆" AF foamboard as blunt cut side strips assembled into a pinwheel design trimmed to the outer edges of the mat unit.
Completion
Since these etchings are strong enough to self-support, they did not require edge strips for full perimeter support and Mylar corner pockets were selected to mount them. The triple mat was cut and stacked with an inner 4-ply spacer between the middle and bottom mat. (photo 9/9A) Conservation clear glass was applied and the unit was slipped into the metal frame for completion.
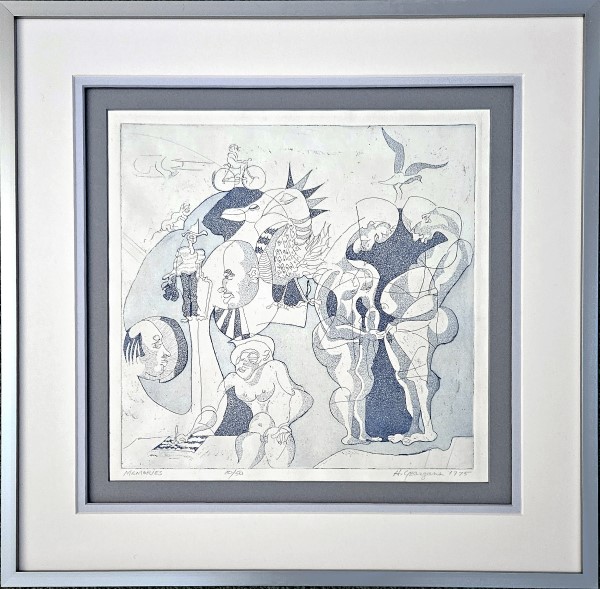 Photo 9
Completed Yeargans etching.
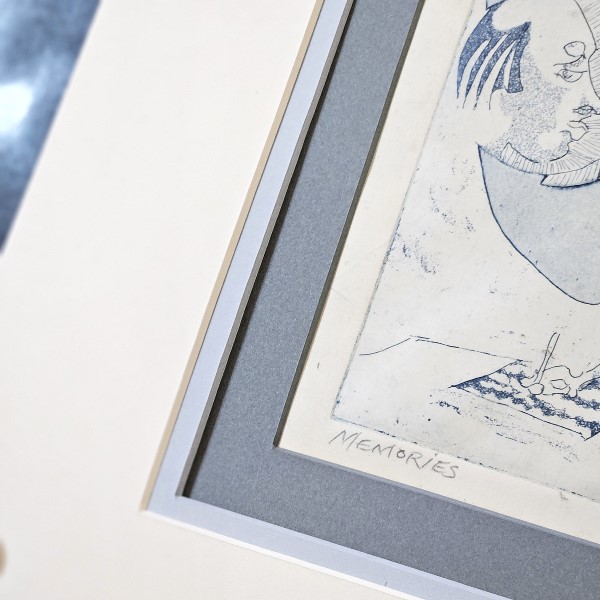 Photo 9a
Detail corner of above.
True preservation framing uses 100% cotton rag matboard as window mats and primary backing board to mount the art to. Secondary filler boards can include Coroplast™, archival corrugated board, 100% cotton honeycomb panels, or Dibond®. Avoid using Gatorboard, Sintra®, paper-based matboards, Kraft paper, non-archival or self-adhesive tapes, or ATG in contact with the art. And, alternative mounting methods should always be considered when framing or reframing a collectable that is likely to continue increasing in value. Never forget, it's the framers job to enhance and protect.
END
Copyright © 2024 Chris A Paschke
For more articles on mounting basics look under the mounting section in Articles by Subject.
Additional information on all types of mounting is found in:
The Mounting and Laminating Handbook, Second Edition, 2002,
The Mounting And Laminating Handbook, Third Edition, 2008 and
Creative Mounting, Wrapping, And Laminating, 2000 will teach you everything you need to know about getting the most from your dry mount equipment and materials as an innovative frame designer.
All books are available from Designs Ink Publishing through this website.
Chris A Paschke, CPF GCF
Designs Ink
Designs Ink Publishing
840 Tucker Road, Suite H-190
Tehachapi, CA 93561
P 661-821-2188
chris@designsinkart.com