This month I'm completing the series exploring the TTPM elements required for predictable mounting, with "part four: moisture". As long as the first three elements are always addressed, the fourth is always easy to control. Make sure the time is correct for the thickness, size and tack for the materials being mounted, the temperature is set to accommodate the type of adhesive being used, and that appropriate pressure is applied for the above combinations.
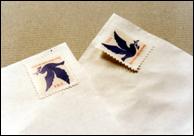
As with the others, moisture is an element that also varies with the process selected for mounting. All wet and spray adhesives contain water, so moisture is good. Any moisture which is present during dry mounting will become a condensed liquid, or steam, and this type of moisture is bad. Just try to bond one of our new $.32 G stamps to a damp envelope (photo 1). Even though the stamp requires moistening to activate the adhesive it must be attached to a dry envelope to create the desired lasting bond.
The similar result of poor fusion could occur if you attempt to dry mount a damp poster. Even using the proper adhesive, for the correct time, temperature and pressure, air bubbles could develop under the mounted poster simply because there was moisture remaining in the selected substrate or the poster itself. Turning the press temperature up or leaving it in longer cannot reverse damage from trapped moisture during mounting.
Moisture is easy to understand and control, and by doing so will ensure repeatedly well executed, smoothly mounted, long lasting projects. Knowing when to `think dry' and when to bend that rule with dampness is the key.
Wet and Spray Moisture
A direct exception to the above stamp on the envelope example occurs during wet mounting. Moisture must be controlled in varying degrees when wet mounting. The general concept of working with dry materials to create the best long term bond remains true when all adhesives used are dry to begin with. But when working with wet adhesives, moisture is an integral part of the adhesive, thus the process. Materials must be made to accommodate the natural expansion of paper as when wet adhesives are applied to dry paper or substrate.
A precaution for dealing with paper expansion and wet glues is by moistening the back of the print with a clean, lightly dampened sponge or misting bottle. This expands the paper prior to mounting to match it to the substrate and help eliminate spotty expansion as the paper becomes slightly damp during the mounting process. Then proceed and be sure to apply the appropriate pressure during drying.
Pressure Sensitives
The adhesive itself begins as a dry form, so the materials being fused during mounting should also begin dry. Take care not to store substrates in excessively damp or humid rooms, and if it is necessary, consider dehumidifiers or a regular rotation of your materials to promote time for them to dry out prior to mounting.
Dry Mounting with Mechanical Presses
During dry mounting all the materials used in the mounting process should begin, bond and remain dry...that means with no moisture. The only way to insure all the moisture is tapped from the mounting materials is through predrying.
All mounting materials, sans the adhesive itself, require the mandatory step of predrying when using a mechanical hardbed or press. It is a simple process and the best practice to get into when mounting any sized project. By removing the moisture from within the board prior to mounting, the adhesive is allowed to fuse to the substrate such as a moistened stamp to a dry envelope. Remember the finger pressure that is always applied to that stamp too, so very similar theories of pressure and moisture apply for almost any good bond.
Predrying
Using a clean piece of absorbent Kraft-type paper folded in half as an envelope, place the artwork or material to be mounted into the envelope then into the press for 10-15 seconds. The press should have been pre-adjusted (see "Part Three: Pressure", PFM March 1995) to the proper pressure for the substrate to be mounted and closed, but need not be locked during this process. Both the art and substrate need to be predried prior to mounting, but they must not be sandwiched and dried together. Doing so could indent the substrate or not adequately tap the moisture from the materials.
Also, do not predry using a release paper envelope, as opposed to Kraft paper, because the moisture has no where to go and is trapped and turned to steam. When assembly line production creates numerous successive mountings needing to be cooled under a glass weight, use the same type of Kraft paper to absorb excess condensation from forming under the glass.
Predrying Foam Boards
There are opposing opinions concerning the need to predry foam boards for use in a mechanical press because of the inert nature of the inner foam not wanting to absorb moisture. I lean towards the belief that the more toothy nature of acid-free foam boards may very well absorb some degree of moisture and might benefit from predrying, while clay coated regular foam boards may not.
If you develop the habit of regularly predrying your materials, it will become second nature and the possibility of moisture problems arising will be eliminated entirely from your mounting worries. Reinforcing good habits by repeated successful mountings will ensure your confidence and reputation.
Humidity vs Predrying
The moisture issue becomes much greater a problem in high humidity areas. Think about where you work and the storage of your mounting boards. If you use a dehumidifier in your store during high humidity months, yet boards are stored in the basement all year, a moisture problem in the board will not only exist but might be greater than you realize. Fabrics notoriously absorb a great deal of moisture as well as boards, and often when materials feel cool to the touch it is a good indicator of moisture content. Even in regions where humidity is generally not an issue, predrying when using a mechanical press is recommended.
The Time it Takes to Reduce Moisture
Another issue to address is the time frame surrounding predrying.— You can't predry an entire pile of mounting projects on Monday for processing on Friday, the boards would reabsorb moisture during that time. Use common sense! It would be best to predry just prior to mounting each time as part of the routine process. If you create the habit of predrying in your step-by-step process, just as weighting the completed mounting during cooling, you've reinforced a positive technical process.
Dry Mounting with Vacuum Presses
In opposition to the mandatory procedure of predrying when using a mechanical press, the principle suction of drawing the air from within the press precludes this step when using a hot/cold vacuum. Begin each mounting day by running an empty press through one full, heated cycle to dry out all interior mounting materials.
Though not a mandatory step, it is sometimes recommended to predry in high humidity regions of the country. I have been known to predry materials slated for vacuum mounting simply to insure control of all variables, especially on tough, scary over-sized projects during humid summer months in Connecticut.
TTPM Recap
All the elements of successful and profitable mounting are at your disposal. Control the elements of time, temperature, pressure and moisture for each project and you will achieve success. Ignore them and at least you'll know where to look when something goes wrong. By creating perfect, predictable mountings each time, with no mistakes, more mounting projects may be tackled with fewer grey hairs. Correct mounting procedures should be nearly mindless, the kind of thing you don't have to stop, think and sweat over. Burn the brain cells on the special and unusual projects, the ones you charge more money for. Those are the brain cells that cost something you know!
There are lots of procedures and lists of steps for successful dry mounting, but if you memorize "TTPM" and apply it to all types of mounting you will always be successful. It's the elements of time, temperature, pressure and moisture that are the only keys to successful mounting...and repetitive routine that will ensure predictability!
END
Copyright © 2013 Chris A Paschke
For more articles on mounting basics look under the mounting section in Articles by Subject.
Additional information on all types of mounting is found in:
The Mounting and Laminating Handbook, Second Edition, 2002,
The Mounting And Laminating Handbook, Third Edition, 2008 and
Creative Mounting, Wrapping, And Laminating, 2000 will teach you everything you need to know about getting the most from your dry mount equipment and materials as an innovative frame designer.
All books are available from Designs Ink Publishing through this website.
Chris A Paschke, CPF GCF
Designs Ink
Designs Ink Publishing
840 Tucker Road, Suite H-190
Tehachapi, CA 93561
P 661-821-2188
chris@designsinkart.com