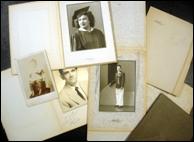
 Photo 1
Vintage 1900s photo card (center L); 1945 and 1956 booklet photos;1932, 1941 and 1948 folder photos (R)
Sink mats are a mounting support system, beneath a window mat, designed to accommodate the additional thicknesses of magazines, books, tiles, or in this case vintage photo cards, booklet and folder photos (photo 1). It is the process of constructing a 4-ply or 8-ply rag board, acid free corrugate, or foam board framework to surround the folder photo. Since the support form is a mounting system, perhaps it would be better called a sink mount rather than a sink mat.
Photo 1
Vintage 1900s photo card (center L); 1945 and 1956 booklet photos;1932, 1941 and 1948 folder photos (R)
Vintage Photo Cards
Vintage card photos most often have the image centered on a heavy weight card with the surrounding area used as the mat. These older photos are the equivalent of a 4-ply mat (photo 2) and are well suited to either a sink mount or a floated pedestal mount in the center of a window mat. This sample is perfect for a window mat over a sink mount support. A sink mount will always have at least one mat between the glazing and the photo surface, thus supporting and protecting the photo.
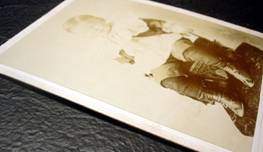 Photo 2
This 5x7" vintage photo is faded and yellowing, but is still a collectible.
More contemporary studio versions may have the photo flush mounted right to the very edge of the card backing. These may be sink mounted, floated, or framed to the outer edge of the frame with no mat. If this is the case always use a spacer, such as Framespace, to keep the glazing from coming in contact with the photo surface.
Booklets and Folders
Folder photos from the first half of the 20th century have a look of warmth and history unequaled by any of the high tech imagery produced today. Studio portraiture from the early 20th century through 1930s are permanently mounted in very elaborately decorated folders, so the folder should probably become part of the finished framed art. The folders are designed to fold over and tuck into a slot to hold it closed, and for display this same flap folds back to form a triangular self-standing easel (photo 3).
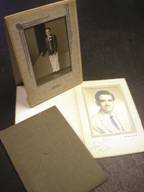 Photo 3
These photos have been permanently mounted within their folders so the whole folder unit needs to be placed under the mat. This thicker unit requires a sink mount to support the folder (photo 4). Booklet and folder photos vary in thickness depending on their intended display. Booklets are thinner so sink mounts of 4-ply rag to ⅛" thick foam will be deep enough, while triple thick folders will require ³⁄₁₆" foam or numerous layers of 4-ply board.
 Photo 4
Booklet and folder photos vary in thickness. Books are 4-ply to ⅛" thick while folders are ³⁄₁₆".
Damage and Decisions
When designing the sink mount the choice must be made whether to cover the entire folder overlapping the actual photo, or only covering the edges of the folder allowing it to become an integral part of the framing design. Damage and discoloration of the protective booklet will help determine the design.
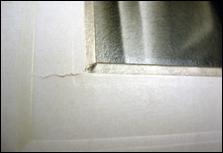 Photo 5
The lower right corner of this booklet image has a 1" tear.
The 1" long tear at the lower inner left corner of the 1945 booklet photo in photo 5 determines the window mat must overlap the actual photo, completely covering the booklet. The dirt and finger oil stains on the left edge of the folder in photo 6 will also need to be covered. The beautiful Art Deco silver foiled corners and ruling pen lines of the 1938 folder should be left uncovered and part of the new design (photo 7). Since the folder is in beautiful shape the window mat should only cover the outer ¼" to ⅜" of the folder, just covering the frayed yellowed edges.
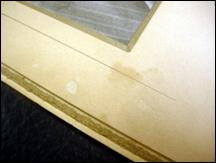 Photo 6
This folder has been stained by finger oils and dirt over the decades.
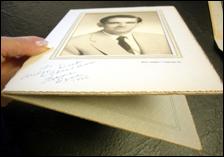 Photo 7
The folder requires a sink mount, but the ragged decorative outer edge will need to be covered.
The 1932 Art Nouveau embossed designs of the beautiful gray-green folder in photo 8 should definitely remain visible. The decisions will be as to whether to cover the studio name too, or leave it also uncovered. There is a full 1" surrounding the folder designs so there is plenty of room for mat overlap. The problem with this folder is the dryness of the folder paper. Folders may become dry and brittle with age, and forcing the tongue to fold 360 degrees in the opposite direction can split or crack the hinge (photo 9). This folder is a 2-ply plus 2-ply construction so when the end flap was bend backwards after fifty years of storage the inner 2-ply split. It should have been relaxed and lightly humidified to soften the fibers prior to turning.
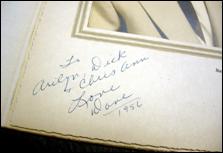 Photo 8
This embossed decorative folder is part of the high design of the period and would be best left showing.
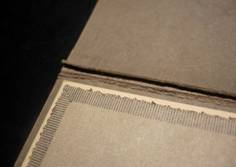 Photo 9
Old folders can become dry and brittle. The inside 2-ply sheet of this folder cracked when back folded.
The decision to cover the dedication or leave it showing is the trick with the booklet in photo 10. The choices are: cover the entire booklet window and signature overlapping the photo, or cover just the outer ¼" of the booklet to hold in the sink mount. Since sink mounting is totally preservation and reversible the signature will always be preserved even if choosing to cover it. This booklet will be folded back to fit within the sink mount (photo 11). This photo would only need an ⅛" foam support.
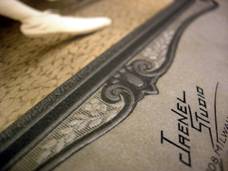 Photo 10
A sink mount will preserve the signature under a window mat, or it can be left showing by just overlapping the outer edge of the booklet.
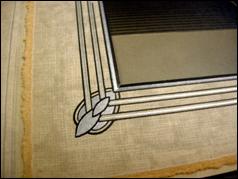 Photo 11
The front cover of this booklet may be folded back for placement in the sink mount.
Selecting Materials
Since booklets and folders are made of acidic paper and photo emulsions are of animal proteins, they are more sensitive to buffering, therefore unbuffered boards are best used as mats. Whether foam board, rag board, or preservation corrugate is selected for the sink mount is up to the individual framer. If desired, raw foam edges may be wrapped with neutral pH paper and either glued with neutral PVA (white glue) or taped with acid-free pressure-sensitive tape. Or they may be wrapped with a Mylar sealing tape.
Photo cards, booklets and folders have survived decades of storage in boxes, chests, attics and under beds in mediocre to poor conditions. And have no doubt been subjected to torturous extremes of temperature and moisture, dust, and general neglect, so anything a framer does will likely improve their lifespan. The samples in this article are all from my family archives and I can attest to all of the above torture having been inflicted upon them, and they still look great. Photos actually survive well in slightly acidic environments.
Strip Widths
Cut the backing board to desired size and lay the folder with flaps back in the visual center. Measure the spaces from the folder to the edge of the backing to determine widths (photo 12). Since the Art Deco surface decoration is to remain a part of the finished design the first measurement will determine the window mat border width. The selected backing and frame size is 11x14". Mat border widths of 2¼" will overlap the folder a full ¼" covering the yellowed ragged edge outer trim.
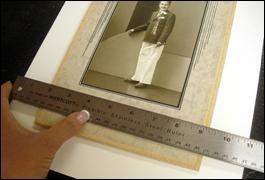 Photo 12
Place the photo at visual center then verify centering with ruler.
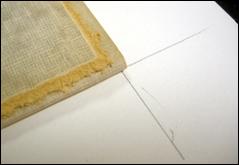 Photo 13
Center the folder over all corners the same ⅛". Measure for exact strip width.
It would take 3⅜" of mat border for the window to overlap the entire folder and outside edges of the photo. Since the ruler measurement was used to determine the window mat borders the pencil marks will be about ⅛" too wide for the strips. Center the folder over all pencil marked corners. Remeasure for exact strip width (photo 13). The strip measurement is for the support pieces that will be attached to the backing board to hold the folder in place.
Assembly
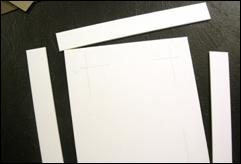 Photo 14
Four strips were marked and cut. Do not bevel cut them.
 Photo 15
Put ATG tape on the back of each strip and begin placing them on the backing.
Cut four strips the length of the longest side of the backing (photo 14). Do not bevel cut sink mount strips, only straight perpendicular edges. Apply ATG tape to the back of the strips (photo 15), and begin placement in a pinwheel fashion at the upper left corner of the folder (photo 16). Butt each successive strip against the previous one, making certain the strips are flush with outer edge of foam base. Turn sink mount face down and cut the protruding strip ends so they are flush with the sides of the backing board (photo 17).
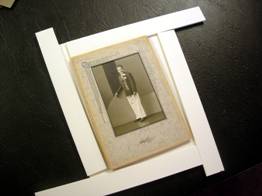 Photo 16
The strips are aligned in a pinwheel fashion. Place first strip at upper left folder corner, then butt each successive strip against the previous one.
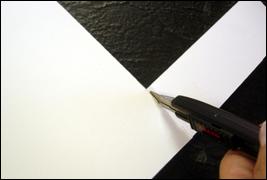 Photo 17
Set folder aside, place sink mount face down and cut strip ends protruding beyond edges of backing.
This folder required a ³⁄₁₆" foam board to accommodate its thickness (photo 18). The sink mount strips should be level with the surface of the folder so the window mat rests on its edges, but is not held up by the folder, not compressing it tightly against the backing board. A booklet photo is much thinner and the same ³⁄₁₆" foam strips are way too deep to hold it securely (photo 19). There should be no gap between the window mat and the art placed behind it (photo 20). A sink mat should have a tiny amount or room side to side for paper expansion, but not front to back. A sink mount should never be used as a spacer, that's a different lesson.
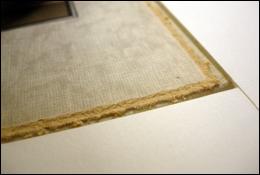 Photo 18
This folder required a ³⁄₁₆" foam board to accommodate its thickness.
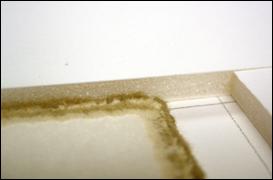 Photo 19
This ³⁄₁₆" sink mount is too deep for the 4-ply depth of this photo.
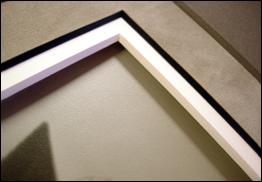 Photo 20
A thinner ⅛" booklet photo placed in a ³⁄₁₆" sink mount allows too much space.
Design Choices
A single mat of Alpharag Deep Sage #8673 matches the photo colors exactly and was cut narrow enough to leave the Deco silver accent showing (photo 21). An alternative design using a double mat of Crescent Moorman Suede blackcore #7193 and Alpharag Antique White #8640 covers the entire folder showcasing only the inner image in photo 22. In either case the folder is encased and protected for future generations to enjoy.
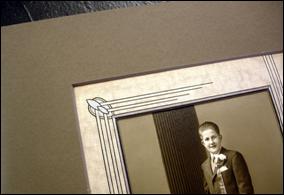 Photo 21
The single Alpharag Deep Sage #8673 matches the photo exactly, leaving the Deco silver accent showing.
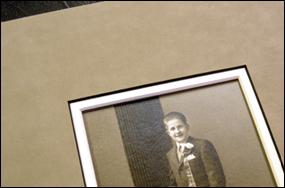 Photo 22
A Crescent Moorman Suede blackcore #7193 tops an Alpharag Antique White 8640 covering the entire folder.
Sink mounts (or sink mats) are a safe, protective way to handle any dimensional art or collectible. They are easy to construct, reversible and totally preservation sound. Though not considered a shadowbox design, they may require a deeper moulding to properly support the additional thickness of the unit construction.
Most of us have family memorabilia in an old chest or storage cabinet. Dig out your own folder photos and create a few sink mounted samples. You'll be surprised at the revenue they will bring in.
END
Copyright © 2006 Chris A Paschke
For more articles on mounting basics look under the mounting section in Articles by Subject.
Additional information on all types of mounting is found in:
The Mounting and Laminating Handbook, Second Edition, 2002,
The Mounting And Laminating Handbook, Third Edition, 2008 and
Creative Mounting, Wrapping, And Laminating, 2000 will teach you everything you need to know about getting the most from your dry mount equipment and materials as an innovative frame designer.
All books are available from Designs Ink Publishing through this website.
Chris A Paschke, CPF GCF
Designs Ink
Designs Ink Publishing
840 Tucker Road, Suite H-190
Tehachapi, CA 93561
P 661-821-2188
chris@designsinkart.com