Paschke Online
Designs Ink Publishing Article Archive and Reference Library
Articles by Chris A. Paschke, CPF GCF
"In-House Canvas Transfers"
March 2002
With the recent reprinting of a very informative article on commercial canvas replications of paper posters (see "Canvas Transfers: How These Moneymakers Are Made" November 2001), it seemed viable to revisit the in-house lamination methods of canvas transferring available to the individual framer. May 1991 there was a very early article of mine "Photos to Canvas to Cash" showing the step-by-step process of transferring a photo. At that point canvas transferring was being offered by photographers for their portraiture to emulate the look of real hand painted oil portraits. In fact, back then the process and the materials were not even being offered to picture framers at all by manufacturers who had developed the lamination and texturing processes.
Once I convinced Seal Products, Inc. to allow me to demonstrate canvas transferring at our industry trade shows I was told transferring photos was fine but it would never work with paper prints. Well, never say never. As a twenty year craft industry veteran familiar with decoupage techniques I knew that once the surface of a paper image had been coated it could very well be peeled and glued down to pick up the texture of its substrate. Testing pursued and demonstrations continued, then in October and December 1994 I released two articles showcasing the transferring processes of both photographs and prints.
Similarities and Differences
Both commercial and in-house (photo 1) processes of transferring create a similar end product. The first is shipped out to a professional company, the second may be completed same day in your back room. One is designed for large scale "over the sofa" home interiors, the other will accommodate the home interiors image as well as the small 4x6" backyard shot of Grandpa and little Johnny during last summer's family reunion for your desk at work.
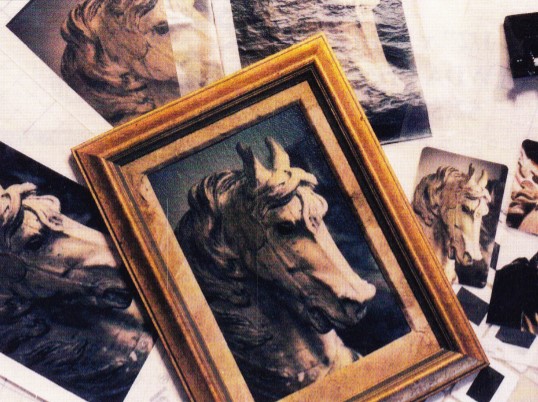 Photo 1
(clockwise from upper right corner) Seal perforator, small 4x6" RC photos for transfer, completed framed canvas transferred photo, unlaminated 8x10" photo, photo trapped in perforated laminate envelope ready for mounting, stripped laminated decal.
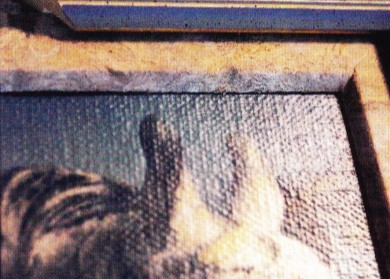 Photo 1b
Detail of transferred photo showing quality of texture achieved with in-house laminate process.
In the November 2001 article, Art Ernst wrote at length about the technical aspects of seizing (not sizing), peeling, and mounting poster images. He also mentioned the in-house methods of using heat-set laminates to achieve the process using a heat press. Both dry mount vacuum or mechanical presses may be used with equally successful results, but so can wet mounting with cold vacuum frames.
Perforated vinyl films are required for laminating photographs and nonporous prints, but nonperforated films work fine with any porous image regardless of paper weight. Though it is possible to use raw canvas and heat-activated (HA) film adhesive (Acid Free Mounting Film, Fusion 4000, Flobond…) in a heat press to bond the transfer as mentioned in the Ernst article, it is not recommended. The potential for wrinkles during bonding greatly increases due to the multiple layers of loose materials (stripped decal, adhesive, canvas) all being allowed to shift and crease during vacuum draw. Specially prepared HA canvas, or wet glue on raw canvas is preferred.
Types of Laminates
Surface laminates used in canvas transferring are those rolled vinyls used by framers with HA adhesives already applied to them. It is the same heat-set film used over posters and photographs as a glass substitute. Smooth finishes (Gloss, Satinex, Luster, Super Matte, Satin Matte, Matte, Mattex, Ultra Matte…) rather than textures are preferred when transferring so the threading patterns of the canvas substrate will be allowed to press through the decal from the back. Textural films (Canvas, Deep Canvas, Fine Linen, Coarse Linen, Sand, Canvastex, Linentex, Emerytex…) have more tendency to visually fight with the actual fabric it is mounted to and becomes more distracting than visually enhancing.
Textures and Weights
There are numerous canvas textures available from many manufacturers, and one manufacturer may offer more than one weave or color (photo 2). Textures will vary from coarse to fine weave which is determined by the thickness and/or tightness of the threads in the fabric. These patterns also vary from knobby uneven threads to even refined threads, which create a more even geometric appearance to the transfer.
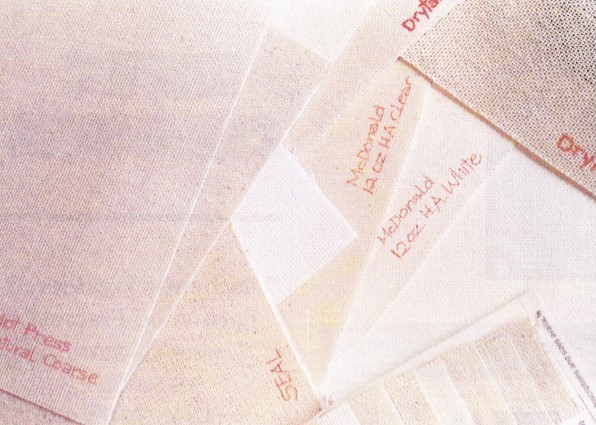 Photo 2
There are numerous canvas textures available from many manufacturers. Textures vary from coarse to fine weave which is determined by the thickness and/or tightness of the threads in the fabric.
Canvases are also available in various weights. Commercial transfer companies often use artist grade 7oz. canvas, while generally 10oz. or 12oz. cotton are found in the framing and photo industries. These canvases may sometimes feel thicker when it's actually not the fiber weight but the stiffness (sizing) of the fiber that is the determining factor.
The Colors of Canvas
Regardless of its weave, canvas is also available in various colors (photo 3). In its natural state, raw canvas is generally a neutral unbleached cream color. It is also found as bleached white, and gessoed (coated) white. White canvas is required when transferring wedding portraits or light colored posters to canvas. Darker natural colored fabrics will color tint through stripped decals darkening the white highlights making whites appear dingy.
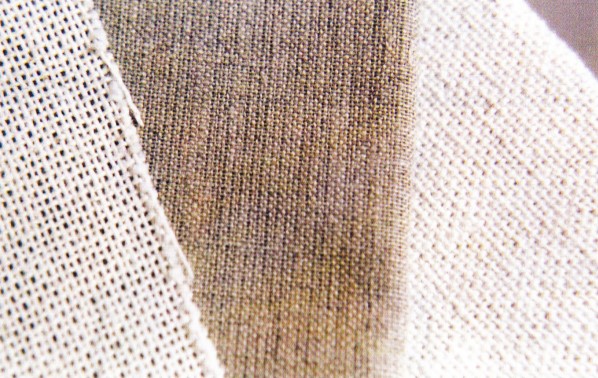 Photo 3
Canvas is also available in various colors from neutral unbleached cream to bleached white to sized gessoed white.
Adhesives and Canvas
Within the industry there are numerous companies offering both natural and white canvases, many in raw and HA varieties. Raw or uncoated canvas is available from some manufacturers (Drytac and Tara/McDonalds) as well as local art stores, and fabric shops. They may be prepared for transferring by applying commercial wet glues, such as Acid Free Mounting Glue (Hot Press), to their surface then mounting the peeled print or photo to it with a cold vacuum frame. There are also HA wet glues that may be applied, allowed to dry, thereby preparing the raw surface for later bonding with a peeled laminated print or photo in a mechanical dry mount press, or heat vacuum system. Wet glues that have been proven to be activated by the application of cold vacuum or heat include Berto (Corona), Lamin-all (McDonalds), and VacuGlue 300 (Hunt).
Heat activated or coated canvas is raw canvas that has already been commercially coated with an adhesive which bonds the transfer to the fabric when placed within a heat press. These may be found as both tacky adhesives with a liner applied to protect the adhesive from dirt, and unlinered with a dry nontacky coated adhesive. If specially treated, sized, variable thread weights, weave patterns, and/or colors are desired to truly customize transferring, then material sources outside the framing industry may need to be enlisted.
Step-by-step Photo Transfers
Begin by selecting and cutting to size all materials. Canvas should be sized large enough to accommodate either stretching or dry mounting onto foam after transferring. The laminate in turn must be larger than the sized canvas so the adhesive will not adhere to the foam overlay during the lamination process.
Trap the predried photo between the removable liner backing and the perforated laminate as a self-envelope for laminating to the photo (photo 4). A perforated laminate must be used to allow all air to escape from between laminate and nonporous RC photo. Place in a 185-220ºF press for 5-10 minutes to laminate, depending upon laminate manufacturer.
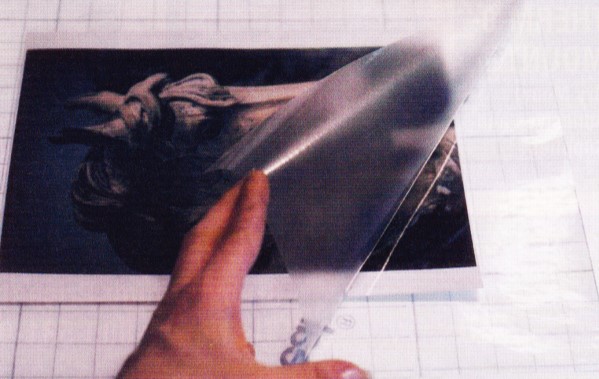 Photo 4
The RC photo has been centered in a perforated laminate self-envelope to be laminated without a substrate.
Remove the laminated photo from the press, lay it face up on a hard surface and remove the laminated surface emulsion from the backing paper (photo 5). As you peel the laminate from it's backing paper peel it against itself in a sharp hairpin turn. Once you have begun to peel continue at a smooth steady speed and pull as evenly as possible holding the remaining RC paper and backing paper firmly with your free hand. Be careful to separate the very top layer of emulsion and perhaps one single layer of paper, because any paper left on the emulsion will reduce the amount of overall texture achieved. The stripped photo emulsion should be extremely thin and look very much like a decal (photo 6, far left).
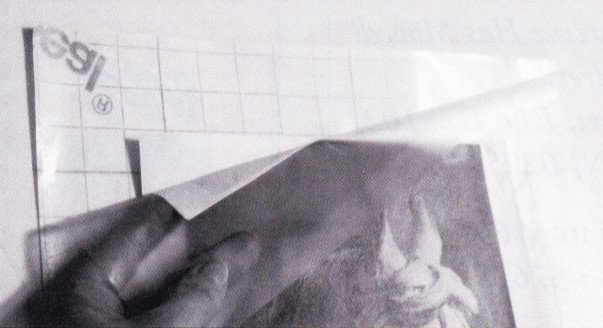 Photo 5
Beginning peeling the laminated emulsion from the corner of photo taking care not to split the image at the edge.
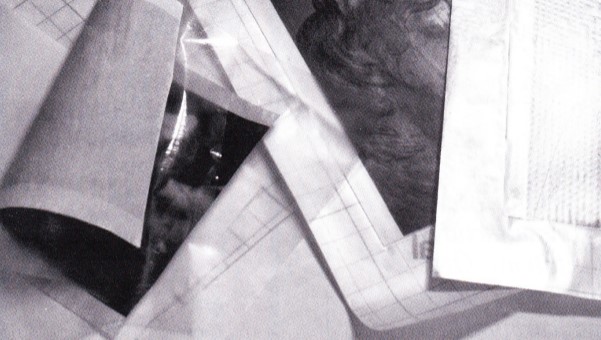 Photo 6
Beginning at right is the self-envelope laminate with photo ready to laminate, the completed lamination, with the peeled decal at left.
If using a linered HA canvas, fold back the top 1-2" of the release backing paper to expose the adhesive. Square the photo laminate from the bottom to ensure proper alignment since once the two adhesives come in contact with each other they are securely stuck. Slide your hand up from the bottom to the top and carefully smooth down the laminate onto the exposed canvas adhesive (photo 7). Carefully lift the lower unattached photo/laminate, remove the remaining protective release paper from the canvas and smooth the laminate into place (photo 8). If using a nonlinered HA canvas (photo 9), simply square up the edges and press to hold in place.
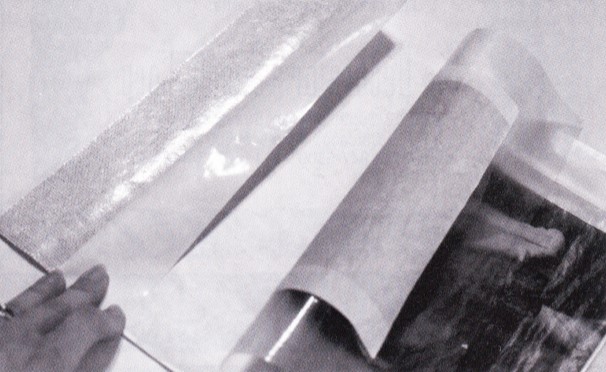 Photo 7
Fold back the removable liner a few inches to expose sticky adhesive. Square up decal from the protected bottom edge and align up sides to the top.
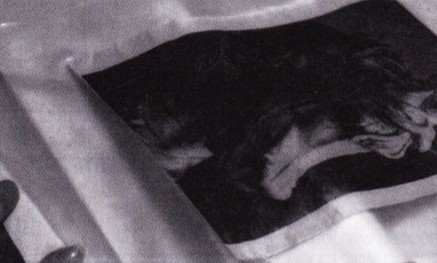 Photo 8
Once the decal comes in contact with the sticky adhesive it holds aggressively. Gently remove liner from beneath remaining decal.
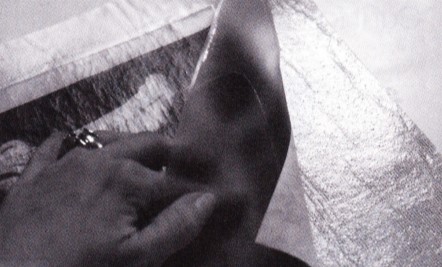 Photo 9
If canvas has a dry adhesive with no protective liner, simply square up the sides of the decal with the liner.
Prior to final bonding make sure no canvas adhesive is exposed as it will bond to the overlay foam during mounting. Trim any exposed adhesive prior to placing back in the press (photo 10). Insert the photo/laminate/canvas unit complete with sponge foam overlay on top into a release paper envelope (photo 11) and place in the dry mount press for a final 5-10 minutes at 185-220ºF. Upon completion of the above steps the newly transferred photo may then be stretched and framed as desired.
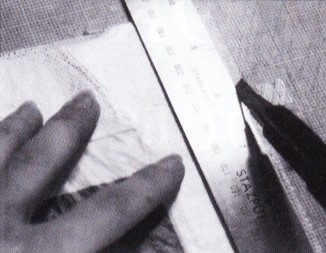 Photo 10
If any HA canvas remains uncovered by the laminate decal it must be trimmed off prior to placing in the press for final mounting, or it will adhere to the foam overlay.
 Photo 11
Place laminate/decal/canvas unit into release paper envelope covered with a sheet of overlay foam for final bonding. In a vacuum system place a piece of mat board scrap a little larger than the transfer beneath it to substitute for the lack of a rigid substrate.
Print Transfer Variations
The above steps, times and temperatures remain the same for a poster print, but the laminate may not require perforation if the image is porous. The primary difference between photos and paper print is the need to soak it in water after laminating, prior to peeling.
Soaking
Soak by submerging the laminated print in water 15 minutes to adequately saturate the backing paper. By soaking it right side or laminated side up, the paper remains in contact with the water for more even saturation. Remove the print, shake off excess water and place face up it on a smooth, hard surface, glass or Formica works well. The damp print will suction itself in place allowing to peel smoothly with little effort (photo 12). Stripping or peeling may be done either face up or face down. Removing the paper from the back rather than the image from the front is the traditional decoupage method, which is more time consuming and a great deal messier (photo 13).
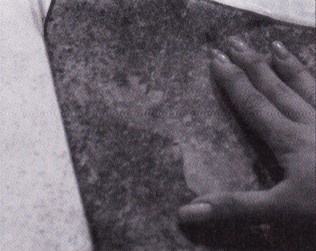 Photo 12
The damp print will suction itself in place allowing for you to smooth out any wrinkles prior to peeling.
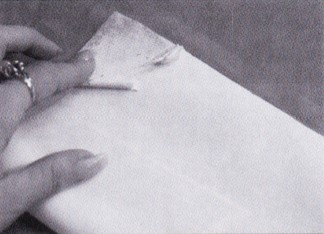 Photo 13
Removal of the paper from the back rather than the image from the front is more time consuming and messier.
Stripping
Begin at the corner by turning the laminate 180 degrees back onto itself . The print will naturally separate at the first layer of laminated paper and very easily separate by gently pulling the laminated surface layer with your hand across the damp paper backing. Any portion of the paper that has not been evenly saturated is likely to resist peeling and can be easily damaged the inked paper surface. The stripped print will begin to dry right away, while a lot of water will remain on the table or glass after stripping as the backing paper will be heavily saturated.
Then complete as the above transferred photo. Align stripped decal onto prepared canvas, and place the still damp laminate/decal/canvas into the press with overlay foam and release papers to protect the press. Mount 5-10 minutes at recommended 185 - 220ºF temperatures, depending upon overall print size.
Moisture and Substrate
Mounting of the peeled decal achieves the best result when mounted damp, and it works equally well in either a mechanical or hot vacuum press (photo 14). When dealing with moisture in a mechanical press, leave the canvas mounting in the press a little longer to cook out any moisture. The additional moisture will wrinkle the release materials more than normal and should be reserved specifically for future canvas transferring of prints.
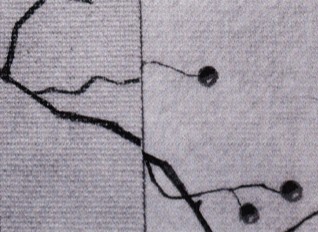 Photo 14
Mounting of the peeled decal achieves the best result when mounted damp, and it works equally well in either a mechanical or hot vacuum press
Contouring and Crackling
Brush strokes may be added for oil painting effect using acrylic varnishes such as McDonalds Acrylic Texturing Gel; Grumbacher, and Winsor/Newton Acrylic Impasto Paste. All are thicker mediums that work well for heavy contours. Some are thick enough for palette knife application while others will need several layers and an artist brush (photo 15). Acrylic mediums designed for sealing a matte or gloss shine onto paintings are thin and best selected for basic low level brushing.
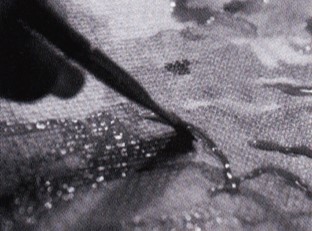 Photo 15
Brush strokes may be added to the completed transfer by using artist mediums and varnishes. Some are thick enough for palette knife application while others will need several layers and an artist brush.
Be sure to match gloss varnish with gloss laminate and matte with matte finishes. Unfortunately, aging and crackling is not achievable when using pliable vinyl finishes. If this effect is desired either commercial techniques or traditional decoupage techniques will be necessary.
Respecting Copyrights
Whether the image selected for transfer is to be completed in-house or sent out to a commercial company, the issue of copyright remains at the core of the project. It remains legal to offer the service of canvas transferring to a customer, but it is not legal to purchase a series of prints specifically with the intent of transferring them for display and resale in your gallery. If an open edition image is available from a publisher as either a print or canvas image, when a customer requests canvas it must be purchased that way and may not be transferred by a framer. Consent of the artist, photographer or publisher must be obtained prior to transferring, for any royalties and acknowledgements be made.
The entire issue comes back to the original artist and publisher having ownership of the image and the right to control the form in which it is displayed. Despite copyright laws, it has become increasingly difficult to prevent illegal infringement of artwork. Photocopiers and computer scanners have made it easy to duplicate, modify and enlarge pages from books and catalogues, encouraging creative framing practices by transferring them to canvas. Copyright infringement is an illegal practice, and ignorance is no excuse. For additional information on copyright issues contact the Lawyer for the Arts office in your state.
Final Transfer
Always consider the image itself. Not all images make a good canvas transfer. Common sense should tell you a watercolor image will look out of media on canvas. So consider the option of image transferring to 140# or 300# rough watercolor paper instead. For additional information on the materials available to framers for in-house transfers and assorted techniques see "Textures and Colors of Canvas Transferring", May 1998 and "Watercolor Transfers", June 1998.
Also see pages 119-126 in The Mounting And Laminating Handbook, and pages 117-132, Chapter 9: Image Transferring in Creative Mounting, Wrapping and Laminating.
Canvas images appear to be thriving whether as custom canvases (images printed directly onto the textural canvas backing) or as canvas transfers. Whether you decided to offer the service in-house as a laminated transfer or send it out to be commercially, professionally transferred there are additional profits to be made from this process. The consuming public has shown their interest in the look, it's your decision to increase your sales by offering it, one way or another.
END
Copyright © 2002 Chris A Paschke
For more articles on mounting basics look under the mounting section in Articles by Subject.
If you already know the specific title then search under Articles by Title.
Additional information on all types of mounting is found in:
The Mounting and Laminating Handbook, Second Edition, 2002,
The Mounting And Laminating Handbook, Third Edition, 2008 and
Creative Mounting, Wrapping, And Laminating, 2000 will teach you everything you need to know about getting the most from your dry mount equipment and materials as an innovative frame designer.
All books are available from Designs Ink Publishing through this website.
Chris A Paschke, CPF GCF
Designs Ink
Designs Ink Publishing
785 Tucker Road, Suite G-183
Tehachapi, CA 93561
P 661-821-2188
chris@designsinkart.com
Photos Unavailable